


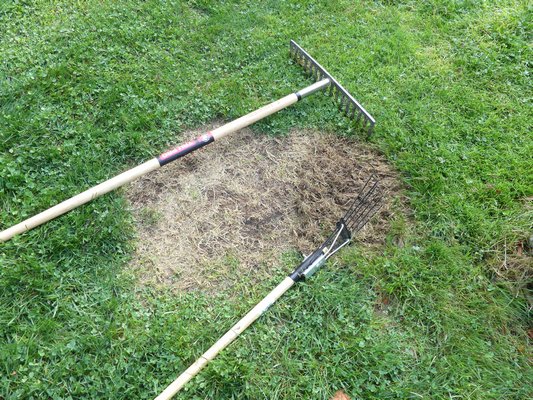
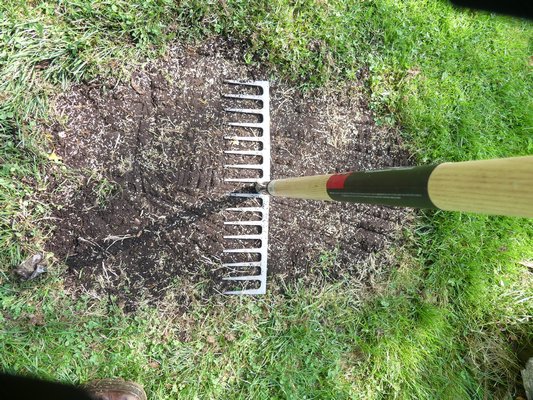
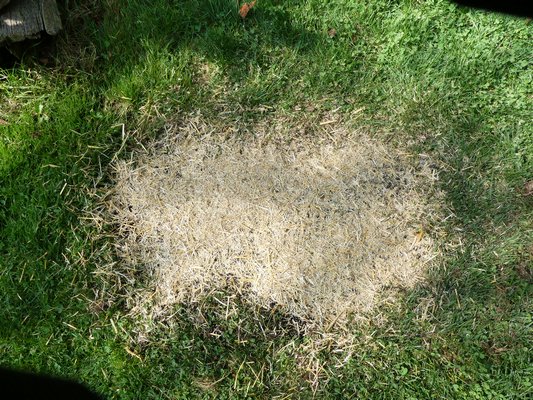
A 2-square-foot area of damaged lawn with the portion on the right already "scratched" using the small fan rake. All the old dead grass needs to be removed and the underlying soil scarified. ANDREW MESSINGER
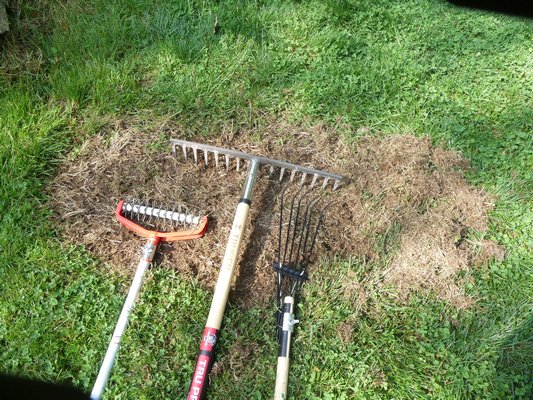
A tined or spiked renovator, left, can be used to rough the soil and prepare a seed bed. The tined rake, center, can be used to level and tamp while the quarter fan rake is used to scratch out dead grass and thatch. ANDREW MESSINGER
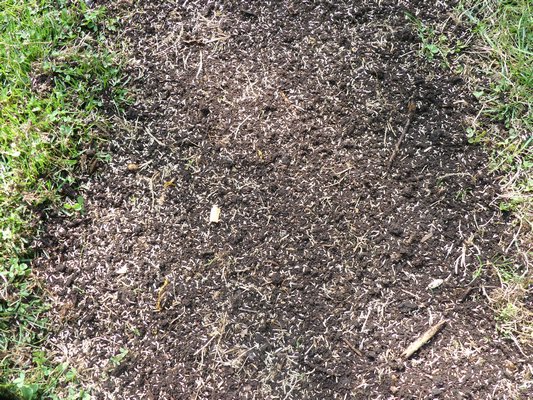
With some screened compost mixed in, the patch is seeded. In this case the seed mix is 40 percent bluegrasses, 50 percent ryegrasses and 10 percent fescue. In all, six different varieties were used in this blend. ANDREW MESSINGER
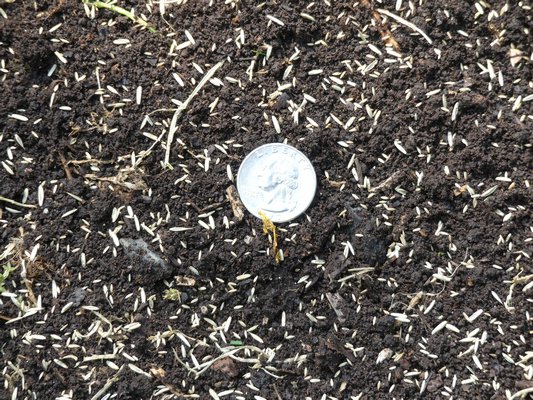
Once seeded and properly applied, the rough bed should look like this with about 10 to 15 seeds per square inch. Note that different seeds for different turf species are different in sizes with the largest being bluegrass and the smallest, fescue. ANDREW MESSINGER
When the seed has been sown it needs to be tamped to make sure it’s in contact with the soil. In this case the flat side of the tine rake is used as the tamper but rollers or tampers can also be used. The tamper must be dry or the grass seed will stick to it. ANDREW MESSINGER
The seed bed slightly watered, the mulch is now applied. In this case Master Mulch was used to cover the seedbed to keep it cool and moist. Over mulching may cause the seed to rot or not germinate. Just cover the bed so the soil isn’t visible and the mulch layer is "airy." ANDREW MESSINGER
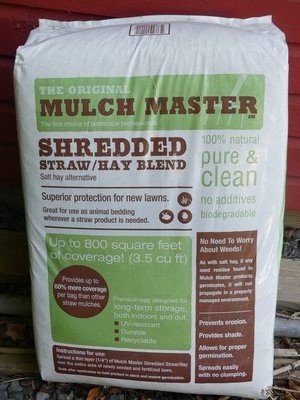
Mulch Master is a seedless/weedless mulch of straw and hay that’s perfect for use when seeding or just patching areas of lawns. ANDREW MESSINGER

In keeping with the theme started last week—that fall is for planting—I was going to continue this week with some more tips on several perennials that you can divide now and enjoy next summer. But, while looking around the property during the week, I realized it might be a good idea to review some lawn care this week and get back to other planting work next week. So, this week, a few ideas on renovating or patching your lawn.
For one reason or another, you may be noticing spots or patches on your lawn where the turf is thin to nonexistent. Yes, it’s been a remarkable growing season for most of our lawns, and it is the first time in about 20 years I can remember our lawns not taking a break. We can usually depend on the warm and dry months of July and August resulting in the grass growing more slowly, and cutting it once a week, or even stretching it out to 10 days now and then, has been the norm. But not this summer. This year, the lawn has stayed green and lush right from the first spring flush of green. In fact, the lawn has actually been getting ahead of us, and I found I had to cut twice in one week in August.
And yet there are those spots where I screwed up. I spilled something in one spot, a local dog left a spot in another spot, we pruned some large trees that left an area where no grass would grow to an area now in full sun and it has to be seeded.
The store shelves are filled with all kinds of lawn patch products and bags of pre-mixed seed blends, so what’s a homeowner to do, and what will you use?
I’m a little old-fashioned here, and I like to keep it simple—no gimmicks, just a little science, seed, soil and moisture. If you’re looking for a more complicated explanation or a good introduction to lawns and how to take care of yours, there are some great links at the end.
So, this time, I’m going to speak only about renovating small areas of your lawn. In other years, we’ve discussed over-seeding, full renovations and sodding—but this year let’s concentrate on the small areas that need to be filled in with grass plants before the weeds settle in and take over.
The first task is to get these areas ready for seeding so that in the next two to three weeks they are all prepped and seeded and well on their way to being established and ready for winter.
But, before you begin to rake out these spots, make sure you have all your tools, seed, fertilizer and mulch. Tools can be as simple as a fan rake or short-toothed tine rake. You’ll use these to scratch out the dead grass and weeds and also to rough up the soil below to a depth of a half inch to an inch.
Remove any stones and debris, and if there’s actually a depression, you will want to fill it in with some good screened topsoil that’s loose and friable. If it comes out of a bag or dumped from a truck, you might want to screen it so it’s consistently granular as opposed to clodded.
Mix in a very small amount of starter fertilizer. It’s very important that you use only starter fertilizer and use it sparingly, as too much can damage the young grass plants.
Spread the soil over the area to be seeded, and let a little blend into the surrounding grass, feathering it as you move to the edges. You can use your rake and ever so gently pull it over the soil to create very shallow furrows.
Now, you’re ready for the seed.
Instead of pre-packaged seed, go to a local garden center and ask if they have custom seed mixes. The better garden centers will have several that they have made just for our area, and they will be different blends of grasses for shade, sun or both. These mixes will contain some combination of Kentucky bluegrass, fescues and ryegrasses, and we usually use all three in varying percentages, as each has attributes that the others may be missing.
A good garden center salesperson can be very helpful here—you won’t find this kind of help at the big-box stores. And this is the one place where you don’t want to skimp. You can buy what is called a “builders mix,” which is cheap and fills in really fast, but it will have you reseeding again next year.
Know how many square feet you’ll be needing to cover, buy a good blend, and ask how much you should use for new seeding for 100 square feet then do the math to know how much you need for your 5-, 10- or 20-square-foot spots.
Seeding is done by hand by filling your palm with a few ounces of seed and gently spreading it over the prepared area like you were putting sprinkles on a cake, keeping the application even and uniform. When done, there should be 10 to 15 seeds per square inch.
Now, turn your rake over—tines pointed up, not down, for a fan rake—gently pull the rake over the seeded area. For a stiff, steel-tined rake, use the rake like a tamper and gently push the flat side of the rake against the soil. The object is to bring the grass seeds into contact with the soil. Only a small portion of the seed needs to contact the soil, and the seed should never be entirely buried.
The next step is to water. Gently spray the area with water so the soil absorbs it. Don’t sprinkle, spray—or you’ll create puddles and the seed will get washed into the puddles and ruin your great seeding job.
There’s more to watering, but we need one more step first, and that’s the mulch. Now that the seedbed is moist, you want to add a mulch that will keep the sun off the seed bed but still allow it to warm during the day and cool at night without totally drying out.
You can use a special mulching material that’s sold in bags and is lightly spread over the seedbed then watered. These materials, such as Penn Mulch, contain a form of cellulose that will absorb the water, expand and, if applied correctly, be a perfect light cover. You also can use salt hay, or specially cut hay, or straw that is seedless or headless. Don’t just use any hay or straw—it must be seedless, or you’ll contaminate your seedbed with seed from the parent hay or straw plants.
Once the mulch is down, you can now sprinkle the seedbed with water. Keep it moist for several weeks by watering lightly once or twice a day, unless there’s rainfall or a series of cloudy days.
Moisture, at the right amount, will result in great germination and a perfect patch. Depending on the seed mix you used, you should have germination of some seeds in a week, and all of the seeds within three weeks.
When the grass plants are filled in and about 3 inches tall, the first mowing can be done.
For those of you who want more detailed information on grass seed: http://bit.ly/2xu8btz. And on lawns in general, they have great information here: http://bit.ly/1HidWKO. There are dozens of links to other lawn grass topics.
So if you can, read up, but time is of the essence. Get those brown spots and lawn renovations done in the next few weeks, and you’ll see the results this fall.
Keep growing!
More Posts from Andrew Messinger


