


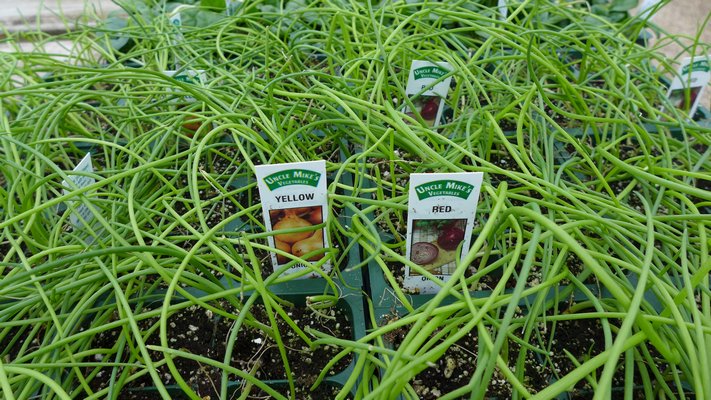
These are onion ‘starts’ as opposed to onion sets. Starts are sold in cell packs and are started early in greenhouses. With some onions this allows you to get a nearly full-sized onion bulb the same year you plant them. They begin to show up in garden centers in March. ANDREW MESSINGER

Gardeners make a lot of mistakes when they try to grow onions and many just give up. I think this happens for two reasons and neither has to do with the color of your thumb.
It’s a shame though. Because once you learn the two important facts about onions, they can be incredibly easy. And that’s why New York is one of the most productive onion-growing regions in the world.
So, here are the two important clues and then all the rest of what you need to know so you can grow your own. First, there are three classes of onion types and they are referred to as long-day, short-day and day-neutral. As an example, there is the Vidalia onion. It’s famous as a sweet onion and some eat them like apples. Makes sense that if you are a Vidalia fancier you’d want to grow them. But we can’t. Vidalia is a short-day onion and we’re in a long-day location. Ah, but there is a compromise and for many that’s the Walla Walla, which is a long-day onion that’s also very sweet. The rule here is that on Long Island we can grow only long-day and some day-neutral (also called intermediate) onions.
The second point is that most onions are biennials. These are plants that grow and develop during the first year and then flower (or create large bulbs) in their second year. The mistake here is that if you grow many types of onions from seed and start them in the spring you’ll get only teeny tiny bulbs and in some cases no bulbs at all the first year, but in the second.
Those who are successful with backyard onions find that they are easy to grow, subject to few diseases, ignored by most insects, deer and rabbits, and many varieties are easy to store for as long as nine months when properly harvested and stored. In fact, once you learn a few of the ins and outs, these tasty vegetables need little more than planting, thinning and occasional feeding. Ma Nature takes care of all the rest.
Unlike most of our vegetables, which are annuals, onions are biennials. During their first growing season, onions store food for themselves in enlarged, modified stems so they can produce flowers and seeds in their second year. For this reason, the most successful onion growers buy union “sets” or tiny bulbs that are six months to a year old and plant them instead of planting from seed, thus cutting the growing time by as much as half.
Onions, garlic, shallots and leeks are all in the same family and they all grow best in rich, loose soil. Sandy loam soils like ours are ideal while the texture and drainage of heavier clay soils need improvement with liberal additions of compost, well-rotted manure, peat, leaf mold or other organic soil conditioners.
In Georgia, famous for its red clay, there are adequate amounts of organic matter and sand, especially in Vidalia County. On Eastern Long Island, it’s probably best to enrich the soil with some additional organic matter, but don’t go too far, as an overly organic soil will retain too much moisture and may result in rot. Choose a spot that gets full sun, good drainage and test for a soil pH of between 5.8 and 6.5. Remember also that onions are heavy feeders, so you’ll want to work in a complete fertilizer like 5-10-5 before planting and during the growing season. Good drainage controls most, but not all, onion diseases. April is the time to plant sets so you’ll need to order your sets soon or speak with your local garden center, so you know what they’ll be carrying and when.
Growing from seed is the most economical way to grow onions, especially if you are going to do a large planting. But as onions are long season growers, the seeds should be started indoors from late February to early March. Of course, if you do your onions from both seeds and sets you’re assured of a crop this year as well as next year.
Onions need cool weather during early development to allow good growth of their secondary roots. Later, they need hot weather and the proper amount of daylight to assure the formation of plump bulbs. There are long-day and short-day varieties and it is imperative to grow the right variety or all you end up with are scallions. Varieties adapted to grow in the South, where summer days are shorter, need 12 hours of daylight to bulb, while Northern varieties need 15 hours of daylight. We must grow long-day types or day-neutral types, and for this reason it should be obvious why a Georgia Vidalia will result in tiny bulbs here while a Walla Walla from Washington will do just fine.
Regardless of the size or maturity of the onion plant, it will start to bulb when the correct day length and temperature is reached; planting short-day varieties here in the North will therefore result in small bulbs, which are not always undesirable if you are trying to raise “pearl”-type bulbs or pickling-type onions.
To grow onions from seeds you need to begin seeding six to 10 weeks before the last heavy frost, so for us this means a first seeding around the first of February through the first week in March. Use a sterile peat-based planting soil. Sow the seed thinly and cover with about a quarter inch of soil or vermiculite. Keep the soil moist and maintain a temperature of 60 to 65 degrees. The seeds should sprout in 10 days to two weeks when they should be moved to a sunny windowsill or put under plant lights that are on for 12 to 15 hours a day. Thin the seedlings, if necessary, to prevent overcrowding in the flat.
In mid to late April, after the danger of a hard frost, plant the seedlings (or sets) in the garden. They should be about half the thickness of a pencil and it’s best to do the initial planting out on a cloudy day or late in the afternoon. Space them 3 inches apart in rows 1 to 2 feet apart—but if you want scallions the spacing can be as little as an inch apart. These can be thinned as necessary leaving a plant every 4 inches to grow to maturity.
“Sets” are small onion bulbs grown the previous year (or over the winter in greenhouses) specifically for garden starters. This is the most popular way to shorten the growing season (but not the day length) since mature onion bulbs grown from sets can be harvested a month or earlier than those grown from seed. Sets are usually from a half to an inch in diameter with the smaller ones being the longest to mature while the largest may bolt to seed and produce inferior bulbs.
Sets should be planted out in early April making furrows about an inch deep. Press the sets into the soil, 2 to 3 inches apart in rows a foot to a foot and a half apart. Just press the bulbs into the soil up to their tops. If planted too deeply, they will take longer to develop.
The third method is to buy seedlings for transplanting. This saves as much as seven weeks compared to seeding your own. Plants are usually bought in garden centers or through the mail in bunches of 50 to 100 plants with one bunch planting a row of 10 to 18 feet. You’ll also find seedlings in cell packs. Each cell can contain about a half dozen seedlings which can be “teased” apart and planted. Plant the seedlings in prepared soil when they are received, spacing 4 to 6 inches apart in rows 2 feet apart. For each plant, punch a hole in the soil using your finger or a pencil, about 2 inches deep; carefully place one seedling in the hole, and firm around it. Keep the soil moist, not wet, until the seedlings are established.
In the case of smaller sets or seedlings, I found that some birds are very fond of simply pulling the plants out and leaving them. A row cover such as Remay placed over the plants for a couple of weeks until they are well rooted should solve this problem. Next week: What varieties to look for, general care after planting and harvesting, plus a look at leeks, shallots and ramps. Keep growing.
More Posts from Andrew Messinger


