


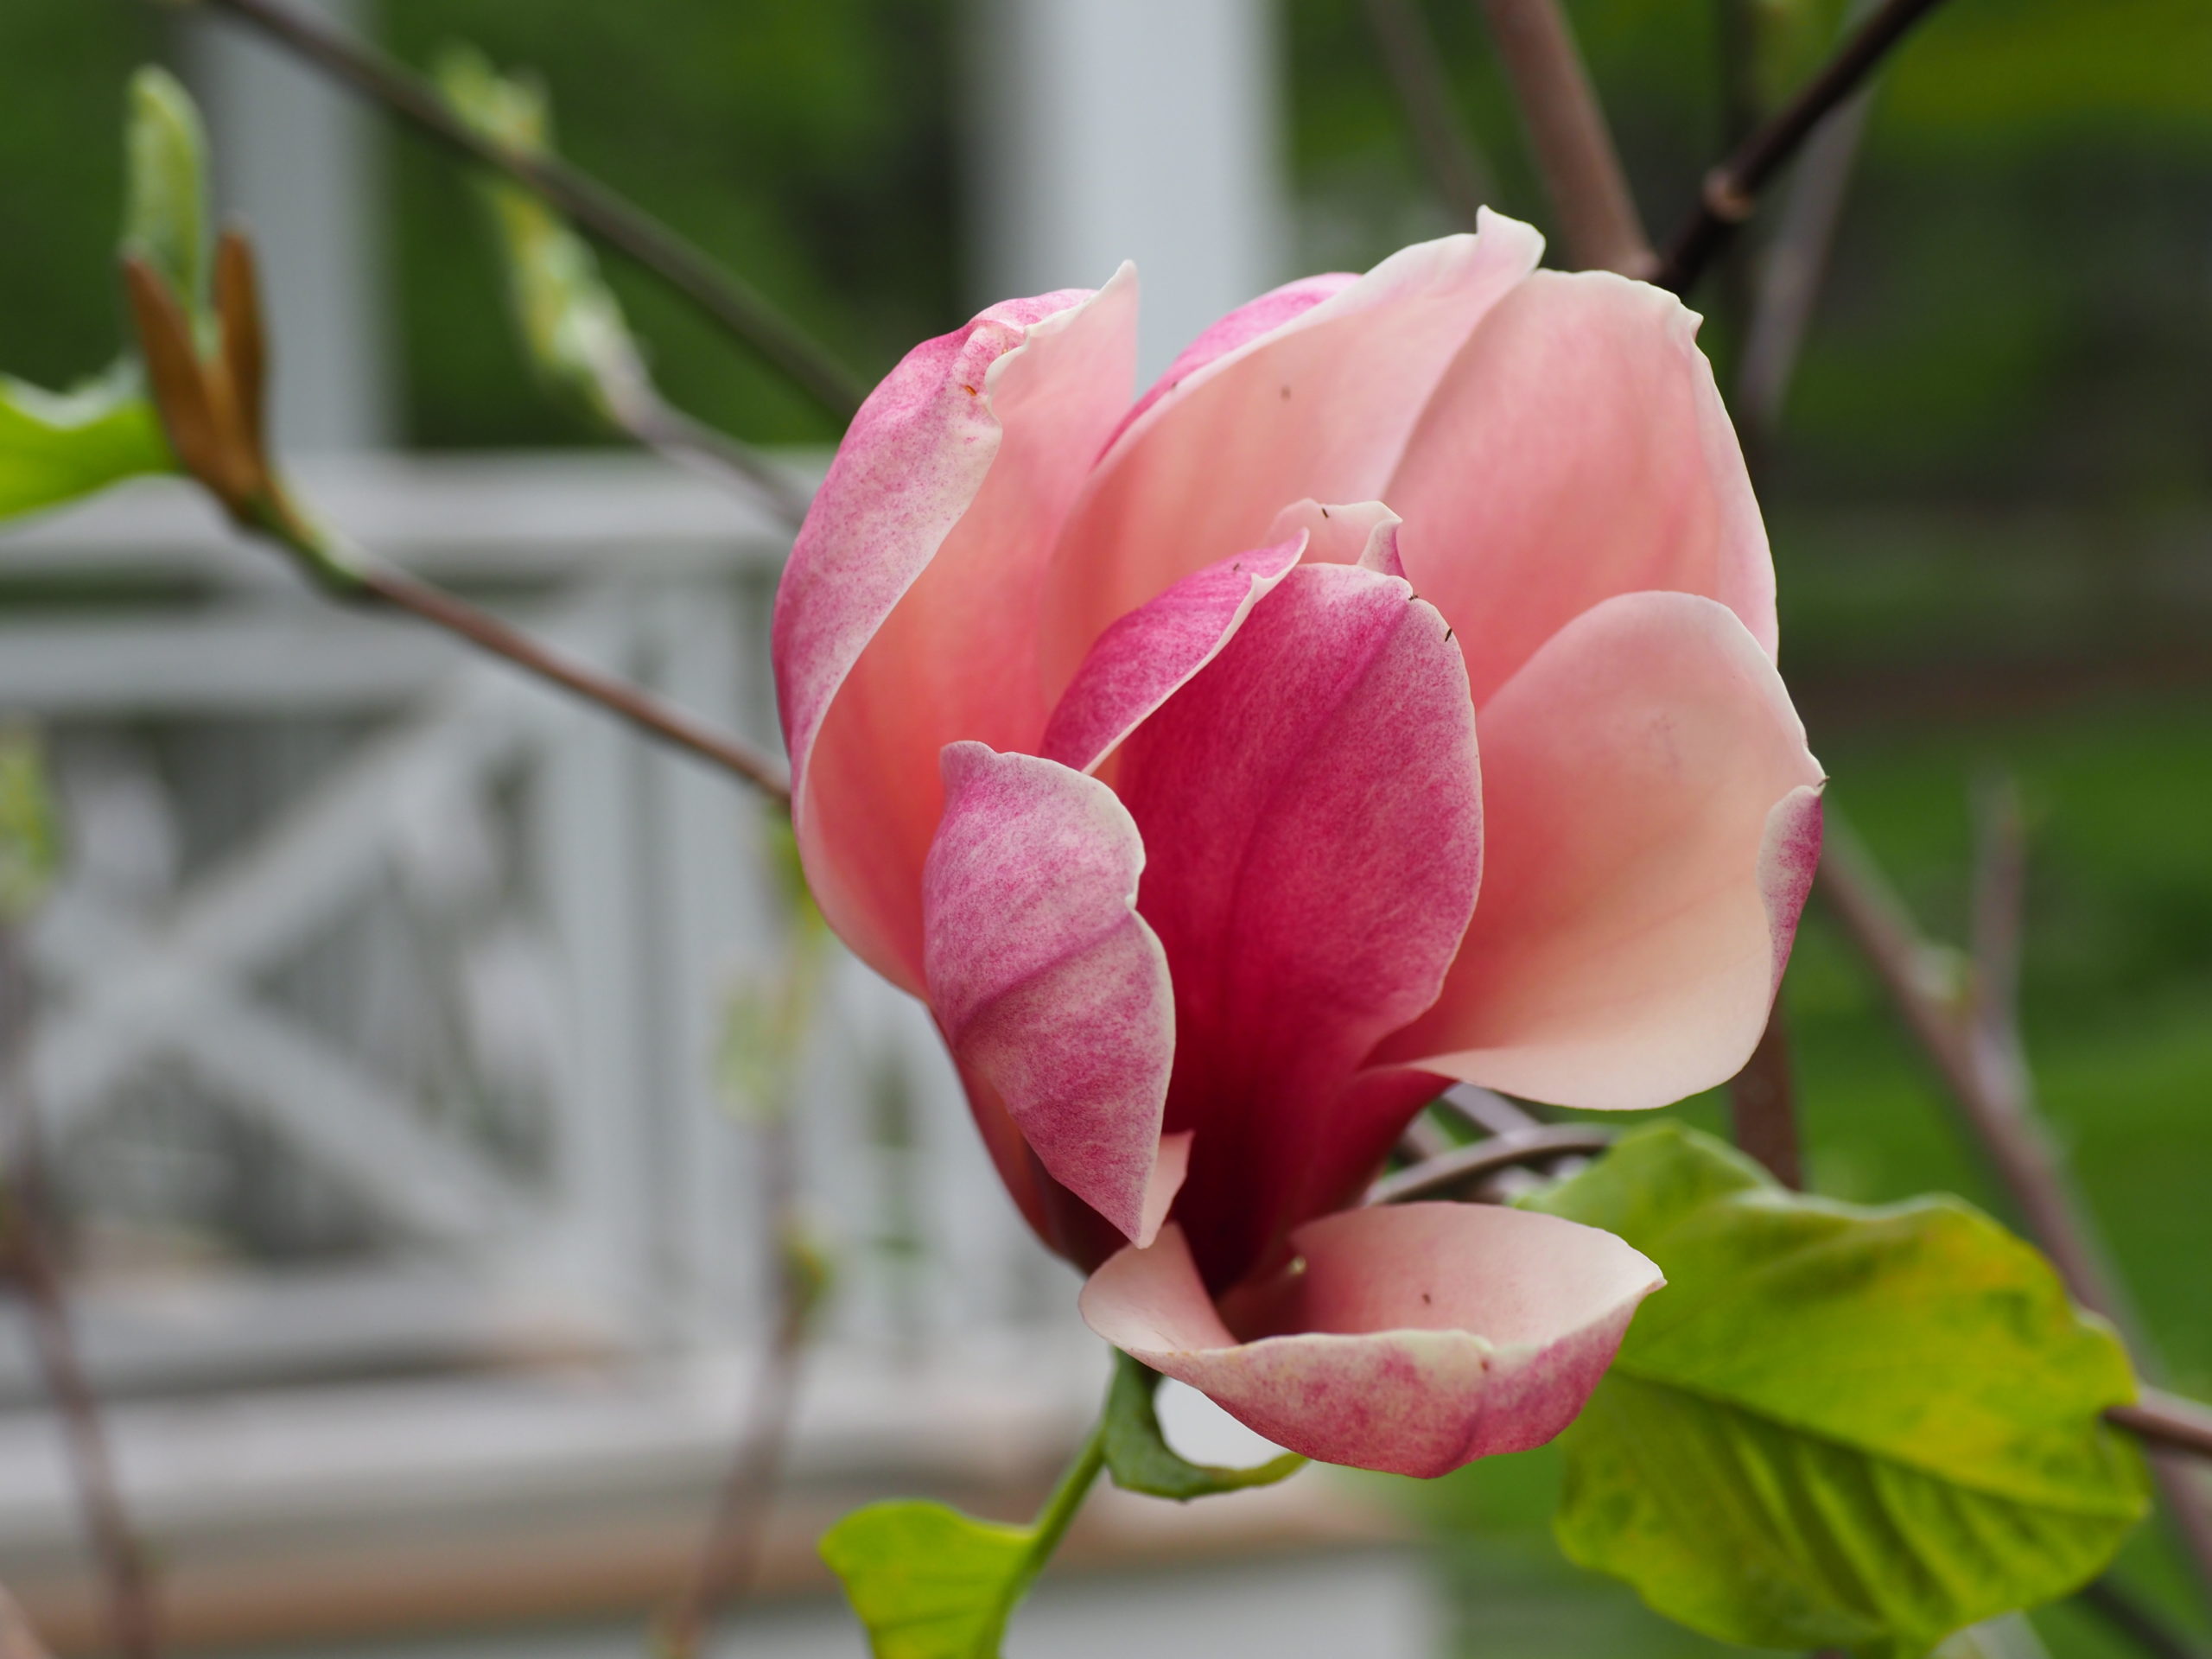
Magnolia Red Baron is one of the latest magnolias to flower, and this variety often takes years to come into bloom -- but well worth the wait. ANDREW MESSINGER
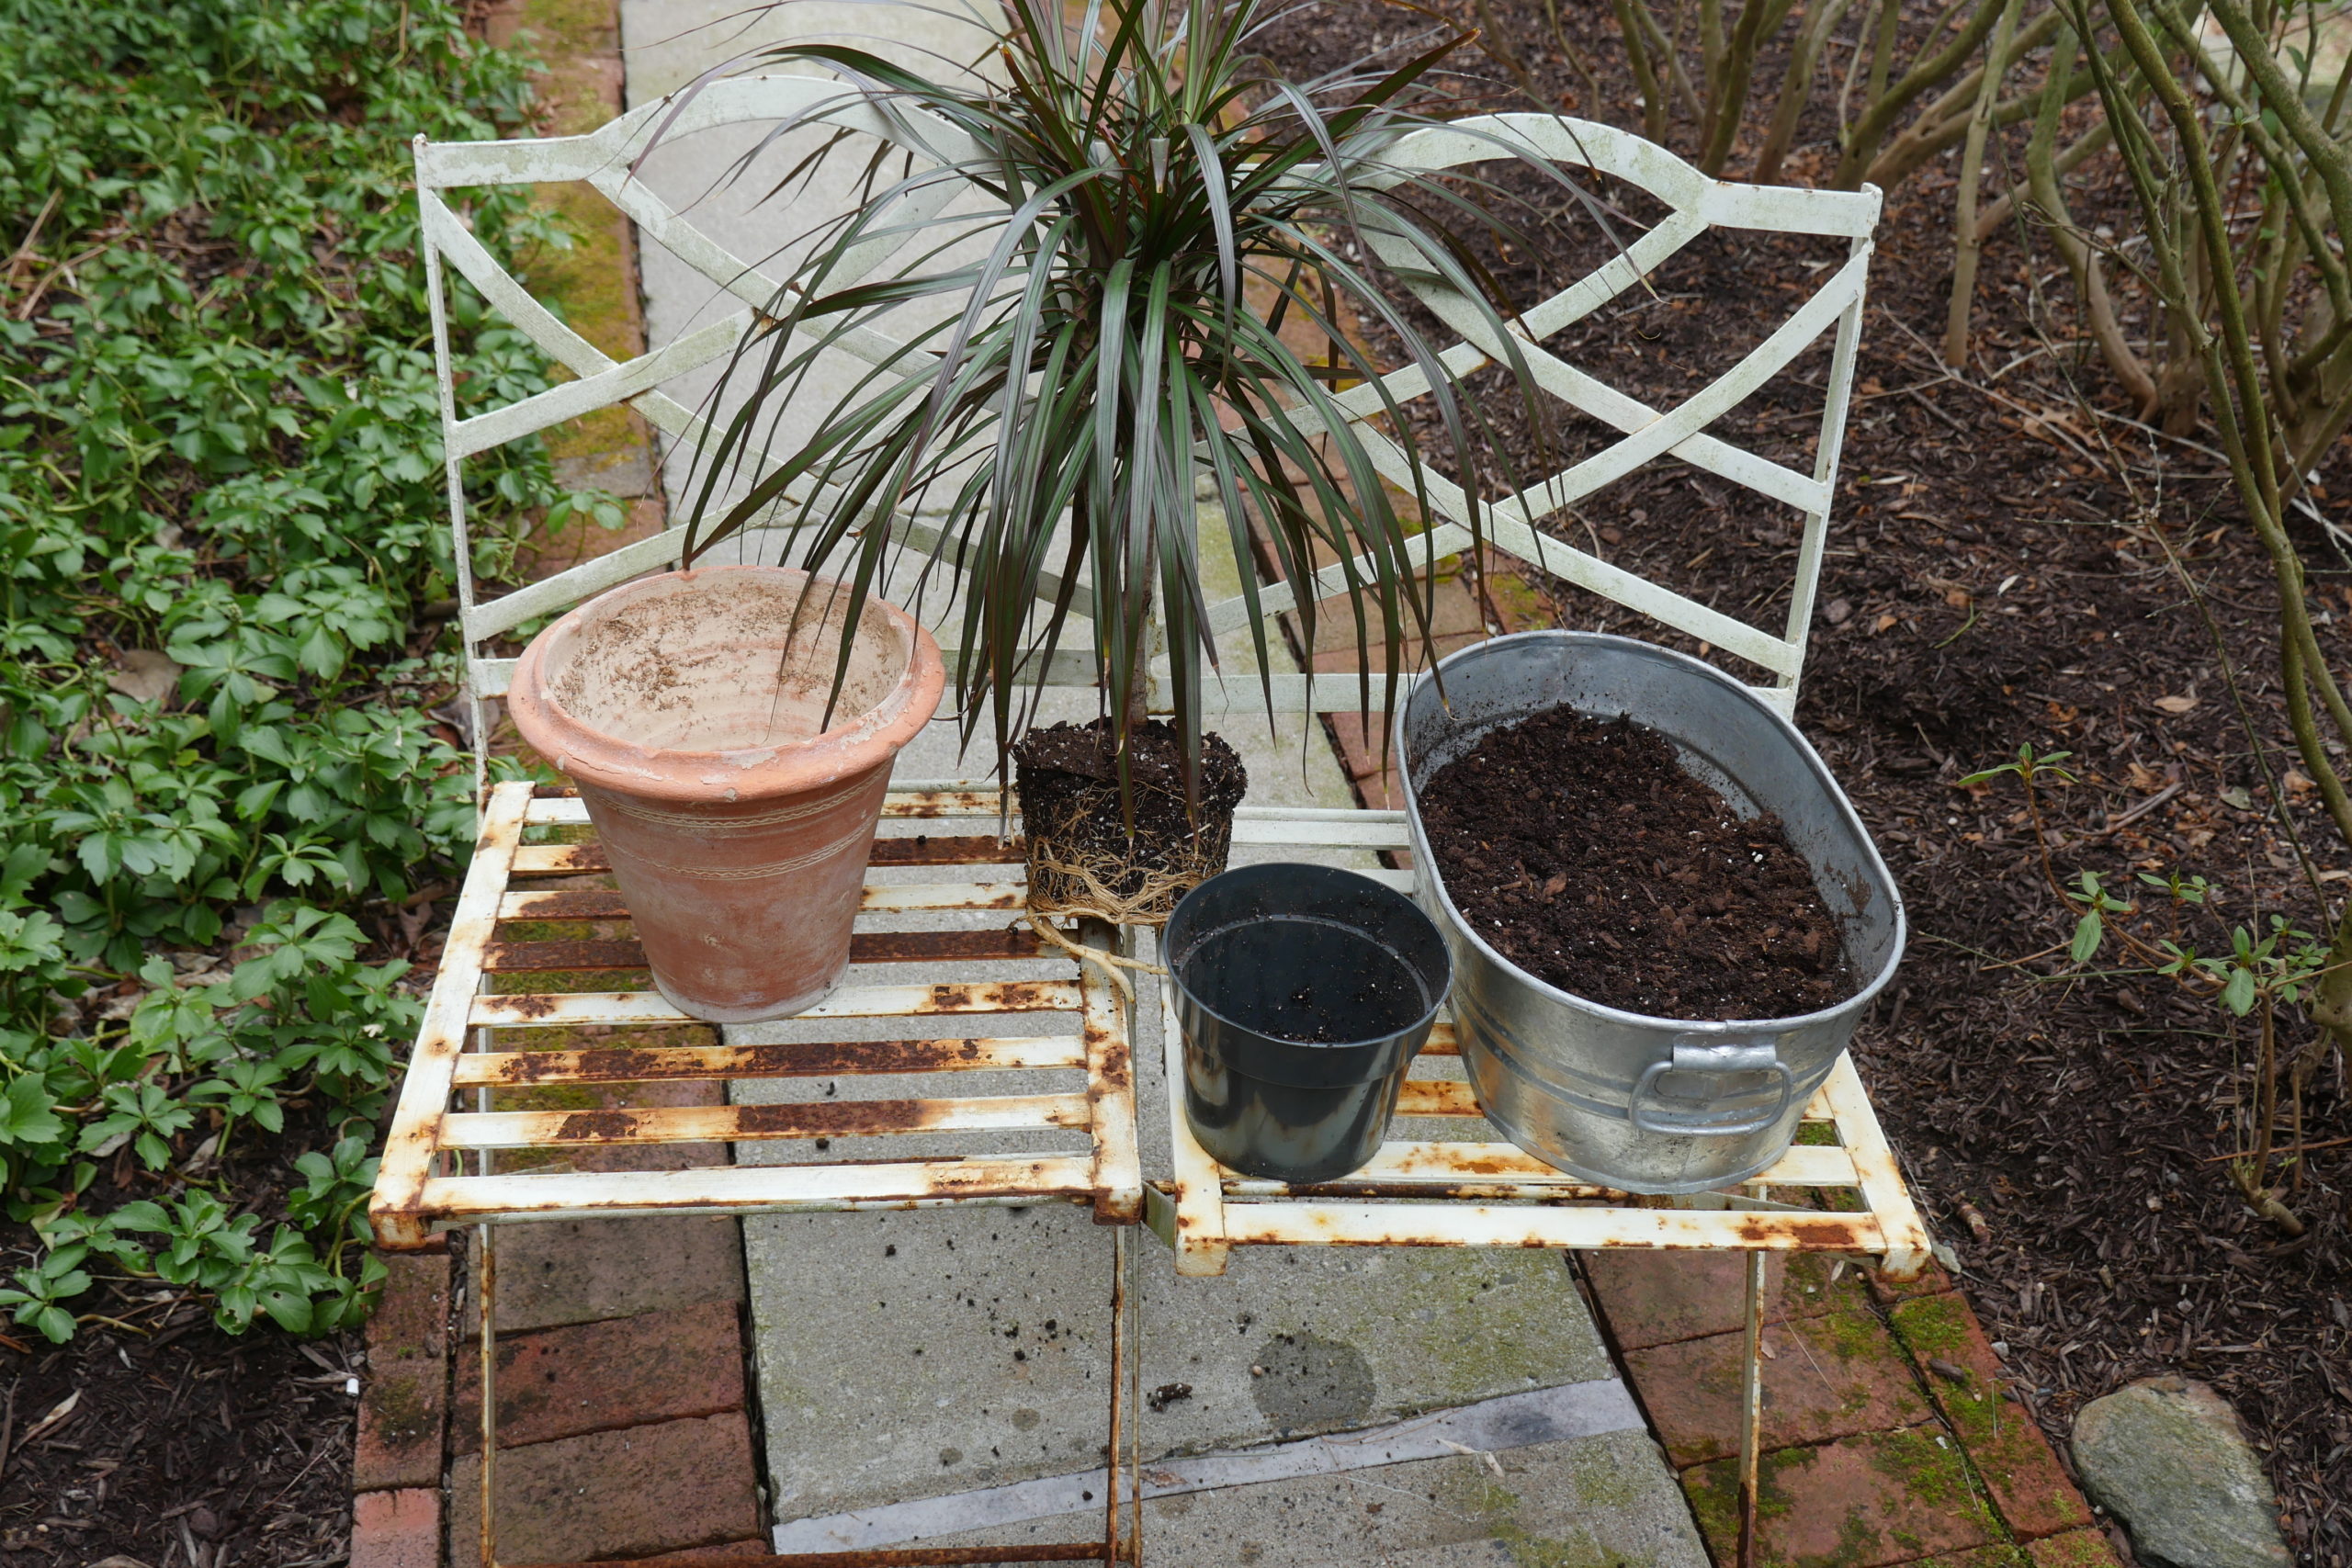
A Dracaena marginata (center) removed from its original 6-inch pot (front) being potted up into a 10-inch terracotta pot The galvanized planter/trough (right) is used for mixing and moistening the soil. Note the roots on the Dracaena, which need to be teased out and loosened before repotting. ANDREW MESSINGER
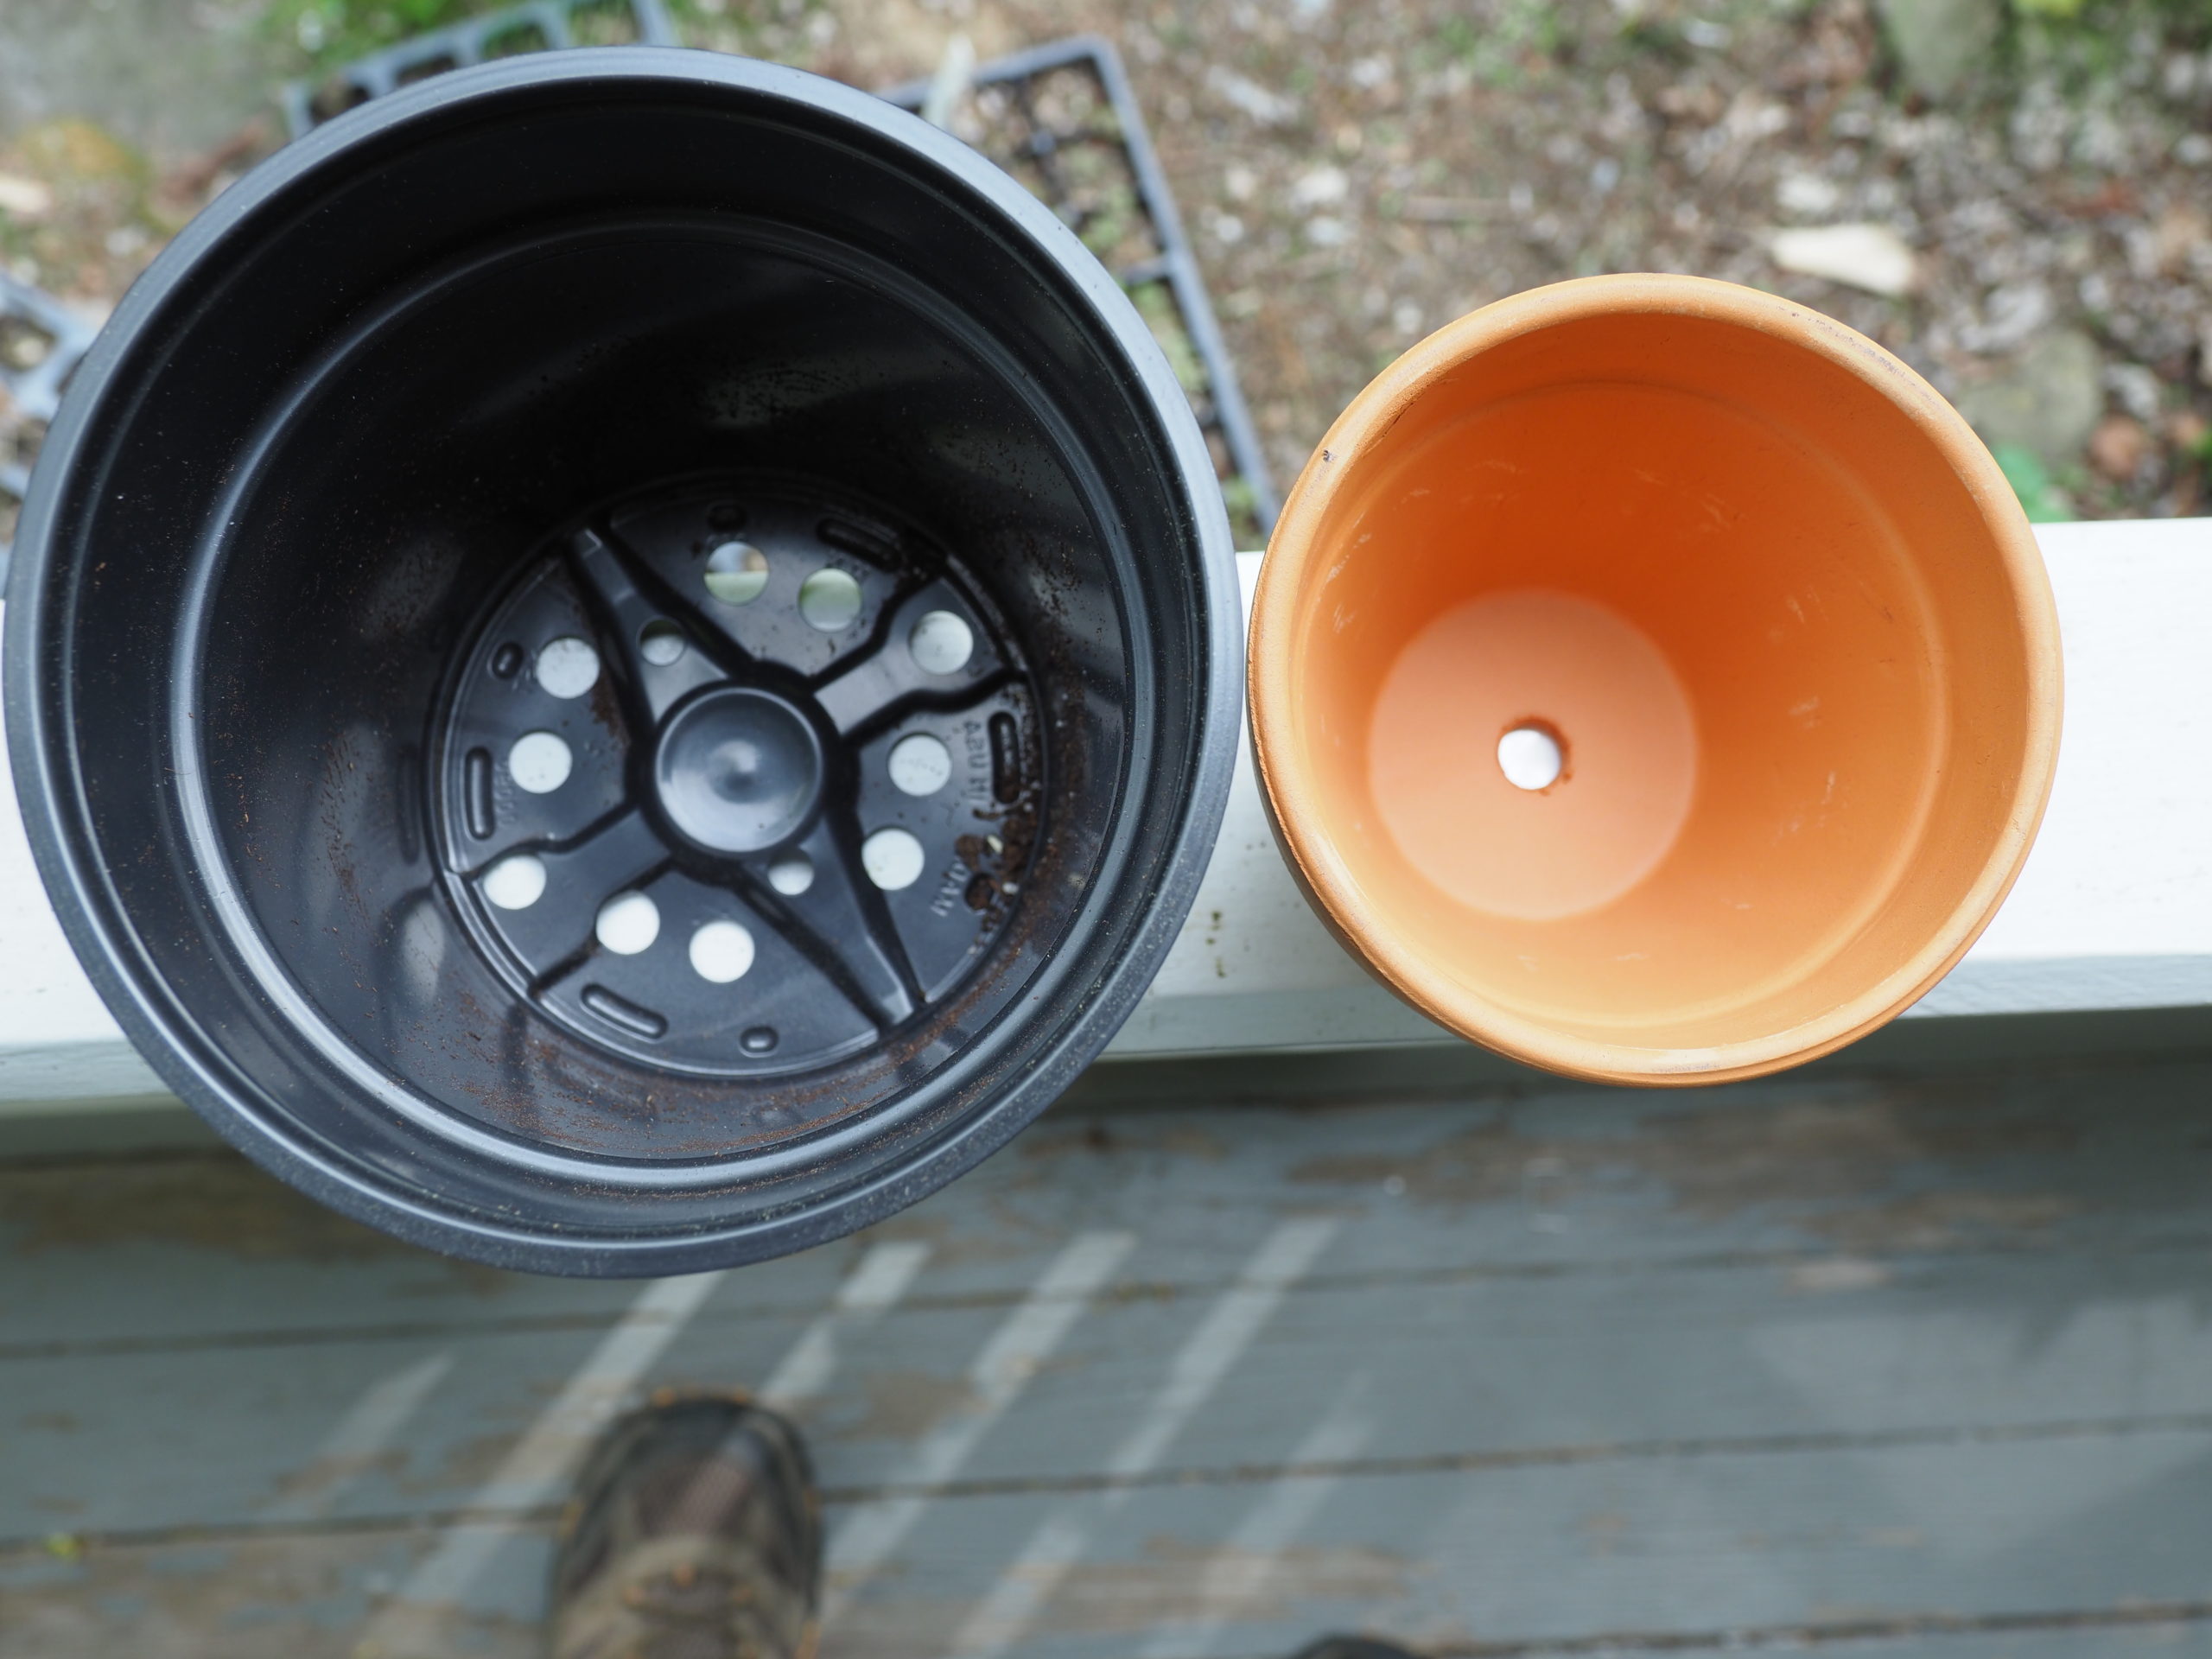
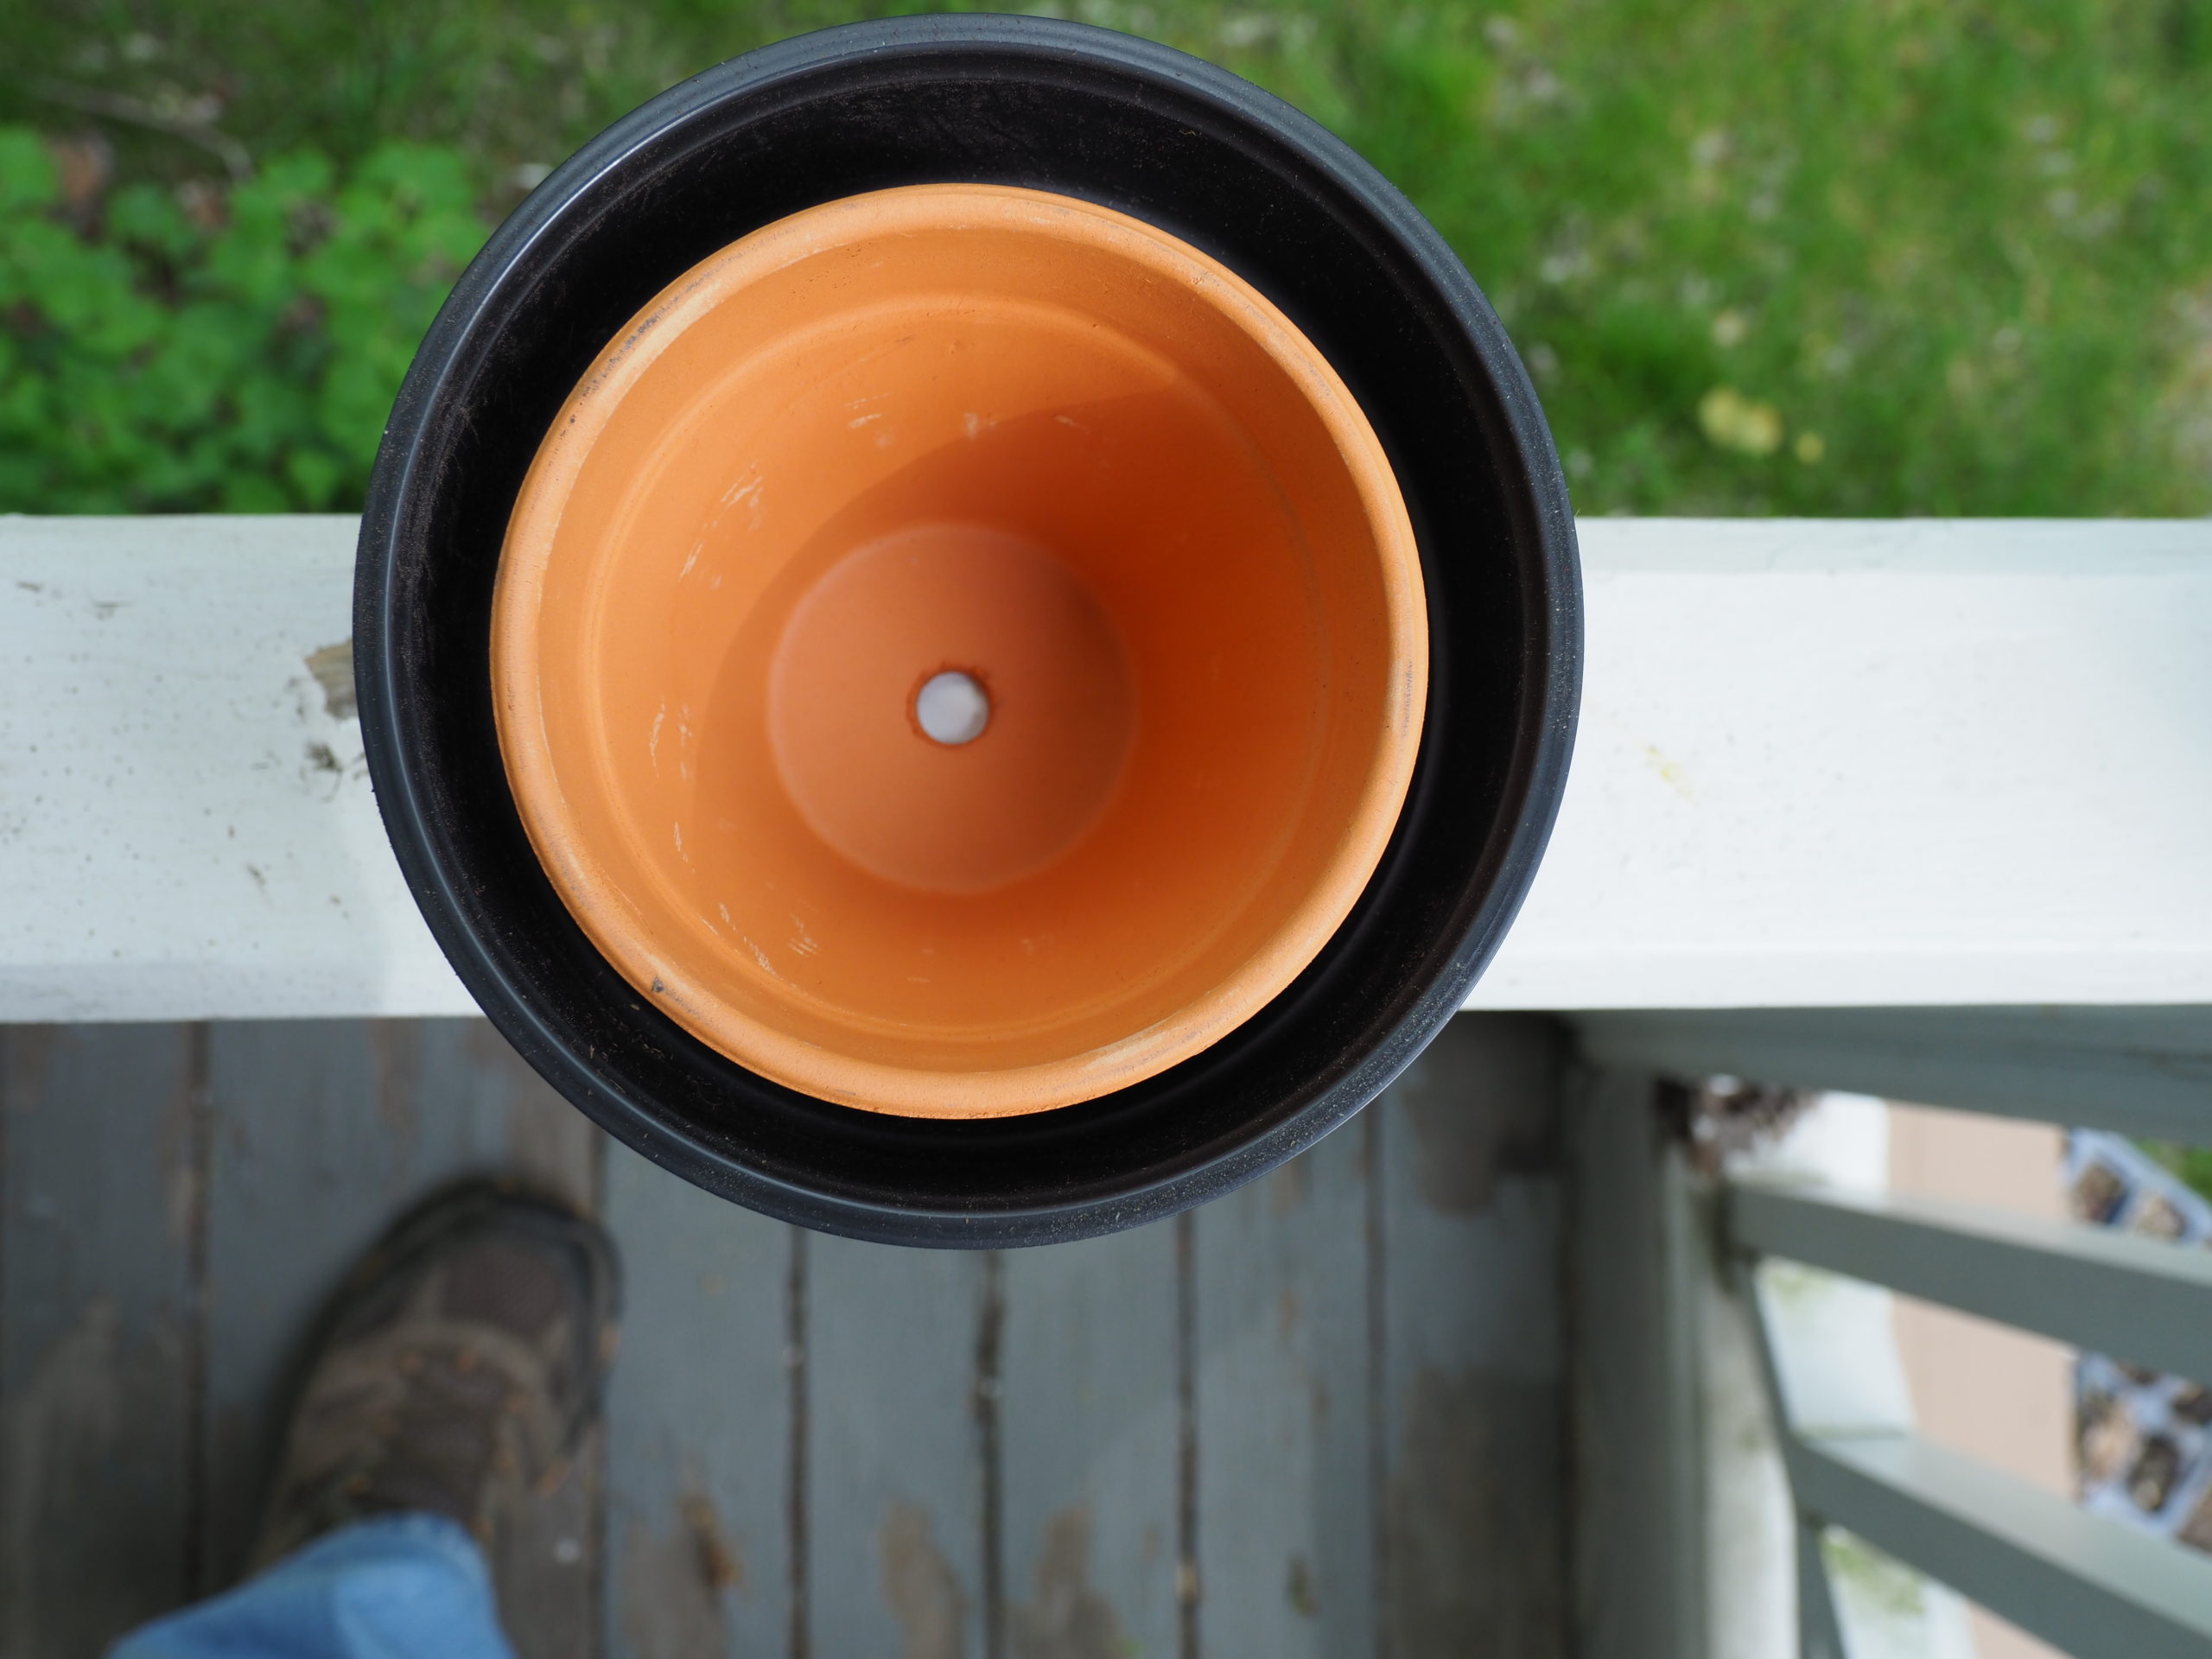
A standard 4-inch clay pot on the right and a 6-inch plastic pot on the left. Note the different drainage holes on each pot. The single drainage hole in the clay pot is all that’s necessary because the clay can “breathe.” The plastic pot, which is not porous like the clay pot, allows for drainage with 10 small holes and one larger center drainage hole to compensate. ANDREW MESSINGER
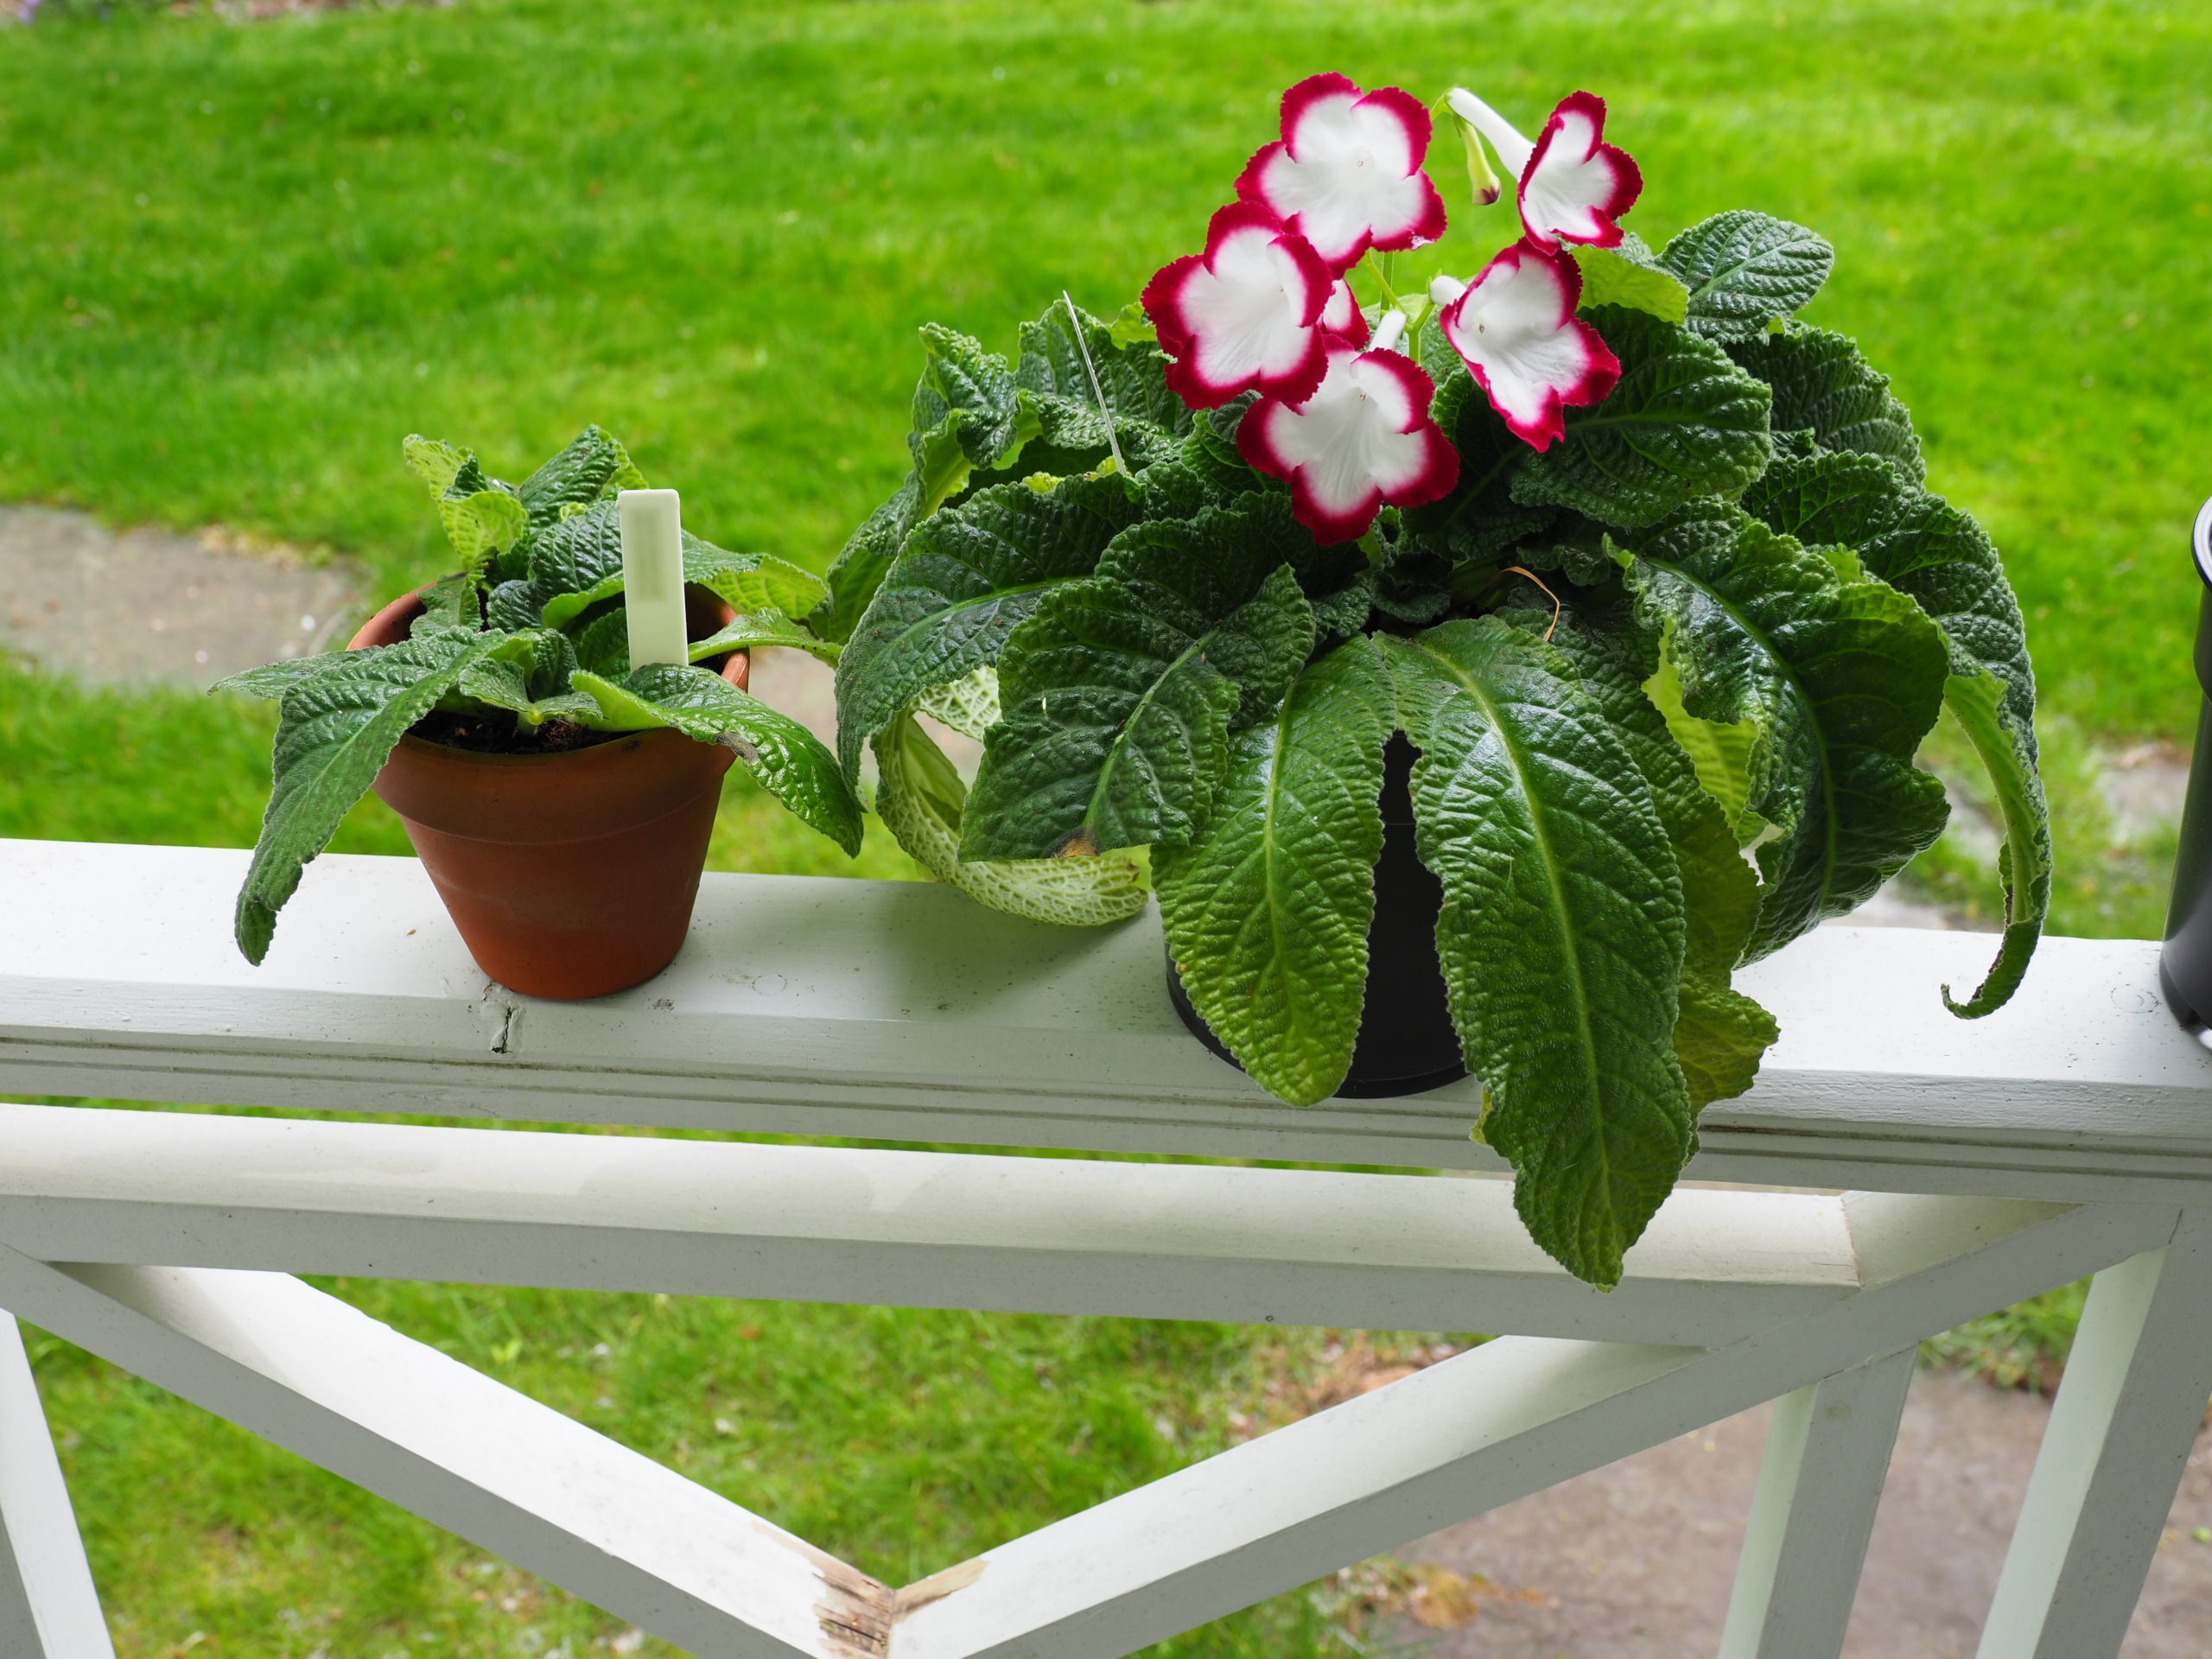
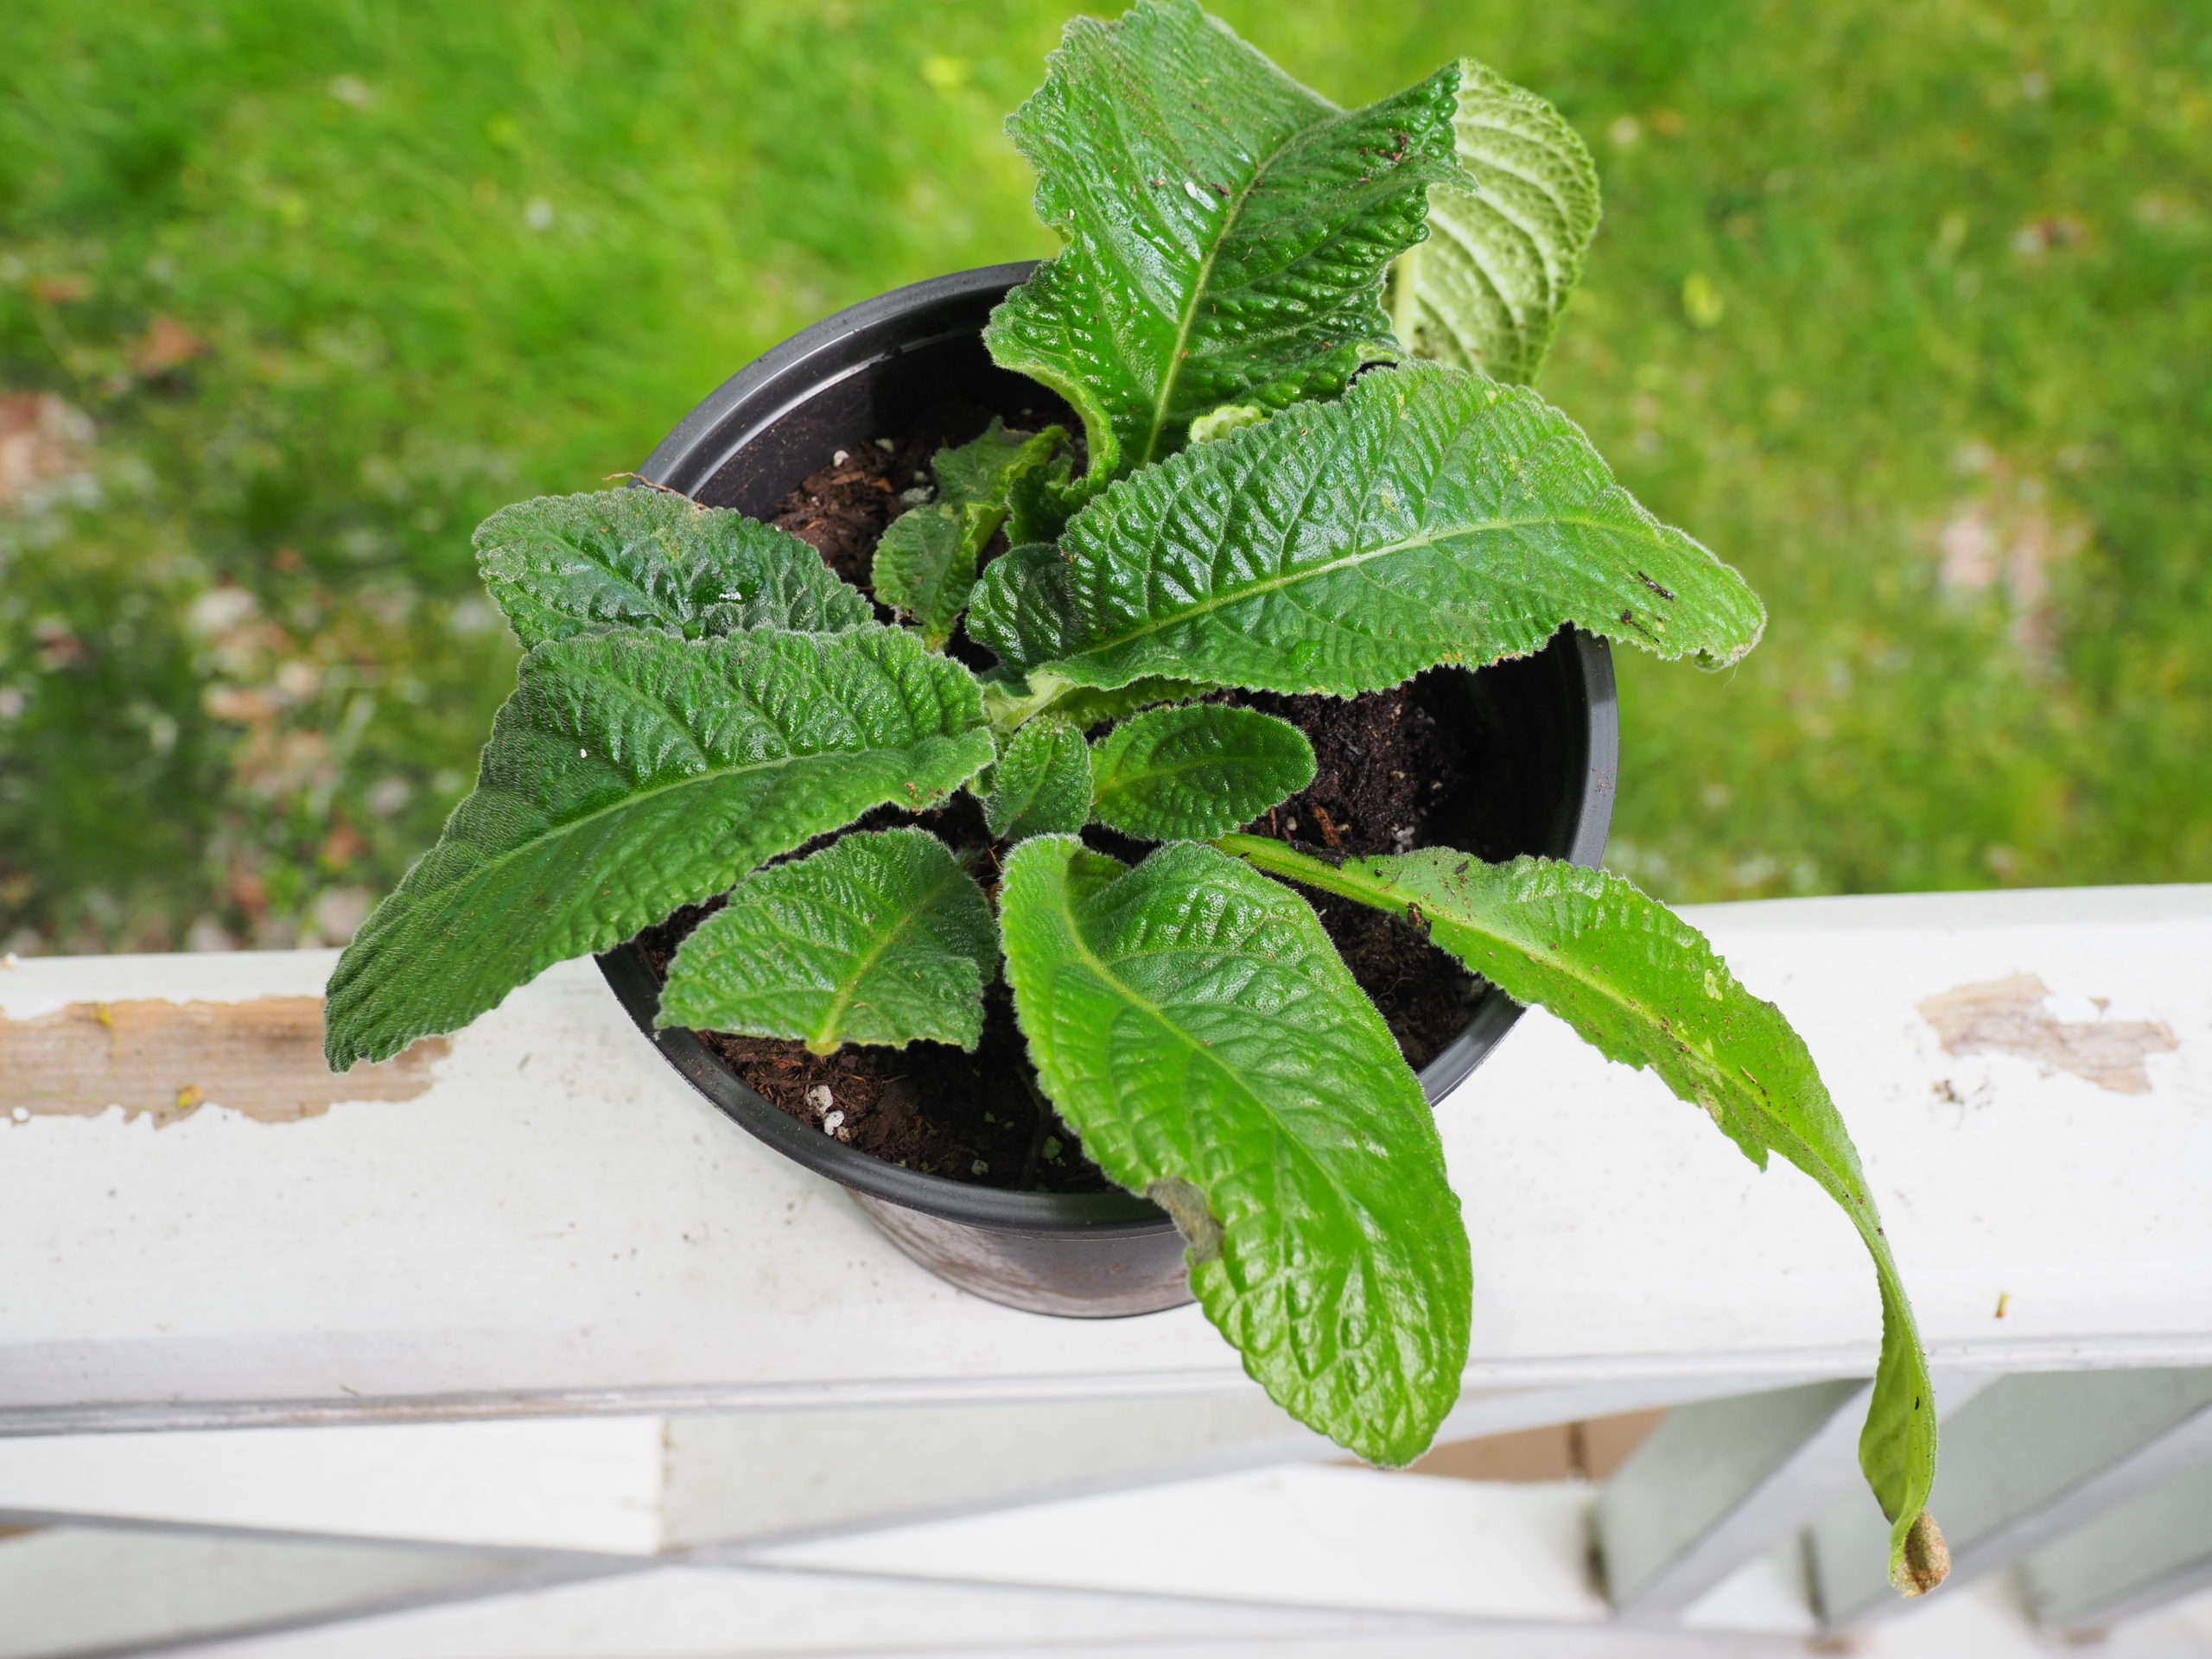
The Cape primrose (Stretocarpus saxsorum) on the left is a 4-month-old rooted leaf cutting in a 4-inch clay pot. The roots have filled the pot and “bumping” it up to a 6-inch pot will allow it to mature and begin blooming in about six weeks. The plant on the right is the parent plant that’s about a year old. ANDREW MESSINGER
With soil on the bottom of the plastic pot, the original clay pot is placed inside the plastic pot with the rim of the clay pot about an inch below the rim of the clay pot. ANDREW MESSINGER
Moist soil was added into the space between the two pots then the clay (or original pot) is lifted out leaving a perfectly shaped cavity for the plant that came out of the 4-inch pot. ANDREW MESSINGER
The original 4-inch plant now sitting snugly in its new 6-inch home. Water well from both the top and bottom. Due to the time of the year and the new space in the root zone, this plant will take off and thrive, being in full bloom in about six to eight weeks.

This is the perfect time to repot houseplants if they are showing signs of being pot bound.
Classic signs are that the soil seems to dry out very quickly after watering. This assumes that you are watering properly, which means allowing the plant to sit in a saucer of water for no more than 15 minutes then emptying the saucer. You can water from the top and/or the bottom as the capillary action of most modern potting soils will wick up the moisture from the soil. If the saucer empties in five minutes then refill it and do so until a small amount of water remains in the saucer — then empty it.
Another sign to repot that’s reliable, especially in the Ficus plants and cane plants like Dieffenbachias and Dracaenas, is when lower leaves dry and fall from the bottom. This indicates that the root system can no longer support the shoot system (stems and leaves).
The repotting process is pretty simple, but you need to have a few things on hand first: Obviously, you will need a new and larger pot. The new pot should be about 2 inches wider (at the rim) than the old pot as well as deeper. If you go much larger you run the risk of having so much soil in the new pot that it retains moisture that the plant roots can’t remove, and that introduces the danger of root rot. Then there’s the question of clay or plastic.
Clay is heavy, somewhat fragile, and expensive. However, since the clay is porous it allows for better air and moisture passage. But that too has its down side because if moisture can escape through the clay that can mean more watering. On the other side of the coin, if the clay pot allows for evaporation of water then overwatering is less likely. Some plants just couldn’t care less and then it becomes a question of which you prefer and not the plant.
When you’ve chosen the right pot look at the bottom and see what the drainage situation is. In clay pots you’ll find only one drainage hole. In plastic pots there will be several. I was taught to add pebbles or shards of old clay pots (crockery) to the bottom of the pot to aid in drainage. While this certainly can’t hurt, the only time it becomes really, truly necessary is when a particular plant is sensitive to wet soil, as in cacti.
The next consideration is the soil. Notice I didn’t say dirt. Dirt belongs outside and garden soil should only be used if you are using it as an inoculant — a source of microbial activity — and then only a tablespoon or so. Bagged soils tend to be lifeless since they are made from materials like bark, peat moss, coconut husks and other materials. And don’t be overly swayed by potting soils that emphasize that they are organic. You’ll have some trouble finding an inorganic potting soil.
Ah, but there are so many choices of potting soils in the stores, which one is right? I tend to use Pro-Mix only because I’ve used it for nearly 40 years, but beware that there are different types of Pro-Mix. Look at the label to see what’s in it. My second choice would be an Espoma potting mix. While you may find that you can get by with one mix and just amend it with sand or perlite for added drainage, keep in mind that a cactus will not do well in a soil that retains lots of water. So here you’d add sharp, clean builders sand or perlite. No need to buy a special cacti soil and pay the upcharge.
The last consideration is if the packaged soil has fertilizer in it or not. If it does then you lose control of what the fertilizer is and how much is in the mix. Of course you also need to know how long the fertilizer will last. Will it remain in the soil for a week? A month? Longer? For this reason, I recommend potting soils without fertilizer. If you want to repot and just take care of watering, then you can add a product like Osmocote, which is a time-release fertilizer. It’s available for a wide range of plants and the label will tell you how long it will work for. Another easy approach is to add an organic fertilizer to your water each time you water the plant. Use a diluted solution as you’ll be constantly feeding. You’ll be amazed how different a plant grows when it has a constant supply of nutrients.
Many of the new potting soils may also contain biostimulants such as mycorrhizal fungi. These are mostly for marketing, but they will not harm your plant. Again, in these sterile soils they can certainly help in the root uptake of nutrients and soil health.
To repot, the first step is to make sure the target plant is well watered. This reduces the transplant shock, loosens the plant from the sides of the pot and keeps the soil mass tight. Once the plant is watered, look to see if roots are emerging from the drainage hole. Most of the time the roots can simply be teased through the hole but with plastic pots this can be a problem. If you find you need to cut off some roots do so with sharp scissors or a pruner, making clean cuts and leaving no frayed ends.
In some cases you may find that you need to take more severe measures to get the plant out of the pot. If this happens with a clay pot, the only option may be to use a hammer to tap the side of the pot and create a crack. If one crack doesn’t work to loosen the plant, go for two. Don’t discard the old pot. It can be broken up into small pieces (shards) and used at the bottom for drainage.
Plastic pots may need to be cut to free the plant. This can be done with utility scissors or a utility knife, but be careful. I’ve used tin snips as well as a utility knife with a blade that was heated so it softens the plastic as the cut is made.
When repotting a cactus, the plant can be wrapped in numerous layers of newspaper to keep the spines from getting into your hands. Even cacti with tiny spines can cause discomfort.
Once depotted, inspect the root mass. If it’s tight and tangled, try to tease out the roots without breaking them. If tight roots are not loosened, they will just continue to grow in a circle and won’t expand into the new soil and space you’ve provided. Again, if you need to cut any roots make sure your cuts are clean with no frayed edges.
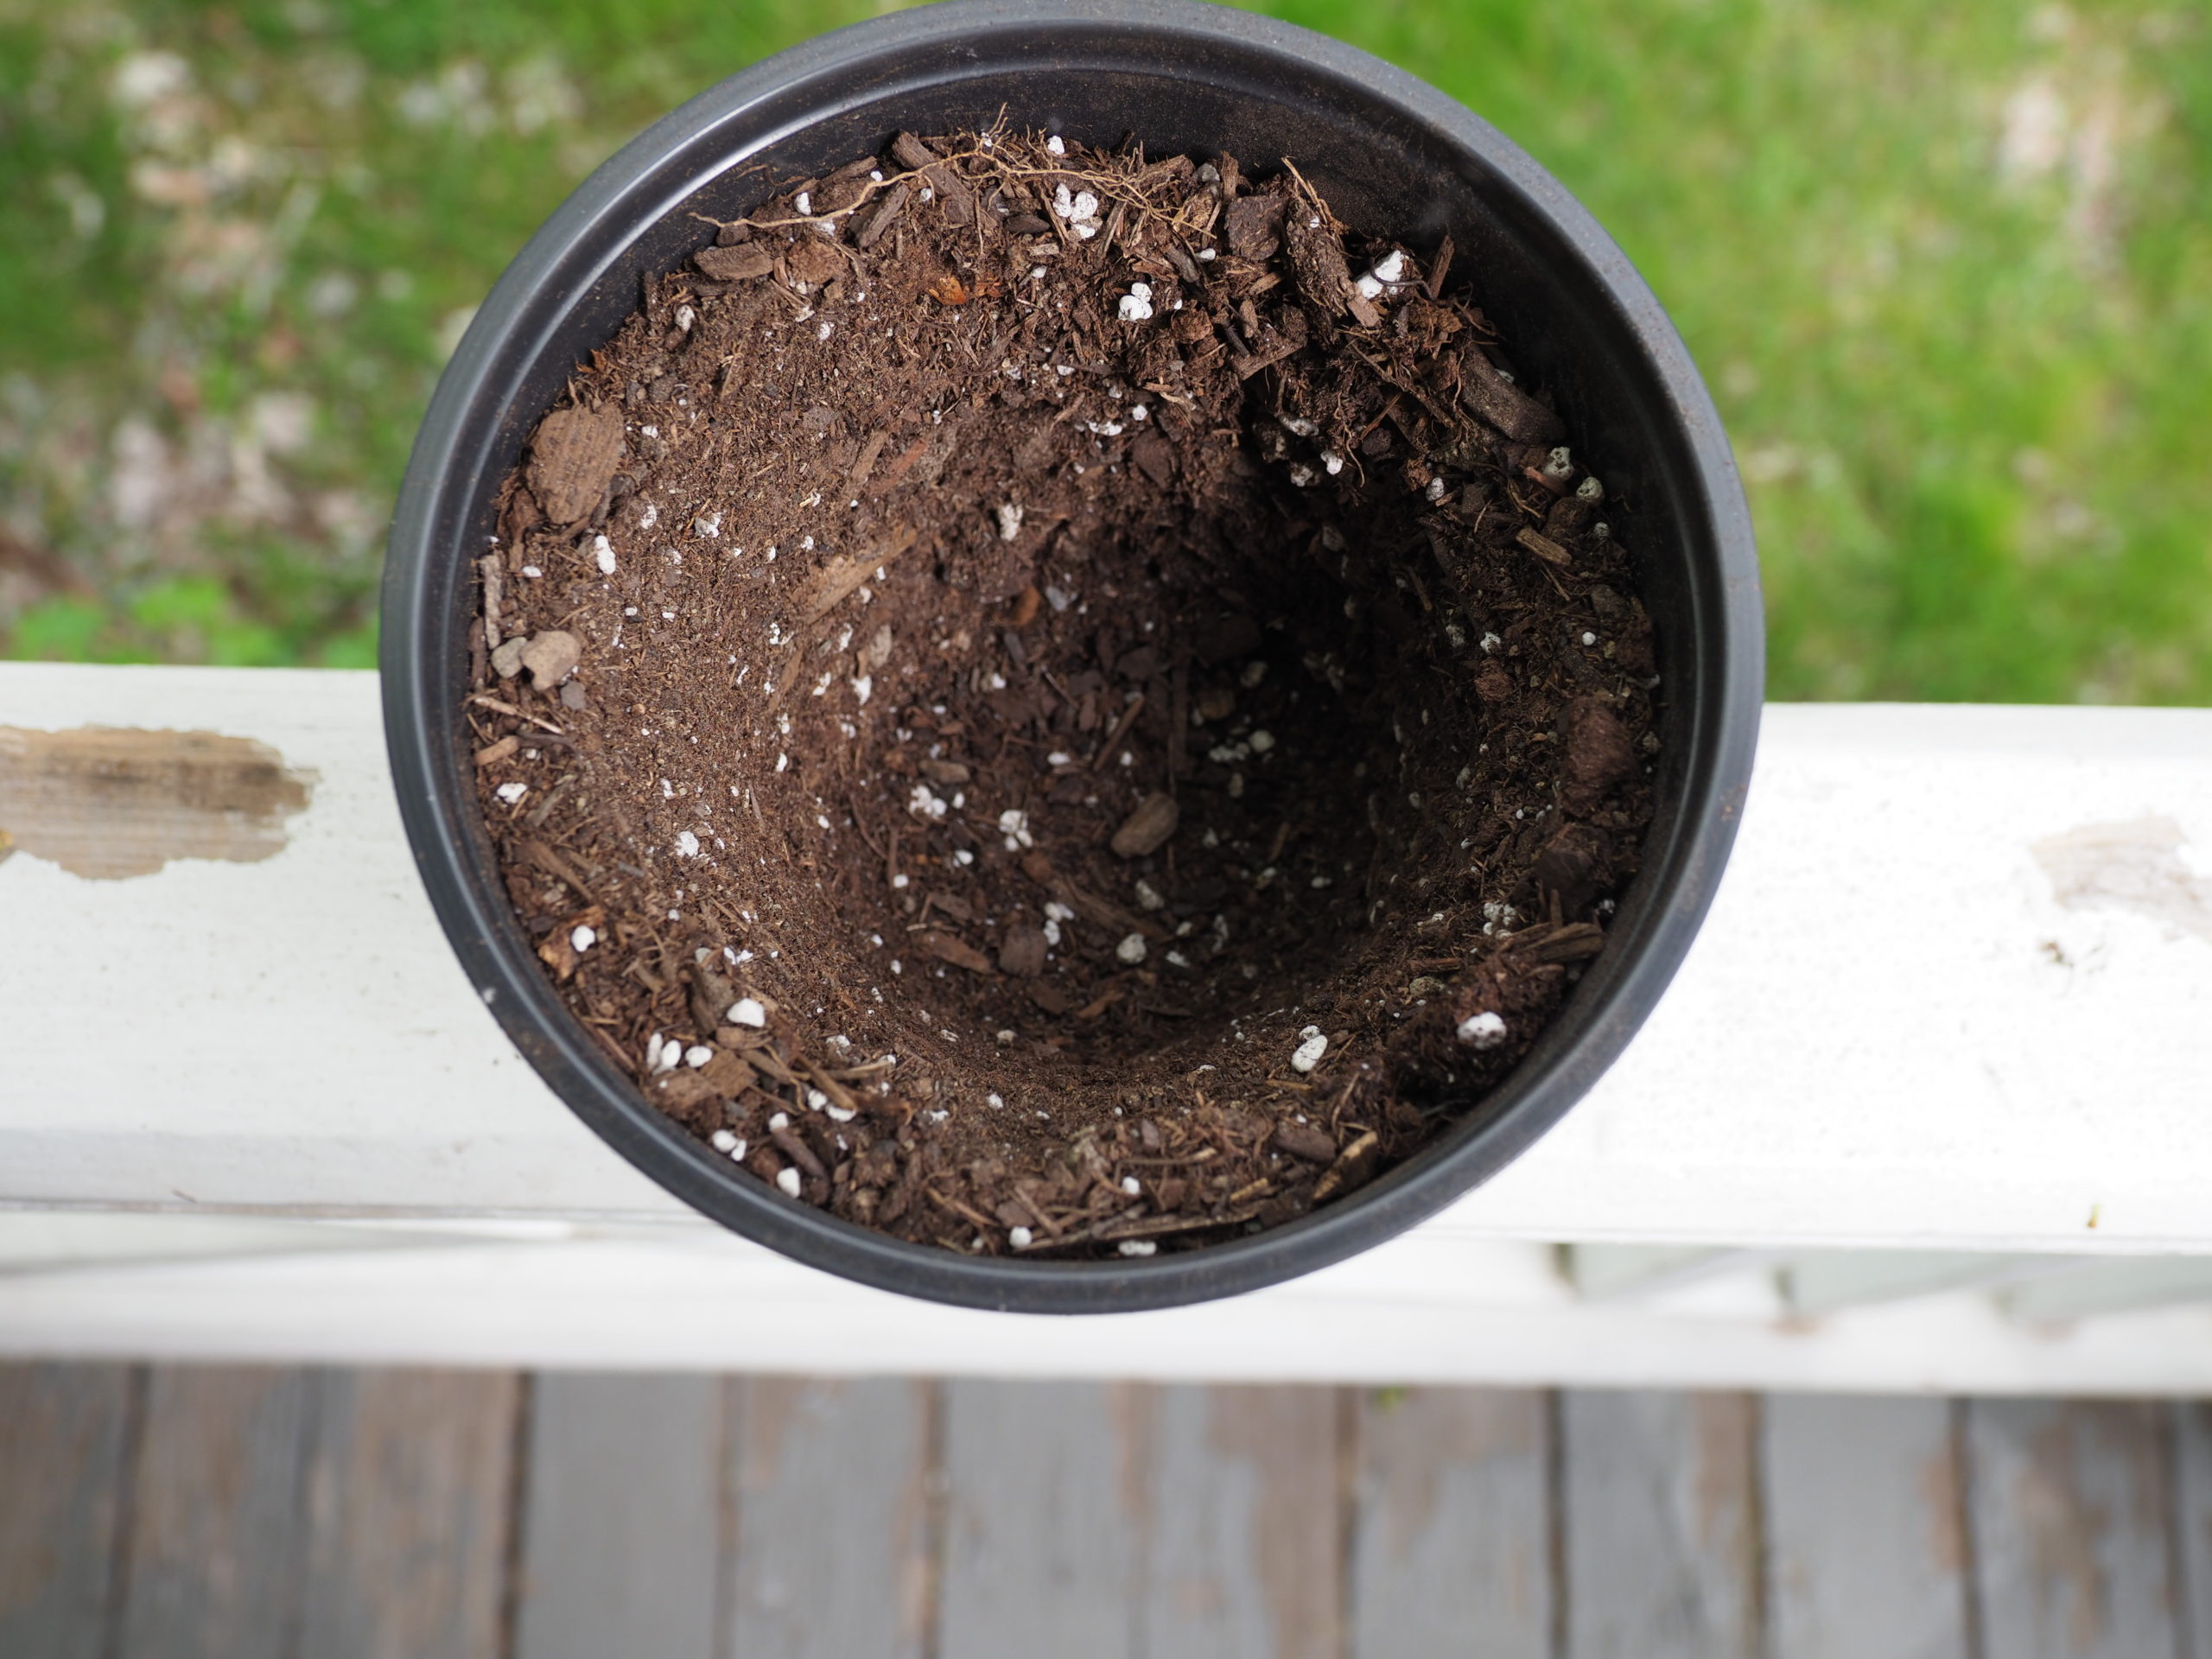
In a bucket or pail, lightly moisten enough potting soil to fill the new pot. If using Osmocote, remember to add the right amount of this fertilizer into the new soil and mix in well. Use warm water as cold water may simply run off the soil. Put some of the moistened (not wet) soil into the bottom of the new pot. A small amount of crockery or pebbles may go into the pot before the soil but just enough to keep the soil from falling through the drainage hole(s). Once you have some soil at the bottom of the new pot then put the old pot inside the new one to measure. If necessary, add more soil until the rim of the old pot is 1 inch below the rim of the new pot and begin filling in the space between the two pots.
With the old pot still inside the new pot, raise both pots and gently drop them to compact the soil — keyword, gently. After doing this a few times the soil will settle, and you should be able to take the old plant and just place it into the new space. Tap a few times again and add more potting soil around the side, but make sure there is still a 1-inch space from the rim to the new soil level. Don’t add any soil to the top of the root ball — only to the sides.
The 1-inch space left at the top is a reservoir where you can add water. For the first watering place the pot in a large saucer and fill it with water. Allow the water to be soaked up and add more if the saucer empties. Remove all water after an hour and you’re all set. From this point you can either water from the bottom or the top as needed. Keep in mind, though, that the entire soil mass should absorb water. Watering just from the top may not do this unless you water enough until you see water in the saucer. Never let water sit in the saucer for more than 15 minutes once the first soaking is complete.
It’s really an easy process and shouldn’t take more than 15 or 20 minutes for most plants. Keep in mind that once repotted the plant will look much larger. It’s spring job and shouldn’t be done in the fall or winter. Keep growing.
If you’re growing Crocosmia Lucifer it emerges earlier, is about twice as tall and flowers earlier than Crocosmia Emberglow. Emberglow is very slow to emerge and can show up two to four weeks later than Lucifer so it’s important to know where the varieties are and when to expect them to emerge. On the other hand, Emberglow blooms much longer.
After seven years of waiting, Magnolia Red Baron finally flowered. This tree is not for the impatient, but when it starts to flower it’s quite spectacular.
The tall garden lilies were very staggered this spring, with some emerging in early April and others all the way into early May.
Last chance to prune and trim those shrub Hibiscus. The rose of Sharon flowers on new wood, but new wood is produced quickly with light pruning. Shaping is more drastic, but for the most part I do a little thinning in the center of the shrub then look at each stem and reduce it to the first developing leaf that looks viable. The diagonal cut is made just a few tenths of an inch after the leaf stem. Want to do it quicker? Use sheers or a hedge trimmer and see what happens.
We had a very good year for overwintering some of the new Echinacea varieties. More on these later in the season, but it’s good news. Not so good on the Coreopsis front. It doesn’t look like any of the varieties we trialed over winter made it. More on these in a few weeks as well.
The climbing bleeding heart, Adlumia fungosa, has returned. I fell in love with this plant two years ago as it invaded my front porch. Being a biennial, there were none last summer but three this year. More on this great native (to the Northeast anyway) vine later in the summer.
Your veggie garden should be well on its way with at least a second sowing of greens and peas. If you have tomatoes, they might prefer being in a pot until the end of the month. Then as the soil reliably warms closer to Memorial Day weekend, they can be safely planted. For newbies: Know if your tomatoes are the determinate or indeterminate type. Guessing could result in a 20-foot-long tomato plant instead of 3 feet high on a stake.
I’ve received a few notes about lettuce and radishes not germinating or germinating then dying shortly after. If you’re just a weekender, these are tough, and in each case this was the problem. Both need a moist seedbed until after germination, and watering every day can often be necessary.
t looks like we may be over the cool days of spring and now we’re into pre-summer. Garden centers will have plants for the veggie garden and landscape well into the summer in larger and larger containers. Plenty of time for planting just about everything if it’s in a pot, but no more grass seeding. If you need to fill in spots, cut pieces of sod from elsewhere in the lawn where they won’t be missed and use these pieces as fillers. You can also buy small amounts of sod at many local garden center. If you’re a perfectionist, take note that the sod patch and may not be the same color as the rest of the lawn. Over the years it blends and may never even get noticed by anyone but you.
Be very careful if you’re doing spot weeding with herbicides and a sprayer. The slightest spray drift can damage perennials, vines and even some trees. Spray droplets should be coarse and not fine. When the tank begins to empty, bursts of air can cause clouds of spray mist to shoot out that can easily drift to non-target plants.
Two mail-order nurseries have told me my orders will be late. You are probably having the same experience. WFF doesn’t seem to having problems, but others can’t seem to find the labor to get the shipments packed and out the door. The biggest surprise was Plant Delights, who says its labor force is down by 50 percent and neither booze or smoke will bring them in.
More Posts from Andrew Messinger


