


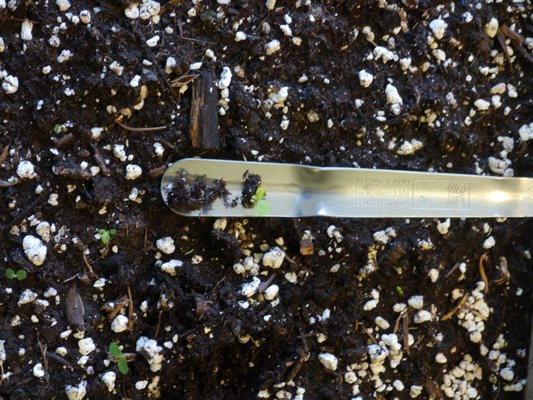
The broad end of a widger or nitpicker is used to gently get a seedling from the germinating soil and ready for transplanting. Though tiny, these seedlings have their first set of true leaves, indicating that they are ready for transplanting. ANDREW MESSINGER
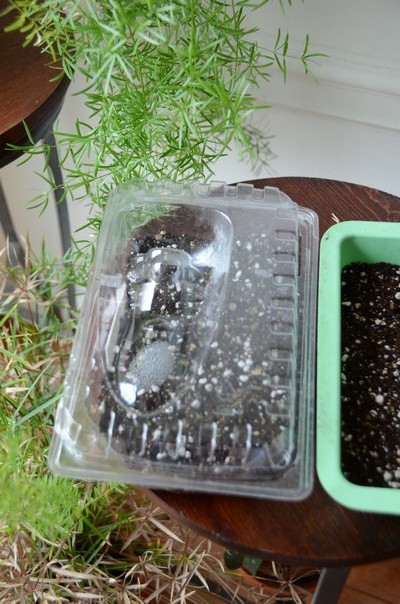
A clear plastic cover from a salad bar sits over a 2-inch-deep black frozen dinner tray. The combination is perfect for a small germination box. ANDREW MESSINGER
A while piece of foam core board about 6 by 8 inches makes a perfect tamper. Light pressure applied to the board on the soil surface ensures that seed comes into contact with the soil. ANDREW MESSINGER
This peony plant is 3 feet in diameter and hasn’t been divided in a quarter-century. Dividing it will provide new plants and rejuvenate the parent plant. ANDREW MESSINGER

This week, back to our seeding project. If you buy any take-out or frozen food and the container is made from black plastic and about 2 inches deep, it can be great for smaller seeding projects. You’ll still need flats and pots or cells for transplanting, but these smaller containers are great for germination. If they have clear or translucent tops, you can use these as domes to cover the medium and retain heat and moisture until germination begins.
Speaking of heat and moisture … you are going to need both. While some seeds need a regime of variable temperatures for as many as several years—some even need to be burned by fire and/or frozen—most of the seeds you’ll be working with need a fairly constant soil temperature of 68 to 72 degrees and moist, but never wet, soil. Wet soil and a poor germinating medium will lead to fungus diseases referred to as damping off. When they strike you can quickly lose all your seedlings as they wilt and die.
You can buy heating mats to keep the soil warm, and these come in different shapes and sizes or you can go simple and do your germination in a warmer part of the house but with bright light. Remember, even for dark germinators, once they begin to grow they need as much light as you can give them.
Now, before you get ready to sow any seed you need to know when you can plant these new plants outdoors. Seed packets should tell you that and once you have the date count backward to see when you can sow the seed and hit that outdoor planting date. Most catalogs and some seed packets will tell you how long germination should take and then how many days before you can transplant.
Keep in mind that in Southampton our first frost-free date is around April 24. Closer to Riverhead it can be a week earlier, but in Westhampton and then east of Southampton it can be a week later.
We’re ready to start. Fill your container so you have at least 2 inches of medium in it. Don’t pack it down, and make sure it’s moistened—not dripping wet—before you put it into the container. You can easily moisten your medium by mixing some in a pail or plastic bag with a small amount of warm water—that is, a SMALL amount. You can always add water but it’s tough getting it out once it’s in.
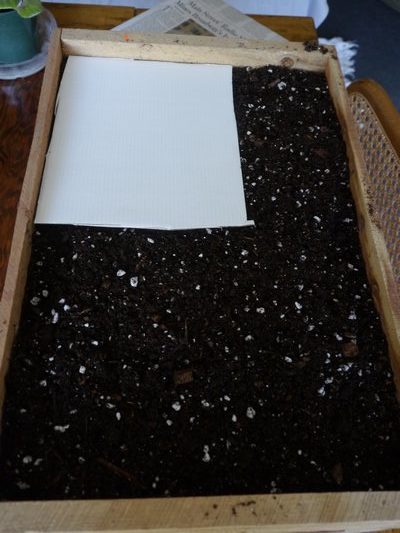
Spread or fill the medium evenly. Now add your seed. Some seed, like marigold, zinnia, cosmos, melons and pumpkins, are large and easy to work with and if you’re a beginner those are good training seeds. Petunia seed, on the other hand, is very small, and you need to practice sowing this seed since it’s so fine. You can practice by taking a pinch of seed between your thumb and index finger. Then, about 2 inches over a letter-sized sheet of white paper, gently rub your fingers to allow the seed to drop and watch the pattern on the white paper. Once you think you have it down pat, put the seed back in the packet and move on to your pot or flat and seed away.
The goal here is to try to evenly spread the seed out. Easier said than done, but the exercise on the white paper should help you out with this. One thing to remember is that you won’t have the visual clues (from the white paper) once you move to the medium, because the seed will be tiny and dark and the medium is dark as well.
OK, you’ve got the seed down. Now what? If the seed is a light germinator you want to make sure the seed comes into contact with the soil and no more. If you use your hand for this the seed will stick to your hand. A piece of flat plastic works, and you can also cut a piece of foam core board and use that. For seed that needs darkness, you will need to cover the seed. Generally, an eighth-inch of cover is adequate and you would use dry, not wet, medium for this. Try to sprinkle it evenly over the soil, and once you have your eighth-inch down (unless the directions call for more), firm the soil as noted above.
Now you need to add a bit more water. No watering cans, though. The one thing you don’t want to do is dislodge the seed or make puddles. You used to be able to buy a tool called a watering bulb to do this, but it’s been years since I’ve seen them. We now use trigger spray bottles. You can buy these bottles at hardware stores and some garden centers. A small one holding 8 to 12 ounces is fine, and you can also use a one-quart compression sprayer that you might use for pesticides in the garden—but only the one-quart size, and it must be clean. Gently spray the soil so the top is moistened.
Now you need the bottom heat, if you have it. Don’t let the flat or pot overheat. Plastic domes come in handy, as they help retain heat and moisture, and you can buy kits that include the flat and the dome. The dome may even have a couple of ventilation louvers on the top. If you’re using a dome or cover of any type, you must keep your flat or pots out of the sun or you will simply cook your seed.
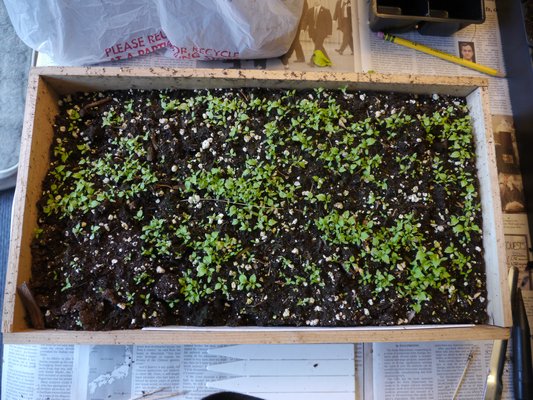
For most garden and vegetable seeds, germination can take from as little as two days to several weeks. For some plants, germination will be sporadic, while others may all germinate at the same time. Once most of the seed has germinated you can gradually remove the dome over a period of days. Keep your eye on the soil and make sure the soil an inch down remains moist and doesn’t dry out. A finger is the best tool for this. Watering can be done with a mister using a coarse spray as the seedlings get larger.
Now watch the seedling as the leaves develop. The first two leaves are called cotyledons and we call those false leaves. The next set of leaves that grow are the true leaves, and for most plants once the first two true leaves develop you can begin your transplanting. You need to know if your seedling will go into cells or pots. This is generally dependent on the size of the plant you will end up with, but remember you can buy cells that are fairly large or pots that are fairly small.
But how do you get these tiny plants out of the medium? Ah, there is a perfect tool for this and it’s called a widger (AKA nitpicker). You can use a tongue depressor but if you buy a stainless steel widger it will last forever. Widgers aren’t something you find at most garden centers, but you can get one on Amazon if you look for the Bosmere Stainless Steel Widger, or just Google “widger.”
Seedlings need to be gently teased from the soil with the roots intact. Most of the time the seedlings have to be separated from each other, and this can easily be done with two fingers.
Have your pot or cell filled with moist, fertilizer-free potting soil before you start the transplanting routine, and use a dibble or pencil to make a hole that will accept the seedling and roots. The roots can be a couple of inches long, so make sure your hole is deep enough. Hold the seedling above the hole and, using the pencil, dibble or widger, gently put the roots down into hole without bunching them up. Once the roots are in you can gently firm the soil around the roots, very gently, and make sure the soil is at the same level it was at in the germinating box or flat.
It’s a good idea to tag your pot or cells so you remember exactly what the transplant is. I even go so far as to include the date of germination and transplanting. Using your spray bottle, mist or spritz the soil and transplant, then place it in a bright warm place where the sun won’t hit it. You can gradually introduce more and more light over several days, and once you feel the transplant has “taken,” it can take sunlight without problems.
Watering can be done directly to the soil with a watering tool as long as you are careful not to drown the seedling. After about a week to 10 days you can start to add a very dilute fertilizer like fish emulsion. The seedlings will now grow pretty quickly, and you’re on your way.
When your plant is ready to go outside you need to harden it off. Sit it outdoors for a few hours each day, then, after several days, as long as there is no threat of freeze or frost, it can be left outdoors until ready for planting. If you need more information on seed starting there are articles online and in many seed catalogs. Time to seed and … keep growing.
More Posts from Andrew Messinger


