


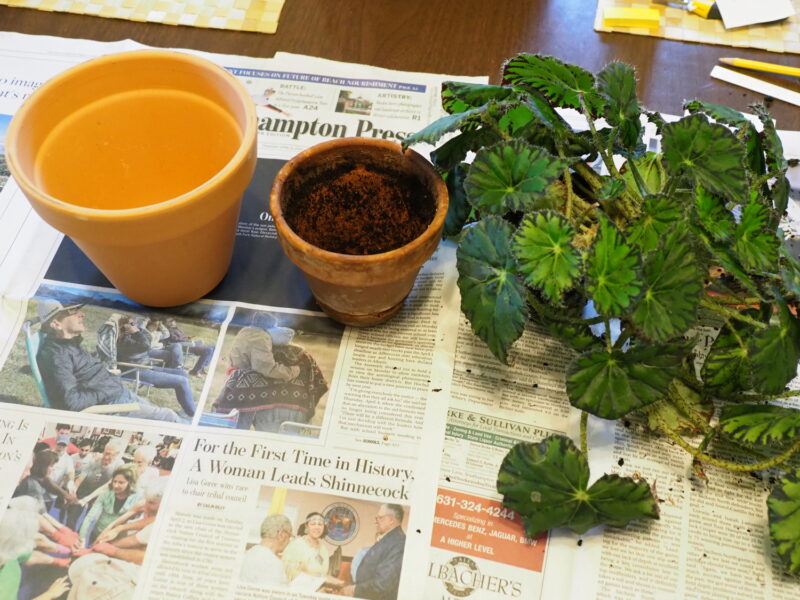

On the right is a 2-year-old Begonia grown from a leaf cutting. After being in the 4-inch clay pot (center) it needed a "bump" up to the 6-inch-wide pot on the left. ANDREW MESSINGER

With about 2 inches of soil on the bottom of the new 6-inch pot, the old pot is laid on the soil so more soil can be used to add into the space between the two pots making a near perfect home for the Begonia. ANDREW MESSINGER
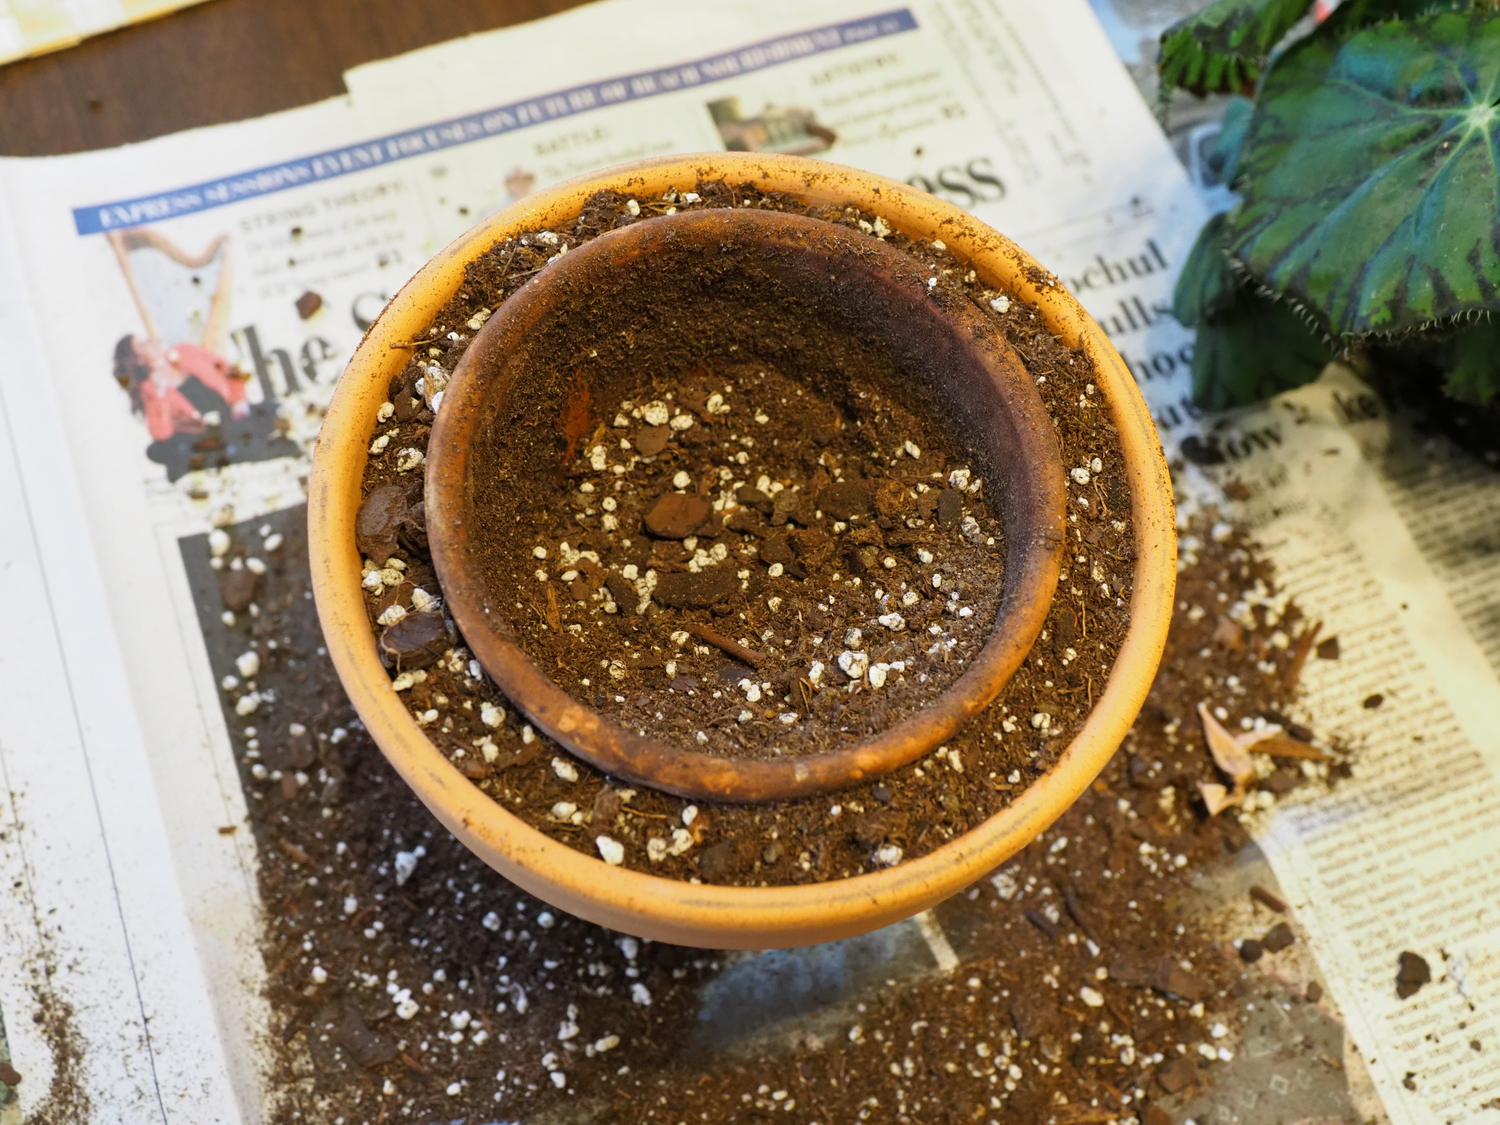
With the space filled between the two pots and very gently tamped, the old pot in the center can be removed leaving a perfect template for the root ball of the Begonia to be set into. ANDREW MESSINGER
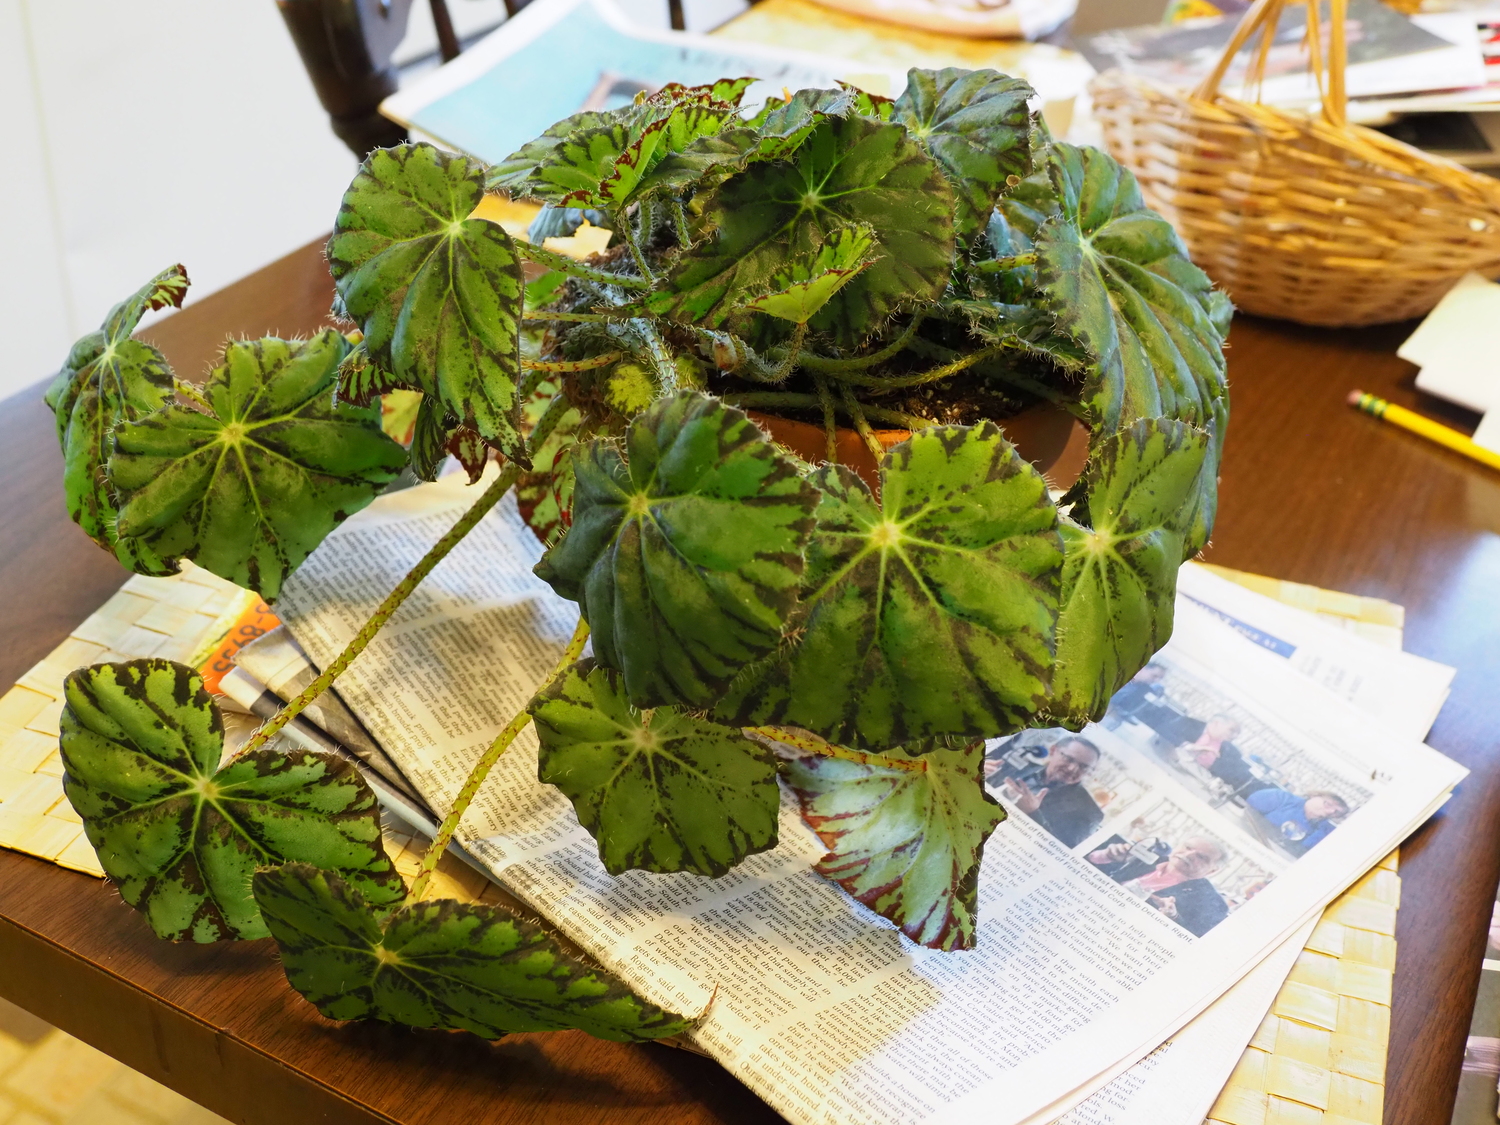
Repotted and watered, this 2-year-old Begonia is set to go for another two years in its larger home. At that point it will probably be propagated again with a leaf cut to keep the plant thriving since it will need rejuvenation. ANDREW MESSINGER

In spring our gardening attention logically and naturally focuses on things going on outside. We make the mistake of taking our attention off our houseplants, and yet this is usually the best time of the year for repotting. This is especially true if any of your plants have been purchased in the past year (including recently) or if they haven’t been repotted in years.
It may be counterintuitive to think that a new plant that you’ve just bought at a plant shop, nursery or garden center would need immediate repotting. However, these plants are grown and propagated in nearly ideal situations that allow them to grow quickly and this means fast root growth as well as fast shoot growth.
The role of the grower is to produce a plant in as small a pot as possible that still has consumer appeal. They are often grown with automatic watering systems and automatic fertilizer systems all aiding in producing larger plants at a faster pace, but it often results in our getting them as pot-bound specimens. They look great, but for some reason they seem to need water within hours of getting them home, another sign that it’s time to repot.
On the other end of the potted plant spectrum are plants that have been in our homes for a year or more. While they may not grow as quickly as those in a greenhouse or nursery most of them will grow rather slowly in the winter months but as soon as they sense the increase in natural light from day length increasing and our homes getting a bit more humid and warmer, they grow again. You can see it in the foliage and in the height and width of the plant.
There are other signs, some obvious but not considered, that tell us that our plants need repotting and potting up. Most pot-bound plants will adjust to having a restricted root mass by dropping foliage. A frond here, a leaf there or bottom branches browning while the top of the plant looks great. The plant is compensating for a restricted root mass by reducing its shoot mass and thus maintaining a precarious balance just to stay alive.
It can get a little confusing though as some plants like the Dracaenas, one of our most popular low-light houseplants, will continue to grow and get taller and taller with just a mass of sword-like leaves at the top and a naked cane. To some degree this is the natural habit for this plant as it grows in the jungle understory with the shoot reaching up to the light in the canopy above. However, if it was in the right size pot and given bright light, even a bit of sunlight, it will stay shorter and lush — but still need repotting.
The smallest plants, such as the tiny miniature African violets, to the largest, such as the mighty Ficus (rubber plants) that can take over the corner of a room from floor to ceiling, will need repotting. In some cases (very few) the root mass can be trimmed, and the plant repotted in the same pots with just some added soil. In most situations though you’ll need new soil as well as a new pot. But what size, and how do you determine the size?
Most garden centers carry a variety of pots and pot sizes. They are generally measured at the rim (top) so a 4-inch standard pot would measure 4 inches wide at the top while a 6-inch pot would be six inches at the rim. Be careful of azalea pots or bulb pots that may also be nearby as these are much shorter in depth than they are in width and should mostly be avoided.
Then there’s the decision of clay vs. plastic. Plastic pots were once cheap, and since they are very light they are preferred by growers. Plastic pots also reduce watering as there’s no evaporation though the sides like there is with clay. You also need to consider if the plant will tolerate being in a damp soil or if it needs the soil to dry out. Most plants will do very well in clay pots. Not all plants will do well in a plastic pot.
If you tend to be a heavy waterer then you should shy away from plastic. Glazed ceramic pots should be avoided.
There are also specialty pots, and we often see these used for orchids and some ferns. Most orchids won’t tolerate constantly wet soil. In fact, most orchids are grown in fast-draining bark mixes that retain some humidity in the pot but don’t stay wet. Orchid pots will often be noticeable with air/drainage slits on the side.
There is also plan B. If you learn how to adjust your soils so the soil accommodates the plants’ needs instead of just grabbing potting soil out of any retail bag of soil then you can grow virtually any plant in any pot. A good example is that most cacti used to be grown only in clay pots. In plastic pots with traditional soils, the cacti would easily rot. Amend the soil though to allow for fast drainage and low water retention and you can grow just about any cacti in a plastic pot.
Most of us like to keep it simple though, and I suspect that most of your plants are in standard potting mixes in clay pots. As an aside, the species of Asparagus that are grown as houseplants have very vigorous roots systems. I’ve seen this plant push up and out of a pot as the roots expand and seen Asparagus split the sides of a clay pot as the root ball expands. Asparagus will take a great deal of abuse though, but like other plants, as they become pot-bound they brown and drop their dainty green foliage as it turns to dust. Repot.
The process of repotting isn’t complex or time consuming unless it’s that 15-foot-tall Dracaena that’s pushing through the ceiling. A good rule of thumb is to repot into a pot that is two inches wider in diameter than the original pot. More is rarely better as this leaves a soil mass that will not drain and can result is root damage.
Use a general purpose potting soil and avoid prefertilized soils. You never ever know when the fertilizer is finished unless you add a time-released fertilizer to your mix and keep track if it’s a three-, six-, nine-month, etc. fertilizer. My preference has been Pro-Mix BX, which I’ve used for decades. It’s my “base” mix that I can add to as needed. No need for other fancy expensive mixes unless you are a specialty grower who might need an African violet mix or a fast-draining cacti mix, both of which you can still make on your own.
First, water your specimen well and let all the water drain out of the pot for 15 minutes. This will also make extracting the plant from the pot much easier. Yes, there are times when you will have to smash the clay pot or in the case of plastic cut it with knife or scissors but usually the plant can be “popped” out.
Now fill the new pot with lightly moistened soil so that when you take the old pot and place it in the new pot the rim of the new pot is at the same height as the old pot. If you need to raise or lower take care of that but when your old pot is at the new pot rim level — leave it there.
Now start to take handfuls of potting soil and add it in the space between the new pot and the old one. Don’t press the soil down just add it. When the space if filled to the top then gently tap the entire pot in pot on a table or the floor to lightly compact the potting soil. You can also use your fingers to eliminate spaces but avoid packing the new soil.
When the space if filled between the new and old pot you’re ready for installing the plant. But — an important but — before you do loosen up the roots or if they are tightly entwined they will continue to grow in a circle and not expand into the new soil. If the old root ball is too tight then use a utility knife and cut four equally spaced slits vertically from top to bottom. This won’t harm the plant but it will force new root growth once repotted.
When the plant has been put in the new pot add some soil as needed but make sure there’s at least a half inch of space from the top of the old root mass to the top of the pot. This is your water reservoir that keeps water from running over the rim of the pot when watering.
Now water. Use luke-warm water, not cold water, and make sure you have a saucer under the pot. Add water until the water drains into the saucer then empty the saucer. Add more water at the top, but slowly and when you see the first signs of water in the saucer, stop. Let everything sit for 15 minutes then empty the saucer. That’s it.
If you want to add a time-release fertilizer add it to your potting mix and make a note when the plant will need fertilizer again. Otherwise begin your usual organic liquid feeding in about two weeks.
Next week, the very controversial world of Buddleias, the butterfly bush, for some a Hamptons staple. Keep growing.
More Posts from Andrew Messinger


