


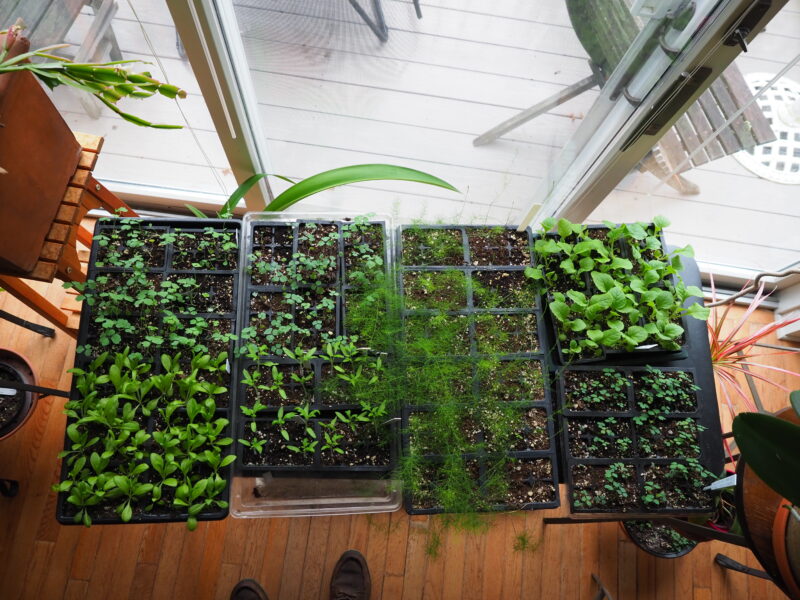
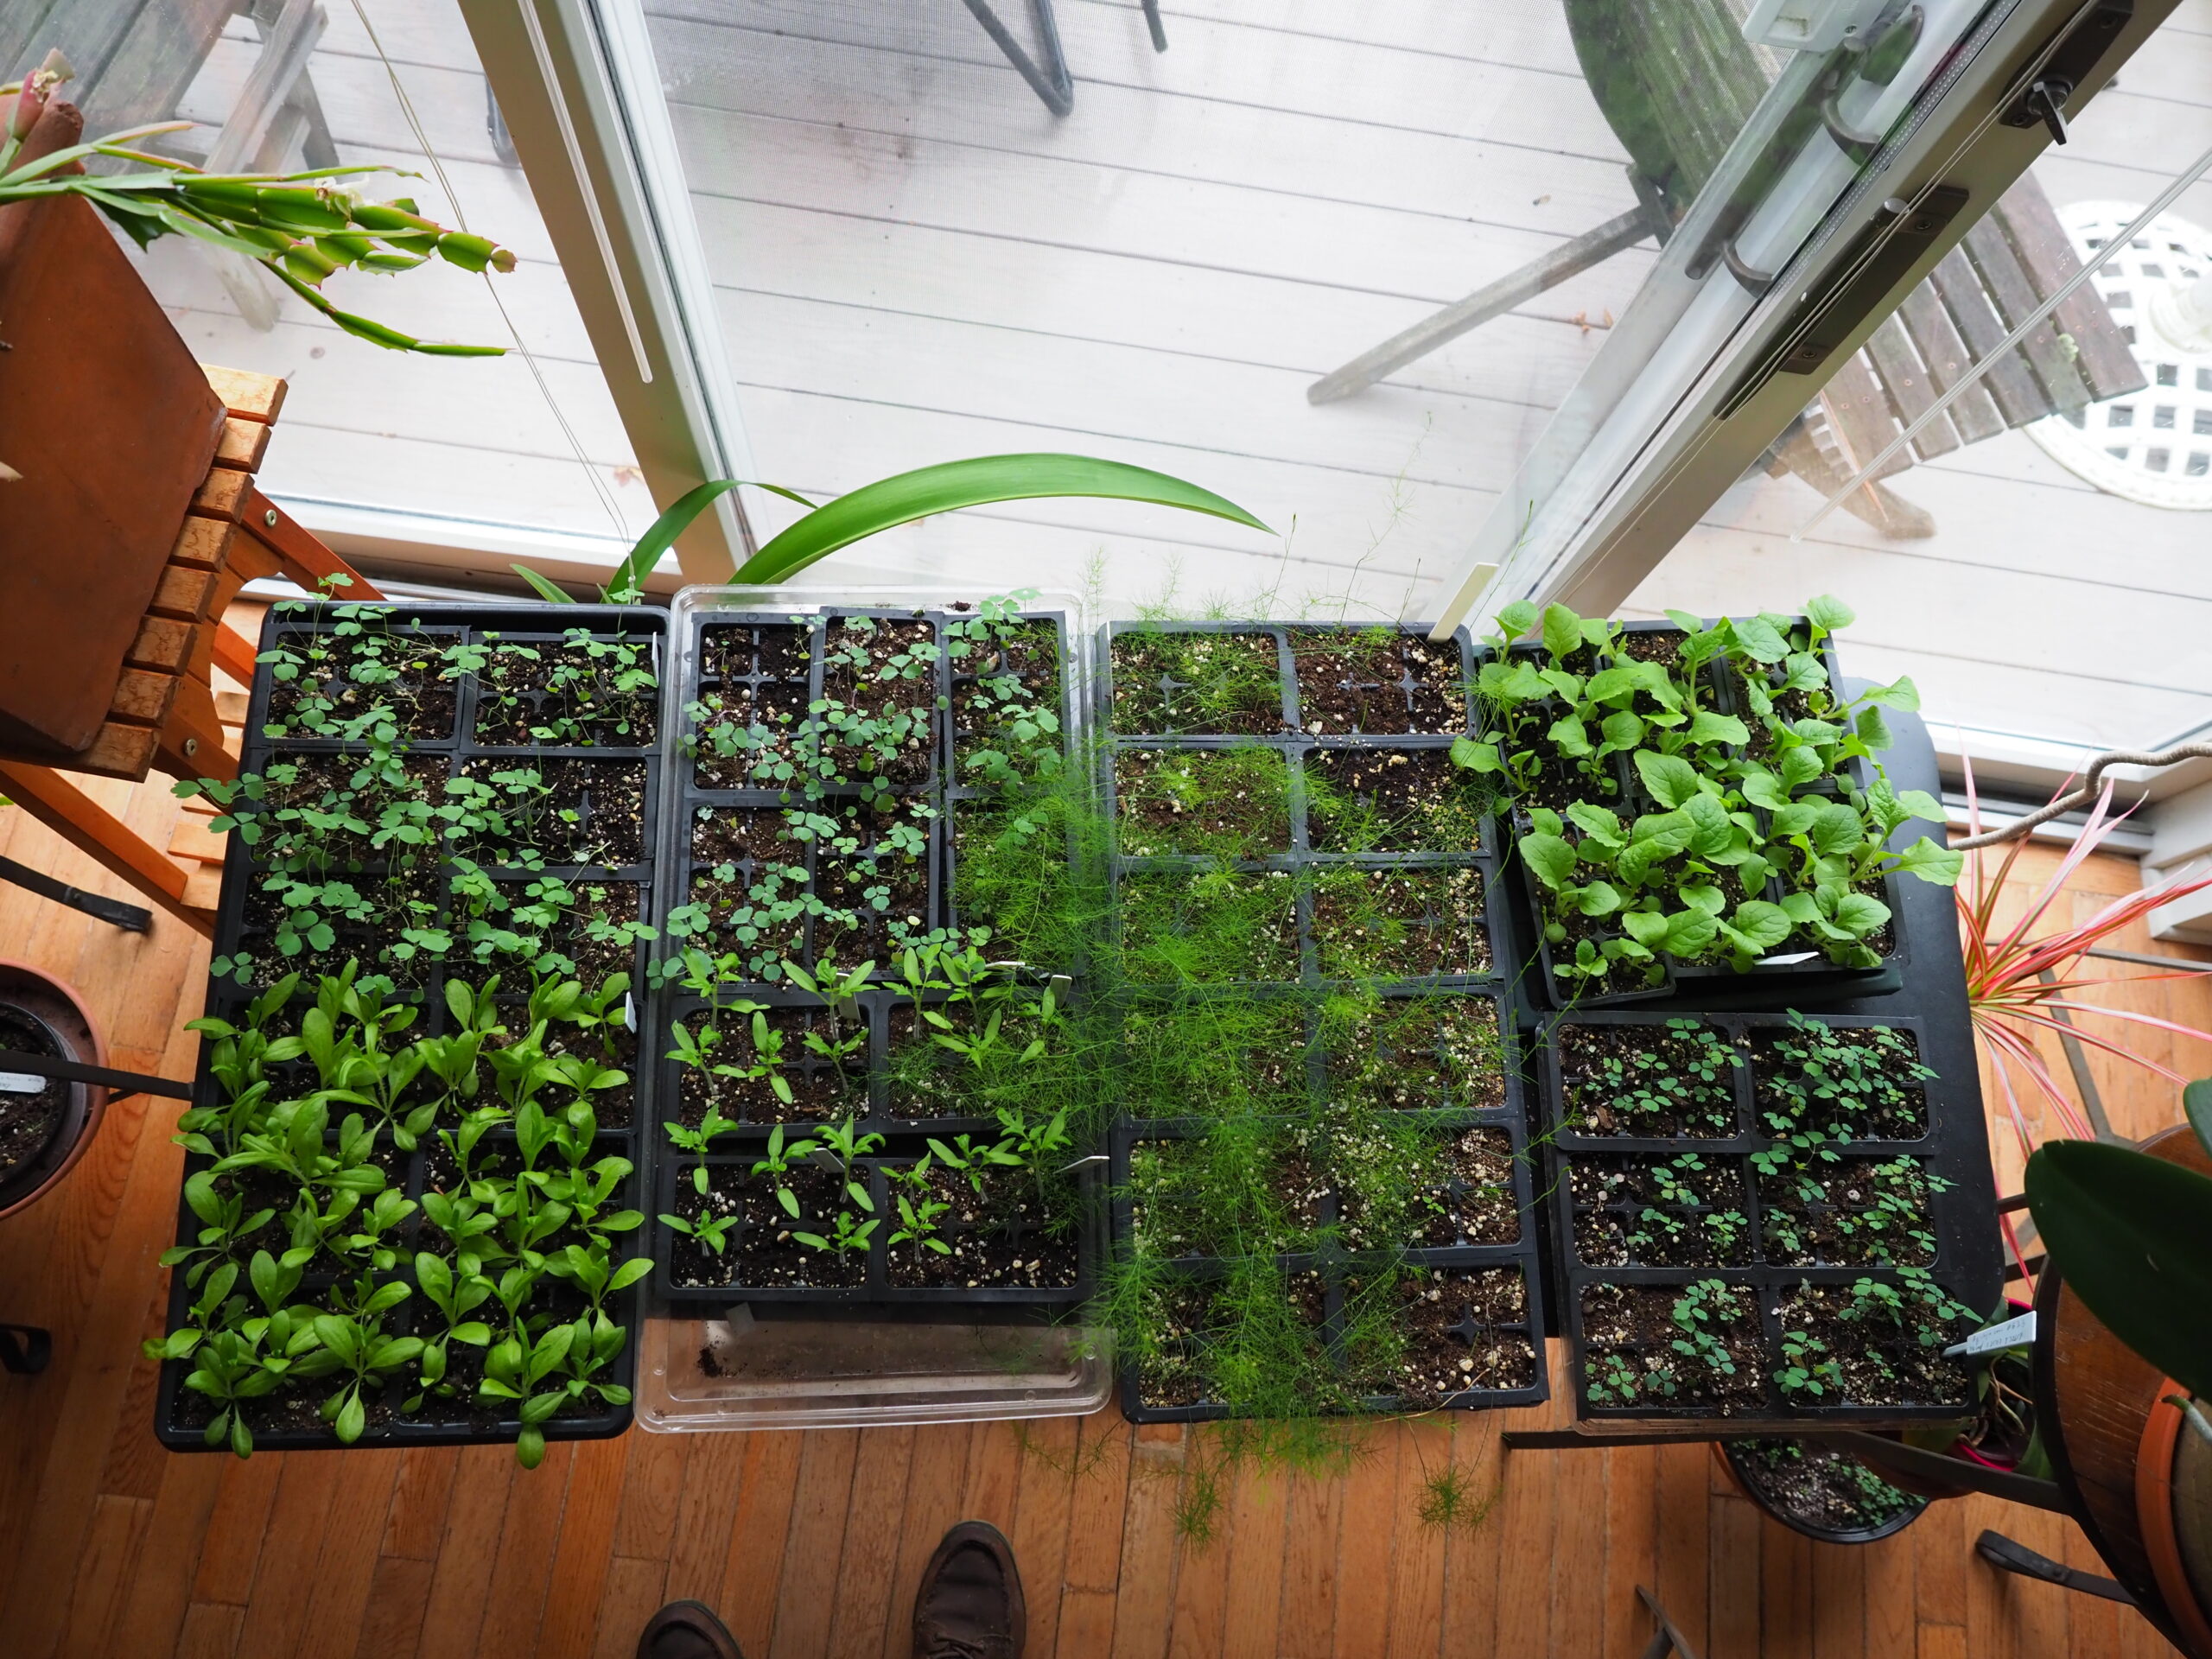
Seedlings of Lychnis, marigolds, asparagus, digitalis and three varieties of columbines in cells that are nested in flats. Sown in late February, this shot is from late April. In all, 144 new plants ready for the garden. All the seed is garden collected so the cost of the entire production was under $25. As potted plants for the garden their value is way over $1,000. ANDREW MESSINGER
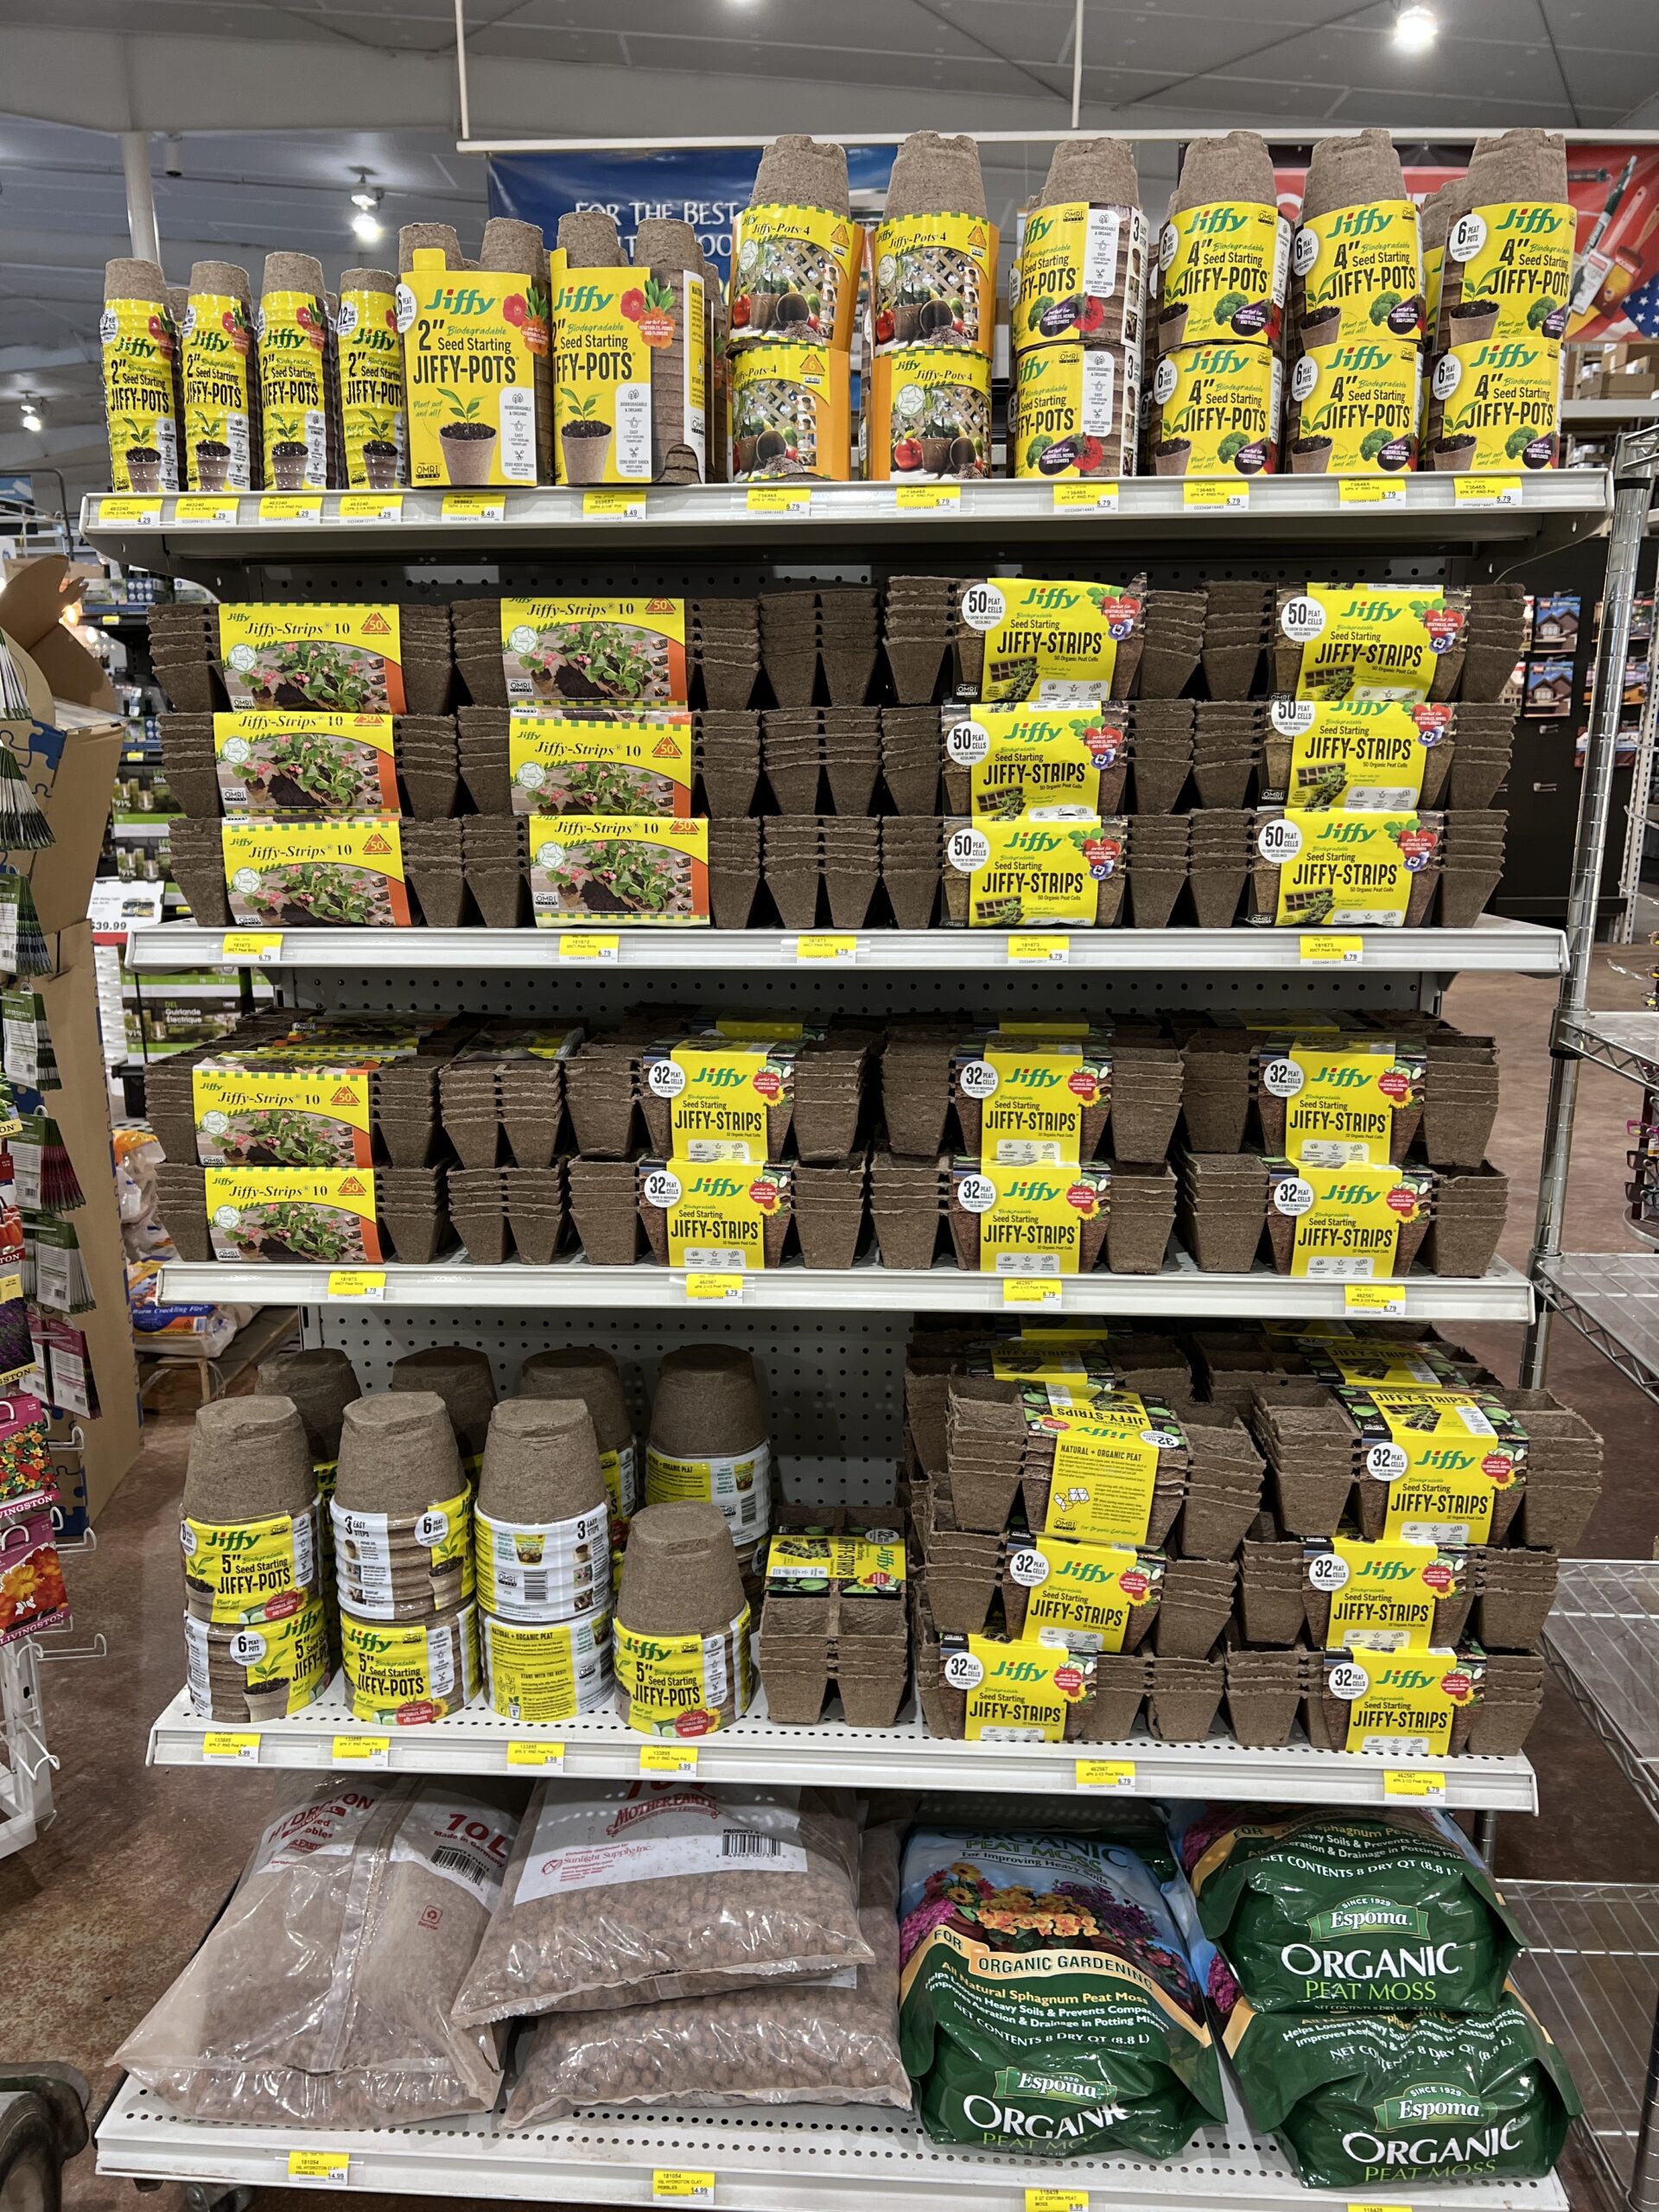
Peat pots, often referred to as the brand Jiffy pots, are compressed peat in the round or square form of a pot. Available in various sizes they’re great for direct seeding of melon and pepper plants that don’t like having their roots disturbed by transplanting. Peat pellets about the size of a silver dollar are also available. Soak the pellets in warm water until they’ve expanded then just insert a seed or two, no pot needed. ANDREW MESSINGER

Once seeds are sown in a flat or pot, how do you water them? The best and maybe the safest ways are with an inexpensive spray bottle with an adjustable nozzle (right) or bottle-top waterers as seen on the left and atop a plastic water bottle in the center. ANDREW MESSINGER
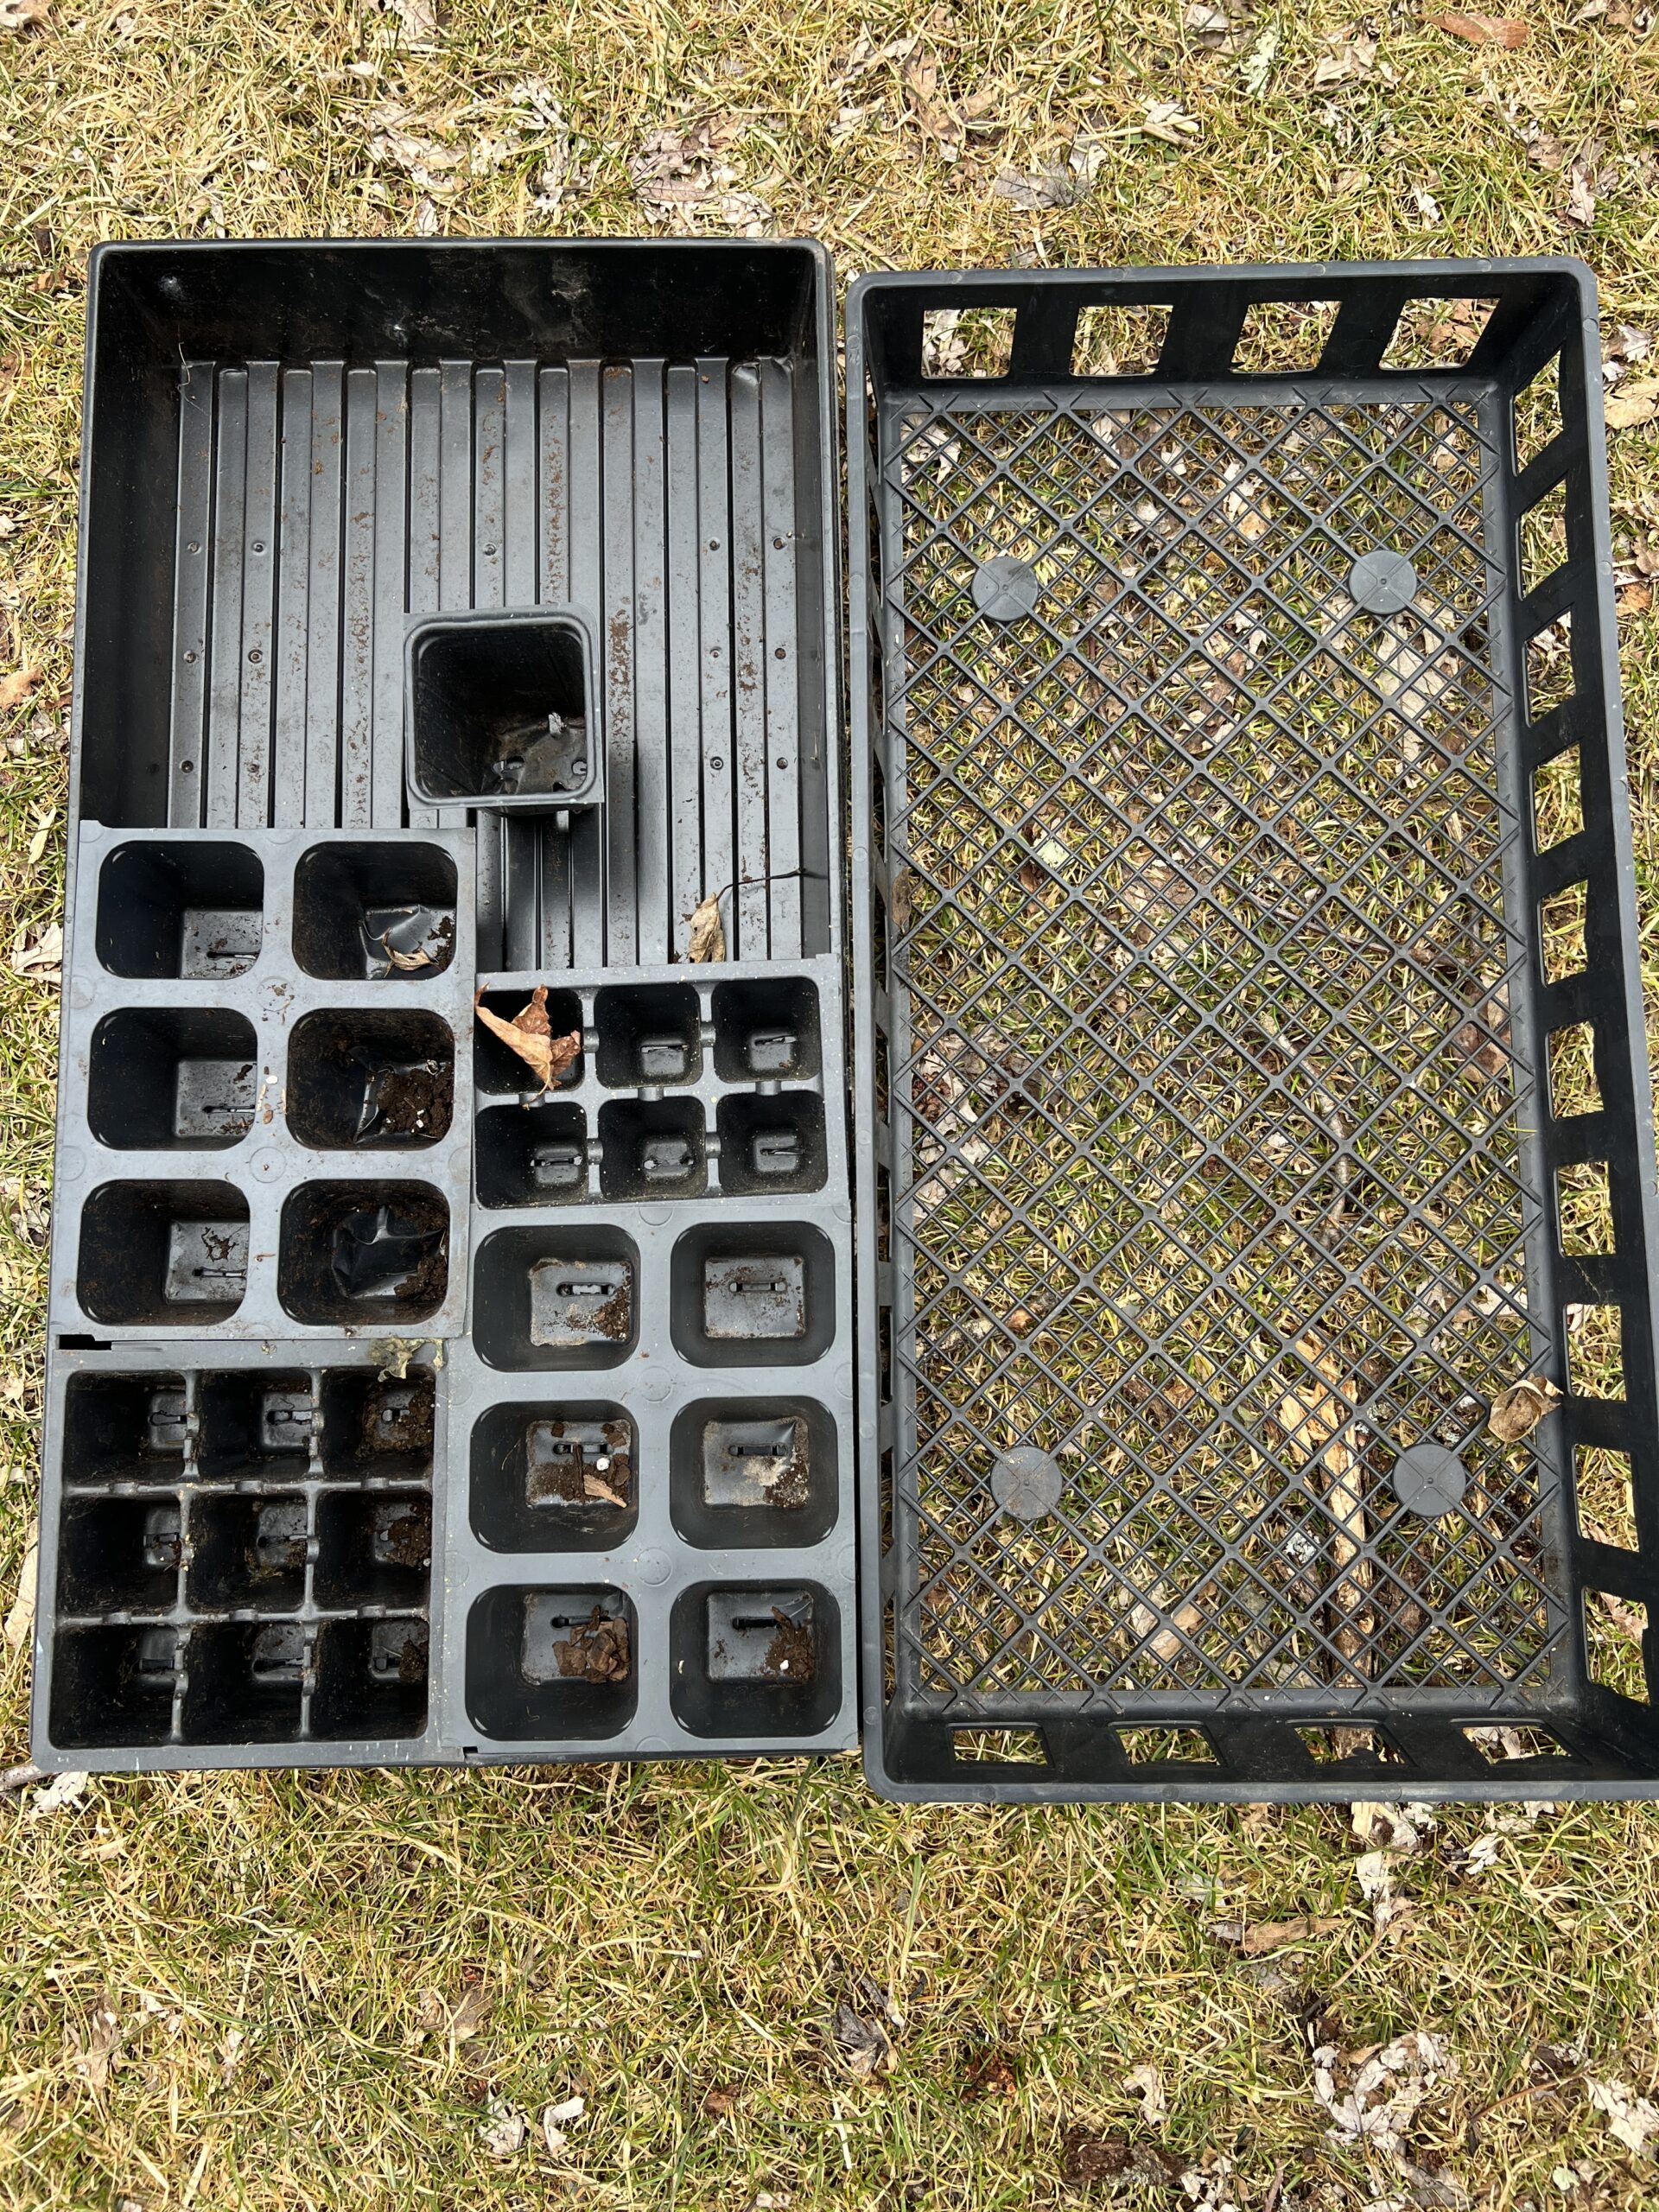
On the left are four different size cell packs as well as a single-cell pot. They are set in a solid (no drain holes) standard plastic flat (11 by 22 inches). Depending on the cell size you can fit from 24 to 96 cells in a flat. Once filled and seeded, the cells should go into a mesh or open flat as seen on the right. The filled or partially filled mesh flat can lowered into a solid flat with 1 inch of water in it. Capillary action will allow the water to be soaked up by the soil in the cells. Let them sit for 15 minutes. If all the water is soaked up, add water to the solid flat then check again in 15 minutes. Remove the cells and mesh flat from the solid flat. ANDREW MESSINGER

Some gardeners already have seeds started, and if you don’t have any started or haven’t bought your seeds yet, time is quickly slipping away. Here’s a quick review of seed starting tips that can be a refresher or a new beginning if you’ve never tried before. For timing purposes, I still use April 24 as our safe frost-free date on the East End.
Long-season veggies should be started early, and this includes peppers, tomatoes, eggplants and melons. In the flower category, petunias, rudbeckias, snapdragons, stocks and verbena, pansies, salvia (longest). The next group should be seeded indoors in mid (M) to late (L) March or early April: Sunflower (L), Zinnia (M) Marigold (M), Nasturtium (L) and the latest being the cosmos.
Know if your seed is a light germinator (don’t cover), a dark germinator (cover seed) or if it doesn’t matter. Snapdragon seed needs to be chilled (in the refrigerator in a sealed container) for two weeks before sowing.
Have what you need for the entire process from seeding through transplanting. Some kinds of seed can be sown directly into cells where the seed is large and easily handled. Others will need to be sown in a germination medium in a flat and then get “bumped,” or transplanted, to larger pots or cells as they grow. All will benefit from bottom heat or a soil temperature of around 70 degrees.
Some vegetables like peppers and melons seem to resent lots of root disturbance, and these can be directly sown in peat pots. Then the entire plant and pot can be planted directly into the garden. When planting a peat pot in the garden, make sure to cut the sides, gently, to allow the roots to move out from the pot and to assist in the breakdown of the pot when it’s in the soil. Never bury the pot so the rim of the peat is below the soil surface. The top of the soil in the peat pot should always be the same as the height of the existing garden soil. The only exception is tomatoes, which can be planted deeper if necessary — such as being too leggy.
You’ll want to have two soils ready. The first is your germination soil, or germination medium. Use whatever you’ve used that you like — but never use soil from the garden. Be wary of last year’s germination mix unless it’s been stored in an airtight bag or container.
For the past couple of years I’ve used Espoma seed starting mix and or Coast of Maine’s mix. For transplanting into cells or pots use a good potting mix. Here again, both Espoma and Coast of Maine make good products, but you can also make your own. Homemade potting mixes are rarely cost effective unless you’re doing a lot of planting. When you’re done with either the germination mix or the potting mix, seal the bag well for storage so mold doesn’t get in and start to grow. Never put wet soils back in the bags.
Both germination and potting mixes should be lightly moistened before they are used. You can do this in a bucket, a plastic bag or a tub. The key word is moisten. Warm water works best. The result should be a soil that’s damp and humid but never dripping wet. If you think the mix is too wet simply add more soil. Remember, you can always add more water but it’s nearly impossible to “de-water.”
Warm soil for germination is critical. The best way to get bottom heat for germination is with a germination mat, or heat mat. These are available at garden centers and online. The best have built-in thermostats, and the mats are available in several sizes. Most are sized for use with standard plastic flats. Never start your seeds in direct sunlight as this is the best way to cook them. Once transplanted, direct sun is fine as long as you keep up with the watering. Let the sun cook the soil though, and your transplants may just shrivel and die.
If you have a warm spot in the house where the air temperature stays around 72 degrees or slightly warmer you can use a plastic dome over your seed flat instead of a heat mat. Always use a soil thermometer to monitor your soil temperatures no matter what method you use. I prefer the digital thermometers with the sensor at the end of a wire. The sensor or probe can be left in the soil with the display in a spot away from the flat or pots. Soil temperature should be measured about a third of an inch down.
Never fertilize soil and never use soils with fertilizer mixed in for germination. Seedlings don’t need fertilizer until after they are transplanted into cells or pots. An easy way to both water your seedlings and feed them is by putting the cells or pots in a standard flat that has no drainage holes and allow them to soak up water from the bottom. You can find all the supplies you need at local garden centers, but you can also find them online at a place like Gardener’s Supply (gardeners.com). A good organic liquid fertilizer to look for would have an analysis of around 1-1-1 or 1-2-1.
Here’s my method. It’s not for everyone and every circumstance though. I transplant my seedlings from the seed flat into cells. The cell size varies based on the size of the plant being raised and the time the plant will be in the cell (or peat pot). After transplanting into the cells or pots just put them into the nondraining flat and add about an inch of warm water to the flat. Let the water get absorbed through the drainage holes in the cells and by absorption through the peat of the peat pots. Capillary action will take care of the rest. If all the water gets soaked up, add more but don’t let the pots or cells sit in water for more than 15 minutes.
If you water these newly transplanted seedlings from the top, you’ll be forever trying to prop them up as they get overweighted by the water drops that hit them. This never happens when you allow the seedlings to absorb the water from the bottom, but this also means making sure that when putting the roots down into the small planting hole that you use a toothpick or another tool to make sure the roots go down into the hole, then very gently firm the soil.
The first watering after the initial soaking can include fertilizer. Add the fertilizer to water in a watering can or jar at half the label rate. Add the mix to the flat and let it sit for at least 15 minutes. If it all gets soaked up, add more. Once the soil has soaked up as much as it can, take the cells and pots out of the flat and put them in a flat that has holes on the bottom or a mesh-type flat.
The next time you feed should be 10 days later as part of your watering scheme. In the interim, water as noted above. The following watering, as needed, can contain fertilizer at the label rate. Always use low-analysis organic fertilizer and you’ll never burn your seedlings.
Once seedlings are transplanted into the garden you can add your favorite granular or liquid fertilizers. You may be tempted to want to give your seedlings a “jump start” indoors, but this usually doesn’t have a good outcome. Be conservative until you get the plants installed outside.
Damping off is a mold or fungus that all seed starters need to be aware of. Using clean tools, cleaned trays, pots and cells will all aid in making sure you don’t get it. Splashing water and not letting your seedlings dry off after watering and keeping the soil too damp will also provide perfect growing conditions for the disease. Splashing water will spread the disease as will unclean tools. If you do end up with damping off you can try a ground cinnamon treatment added to the soil.
One of the biggest challenges for seed starters is keeping the germination medium moist. You can’t use a watering can or a glass because you simply wash any surface-sown seed to the sides while other seeds gather in puddles. Your solution is mist. Buy an inexpensive misting bottle with an adjustable nozzle spray pattern or get the bottle top watering attachments found here: https://bit.ly/3S9nF0L. These work great with plastic soda and water bottles.
If you need more information on what to plant when and how to do it, take a look at Suffolk County Cooperative Extension’s fact sheets. You can find the vegetable fact sheets here, https://bit.ly/3XBSVXn, as well as links to others. Keep growing
Last week I mentioned row covers and frost protection. Just things to have around so that when you’re ready to put your seedlings outside and harden them off you have emergency protection against light freezes and frosts. This material is a spun fiber that’s white and comes in rolls or in precut packaging. They’re also called blanket covers, plant covers and floating row covers. One package I recently saw in a garden center was 8 feet wide and 24 feet long for $15. The material is easily cut to the size you need. The row covers can be gently set atop plants, or you can build a wire or plastic pipe frame. Some kits come complete with wire hoops. The most well-known name is Reemay, but there are many that are as useful. There are even kits available in some places and on Amazon.
When doing seeding indoors or out for your garden always try to do two sowings about two weeks apart. This protects against failures, and if there’s a cold snap resulting in leggy seedlings indoors, the second sowing can be used instead as they’ll be two weeks later.
More Posts from Andrew Messinger


