


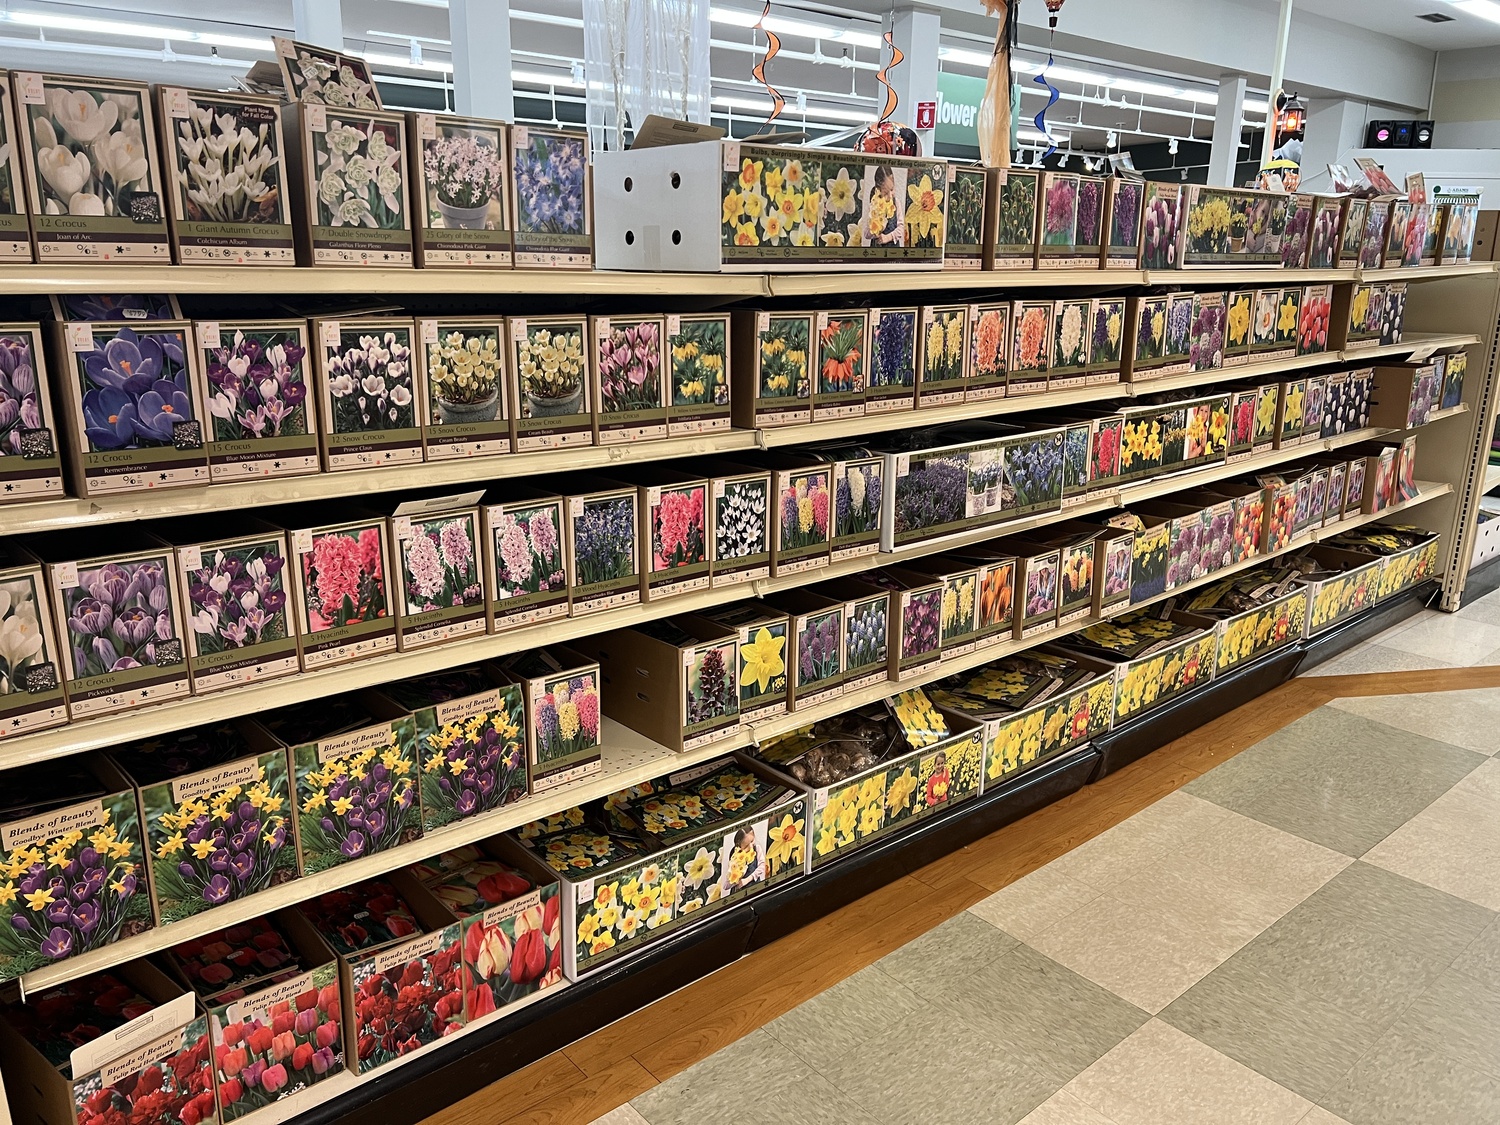
Never buy forcing bulbs in bulk bags or in discount stores with rows and rows of boxes of bulbs. The boxes of bulbs in our better East End garden centers may look the same but the bulbs tend to be larger, fresher, of better quality and will be more reliable. ANDREW MESSINGER
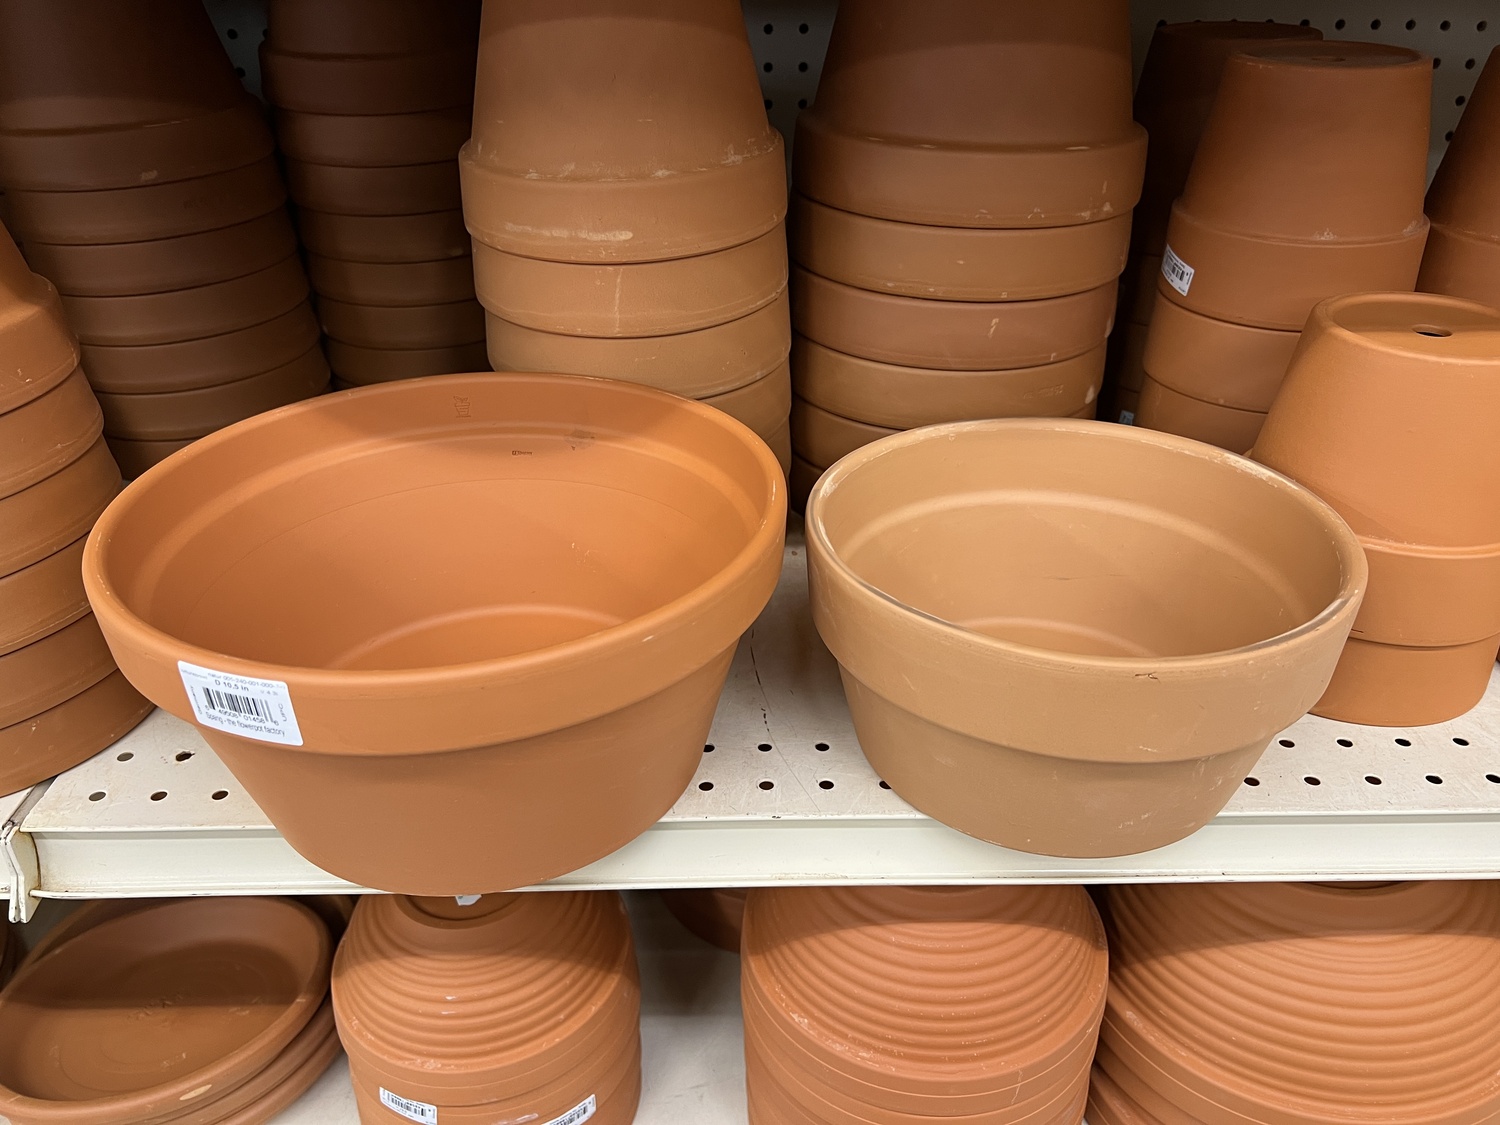
Clay pots are the best type for bulb forcing as plastic pots easily lead to rotting. On the left a 10-inch pot and on the right is an 8-inch pot. As the pots get smaller they also get shorter. A 10-to12-inch pot should hold eight to 12 tulips or daffodils depending on the size of the bulbs. The larger bulbs yield the best flowers. Smaller pots are better for the smaller bulbs like crocus. Mixing and matching different types of bulbs in one pot is not recommended. ANDREW MESSINGER

Imagine it’s mid-January. The holidays are over, it’s cold and dreary outside, and you’re beginning to long for spring. The arriving seed and nursery catalogs just won’t do it. Well, in January, February and March you can have your spring and some of its wonderful scents and colors indoors if you do a little work and planning right now.
As a result of this little project you’ll have the ability to have tulips, daffodils and crocus blooming indoors, giving you weeks of color and wonderful scents that won’t be happening outdoors for weeks or months. All you need to do is get some top-quality spring bulbs potted up now, cool them down and keep them cool for 12 or more weeks then gently bring them into bloom. I write about this indoor gardening project every few years, and here’s an update with the hope that more of you will give this a try.
If you’ve ever wanted to force spring-flowering bulbs and have them bloom on demand this winter, then now is the time to take action. Bulbs for forcing need to be potted up now, and you need to shop for the bulbs in one or more of our better garden centers. Cheap orange box or hardware store bulbs won’t do for this project, but garden centers that sell loose bulbs are a great place to start. If you wait longer then you’ll be disappointed at the selection available and you’ll run out of “cooling” time. However, by getting the work done now you have the choice of colors, sizes and varieties.
Bulb forcing is much simpler than you’d think. This is a project for pandemic-inspired gardeners as well as those with experience.
Close to perfect timing is important since most bulbs that are forced (and not all can be) need from 12 to 16 weeks of cool temperatures to get them blooming indoors from January through April. So bulbs potted up in early-October can be timed to bloom from mid-January right through late March.
You do need to buy your bulbs right now though, and you’ll find a link below that will be helpful in choosing which varieties are best suited for forcing. You can use 8-to-12-inch-wide bulb pots that are wider than they are deeper. While heavier and more expensive, clay pots are preferred over the plastic ones.
There are plenty of intimidating articles and even books and precise growing guides on how to pot the bulbs, cool them to one temperature and then another and yet another, then cover them with sand and finally a regime of raising temperature exposures that will result in blooms when you want them. Well, if you want to have your tulips blooming precisely on Valentine’s Day you can follow those prescriptions, but if you want blooms from mid-January until late March it’s real easy.
Pot up your bulbs (or practice) as soon as you have them. Newbies should probably use clay pots unless you can restrain yourself when watering since plastic pots can retain too much moisture and encourage rot. The preferable pots are a type called bulb pans that are available from 8 to 12 inches in diameter and 4 to 6 inches deep. As an alternative, pots that are very shallow (depth about half their diameter) can be used, though standard pots can work. The increased depth can allow too much moisture in the root zone so shallow is better. If you are using old pots, wash them well to eliminate any possibility of mold or algae build-up.
No special soil is needed, but soil from the outdoor garden should be avoided. I’ve had no problems with Pro-Mix right out of the bag so long as you don’t get it dripping wet and keep it that way all winter. Moisten the Pro-Mix with warm water that has one drop of Joy added to each gallon of water. Any peat-lite potting mix will do but try to find one that doesn’t have any fertilizer or water-retaining crystals in it.
The bulbs are planted so that the “nose,” or tip, of the bulb is just a quarter to a half inch below the top of the soil. It takes a little practice to get the right amount of soil under the bulbs, around them and on top of them. After a pot or two, you’ll catch on real quick. It doesn’t cost anything to practice, and since the whole process starts out dry you can just empty the pot, refill it and replace the bulbs until you have it right.
Take a dry run using a pot and some dry soil and the appropriate number of bulbs before you moisten the soil. Add or subtract bulbs and rearrange them as needed. This practice will allow you to space the bulbs, get them to the right level and fill in the voids with the soil. The pot should be somewhat crowded with bulbs to result in a “full” presentation when they bloom. Then once you’ve got the hang of setting up the pots, use lukewarm water to moisten the soil and “set” the bulbs in their beds. Bulbs can also be layered in larger, deeper pots and this results in graduated heights of blooms when flowering takes place.
With tulips you’ll notice that the bulb has a flat side and rounded side. The flat side should face outward, but with hyacinths and others it doesn’t matter. A 10-inch pot is probably the most popular and as a rule of thumb for tulips and daffodils try to get in one bulb for each inch of pot diameter and space them evenly around the pot. So, an 8-inch diameter pot can have eight or so bulbs, but if the pot is deeper you can layer the bulbs and get nearly twice that number in. Hyacinths are spaced at about half this rate so we try to squeeze five into a 10-inch pot while you can get a dozen Scilla, Muscari or Iris reticulata into the same size pot.
For now, get your pots together, and you can start collecting your bulbs, keeping them in a cool dark place until you’re ready for potting. At the garden center or online look for bulbs that are noted as “good for forcing.” Think about where and how you’ll cool your pots. They can go in an unheated garage or shed, an uncovered cold frame or even a backyard pit and yes, a refrigerator shelf, but more on this later. It’s probably a good idea to cage your pots or dip your bulbs in rodent repellent to keep the mice and voles at bay if you’ll be cooling the pots outside.
Using modern refrigerators to cool the bulbs presents a challenge because the frost-free functions suck all the moisture out of the bulbs (wine coolers are perfect if they’re cool enough). You can work around refrigerator issues by keeping your pots on the dry side, putting them in plastic bags and sealing them inside the fridge. And you don’t need to do all your bulbs at once. If you have the fridge space you can do a few pots (or more) every week for a month to stagger when they’ll bloom or you can pot them all at once and just stagger when you pull them out.
The whole object of the cooling period is to stimulate the bulbs to develop roots. These roots will then supply moisture to the developing foliage and flowers once you begin the actual forcing next year. It’s the same process that the bulbs go through when planted outside in the garden. They develop their roots in the cool fall soil then go dormant until the soil warms and shoot development and flowering takes place.
In two weeks I’ll cover the steps to take and how to do the chilling process, the forcing and some varieties that I’ve had good success with. But if you want to jump right in take a look here: bit.ly/33p6SO3. This is a great fact sheet with instructions and suggested varieties to use for forcing. Next week, the balance of the information you need, but for now go get those bulbs. Keep growing.
More Posts from Andrew Messinger


