


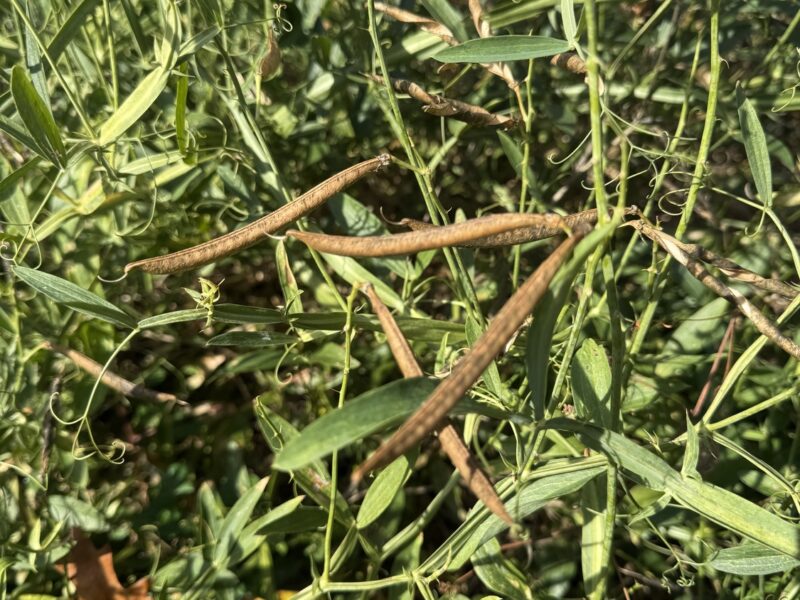

These 3-inch-long brown seed pods contain the seeds of our native wild pea. The pods of our native beach pea look very similar. The pods split open and send the seed flying, but when removed at this stage, the seed can easily be collected by just pressing on the pod, which will open to reveal tiny, dried pea seeds. Stored as noted; they can be put into peat pellets to germinate in the spring, or be sown directly in the garden. ANDREW MESSINGER
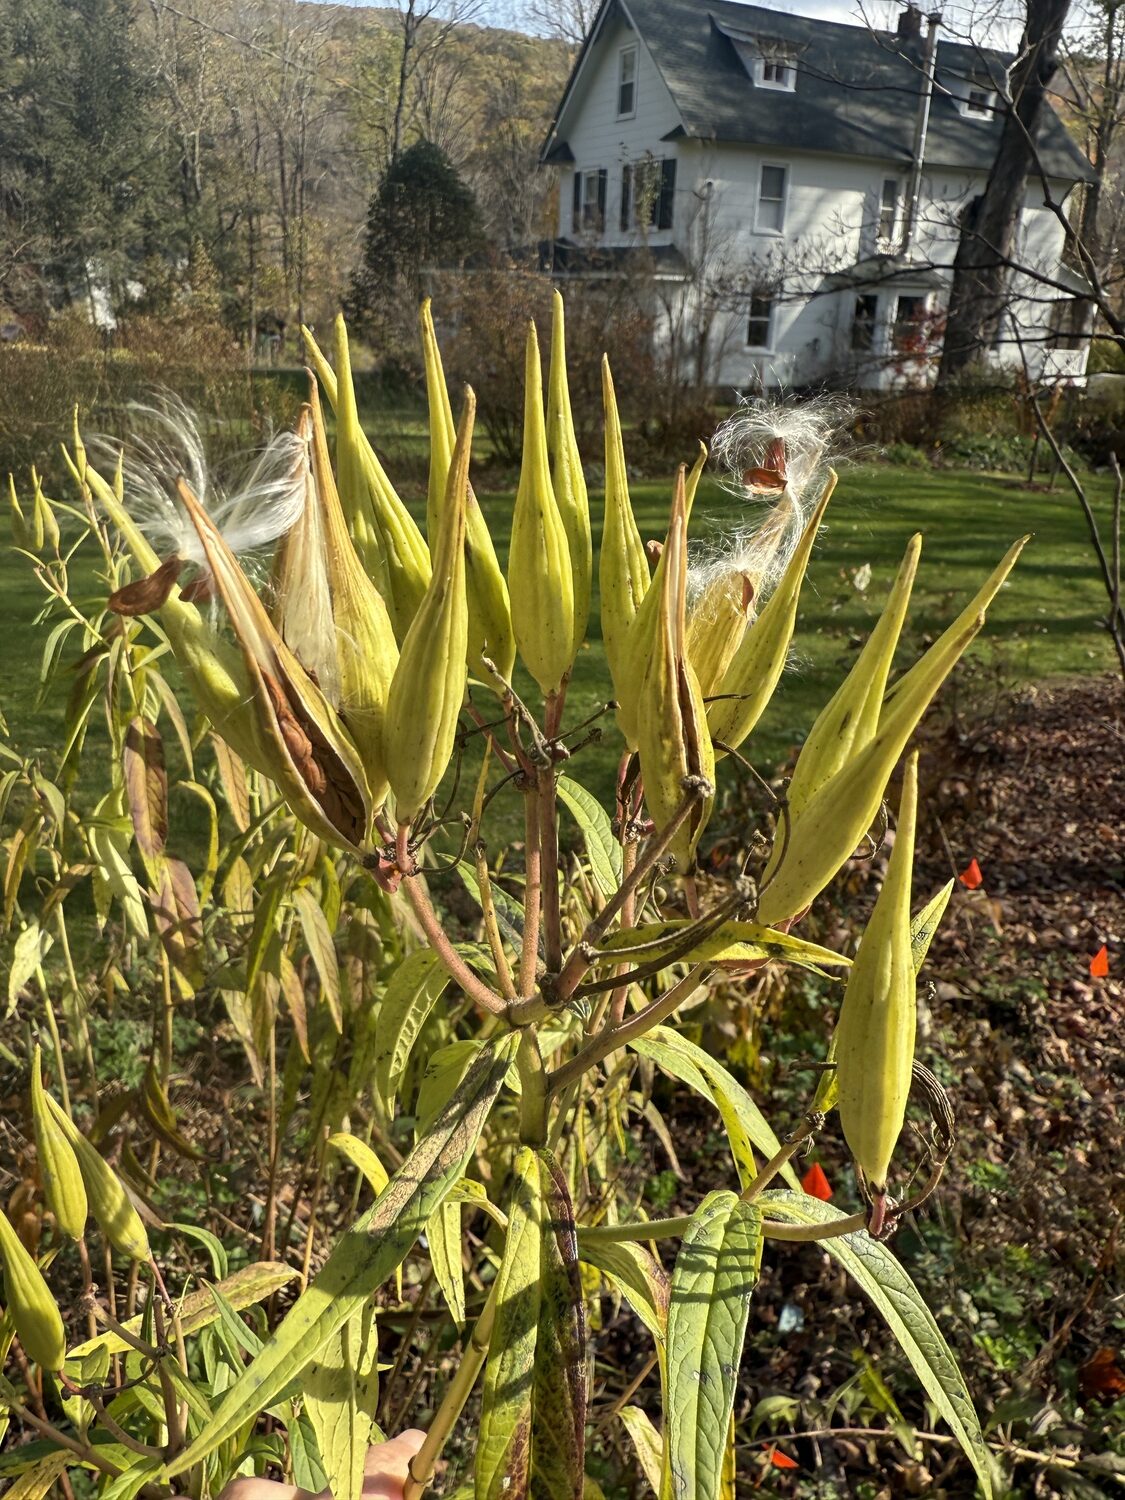
These are the seed heads of Asclepias incarnata “Cinderella,” one of the latest perennials that sets seeds in the fall. Each seed is attached to a fluffy parachute that allows the seed to be carried miles from the parent plant. If you open the pod just as it ripens, the seed can be extracted and the parachute removed. ANDREW MESSINGER
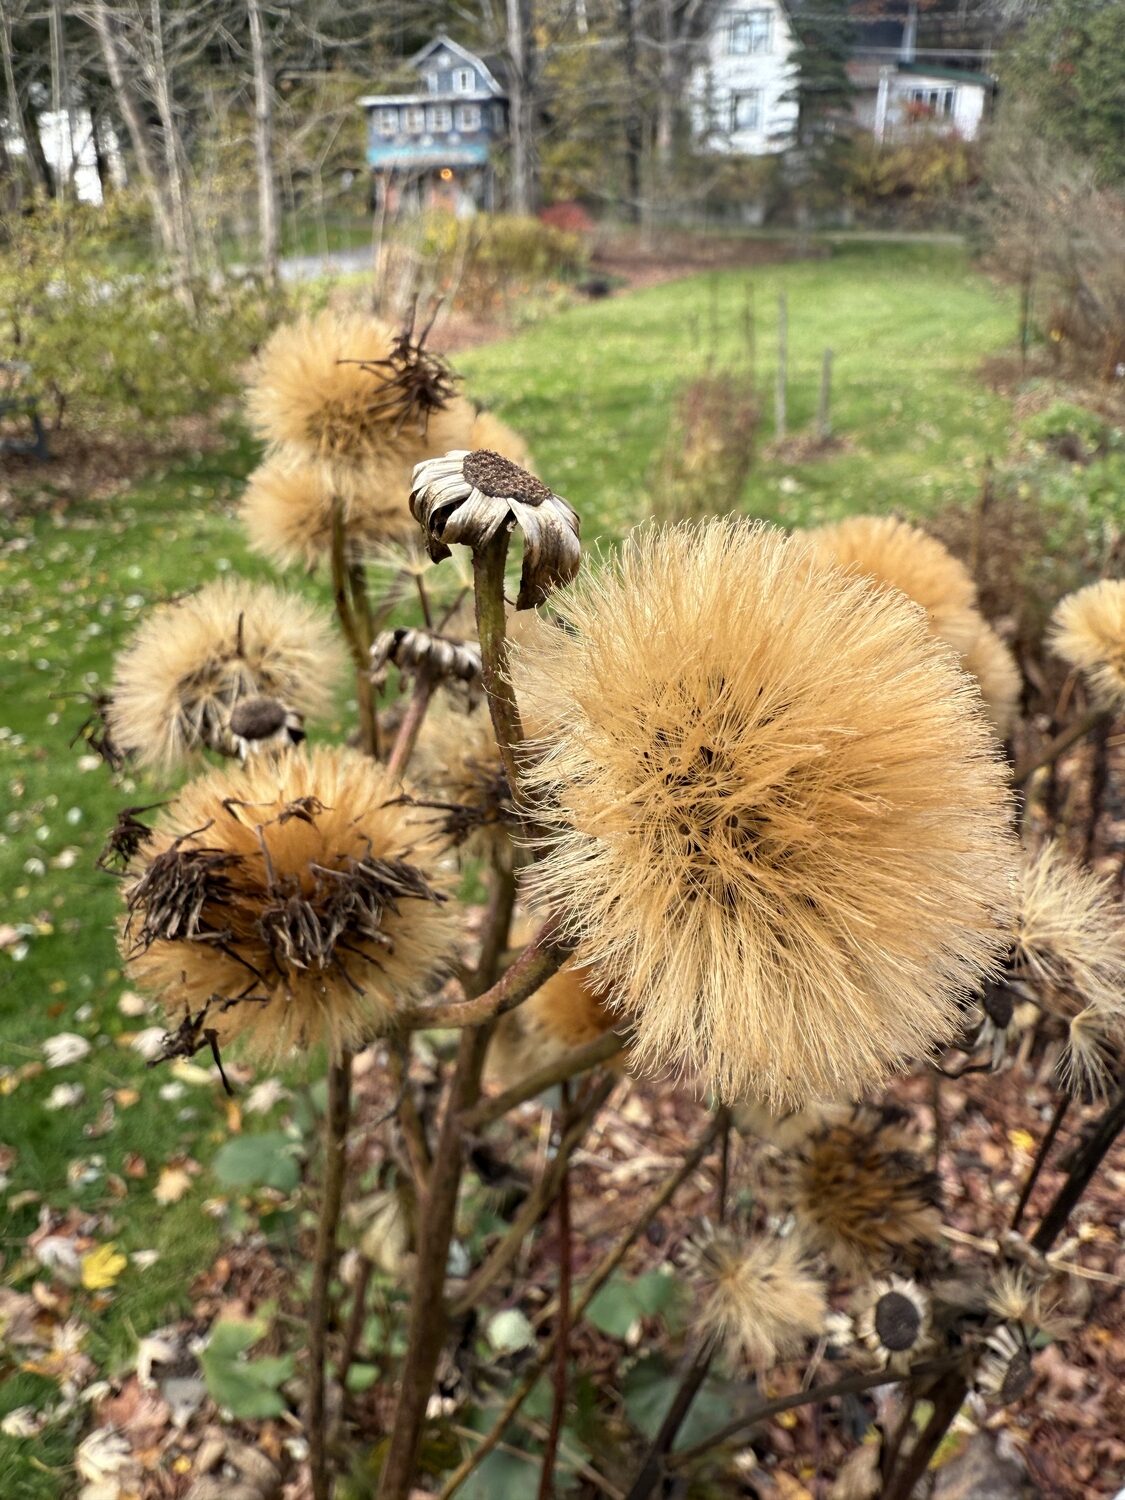
These are the flowers of a Ligularia that’s gone to seed. The seed needs to be carefully harvested so only the seed is saved and not chaff. The seed is actually not visible until you grab the fuzzy parts on top, pull them out and you’ll seed the black seed attached. ANDREW MESSINGER
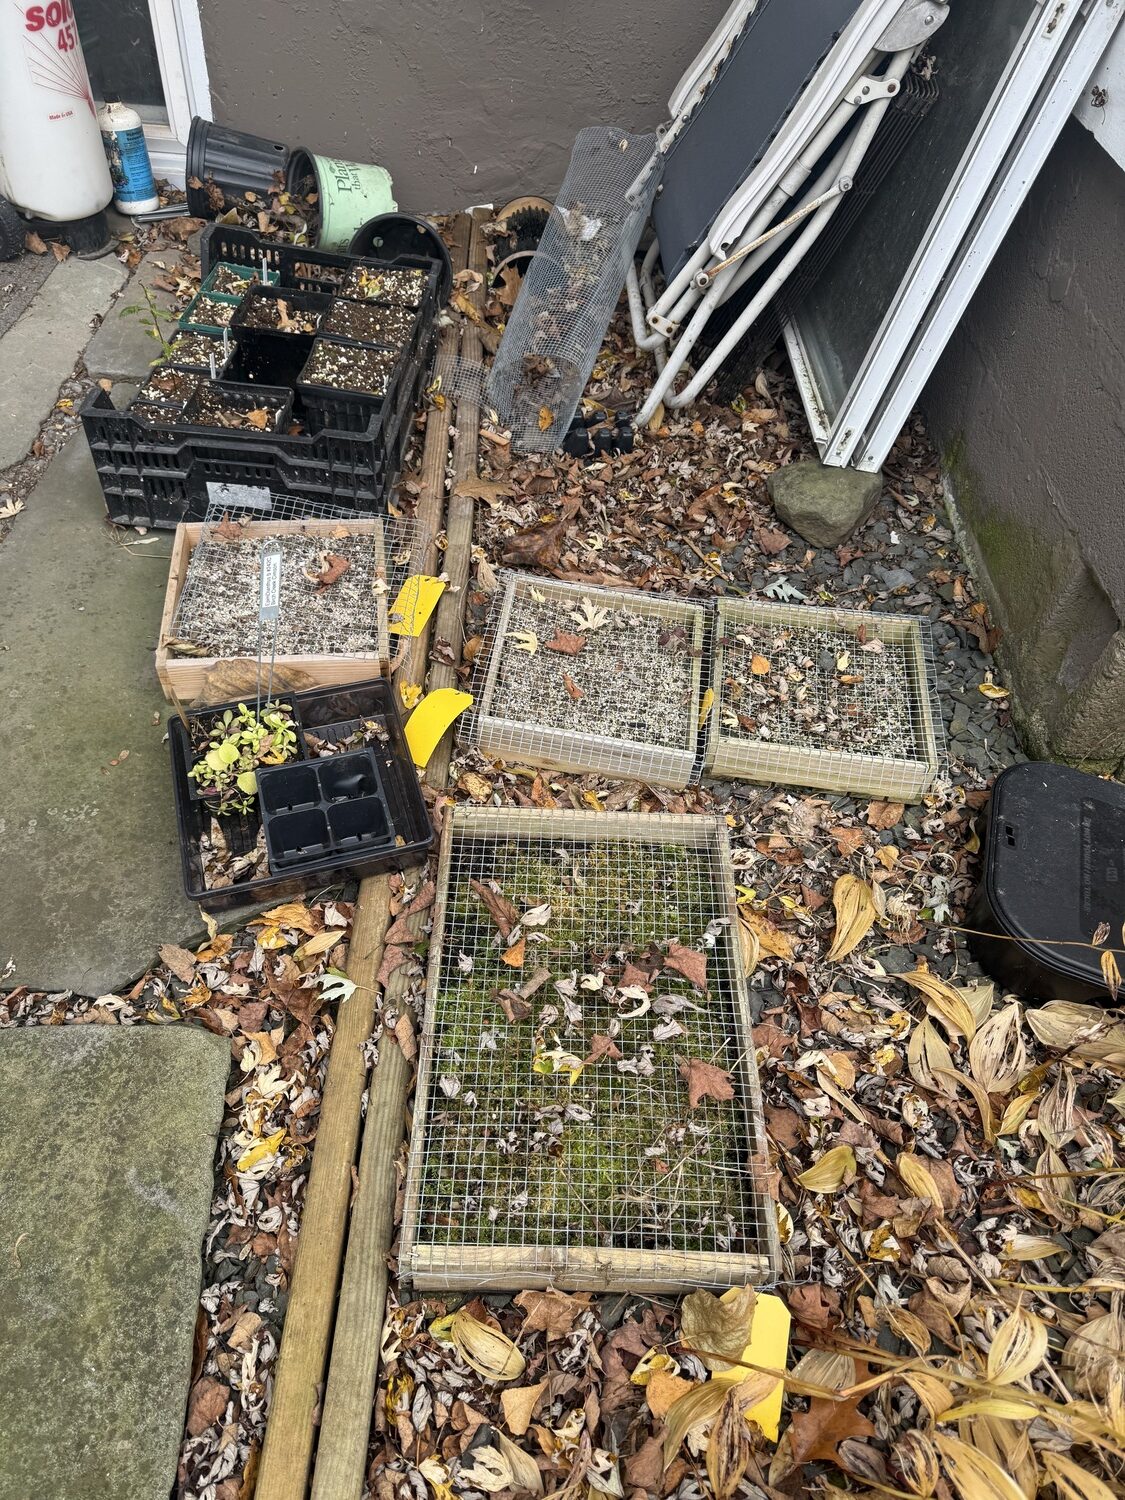
Wooden seed flats, right, covered with screen mesh and filled with soil and planted seeds, will remain outside from October until the seed germinates in the spring through summer of 2026. This is called vernalization or cold treatment. Some seeds require this in order to germinate, but you need to know which ones. ANDREW MESSINGER
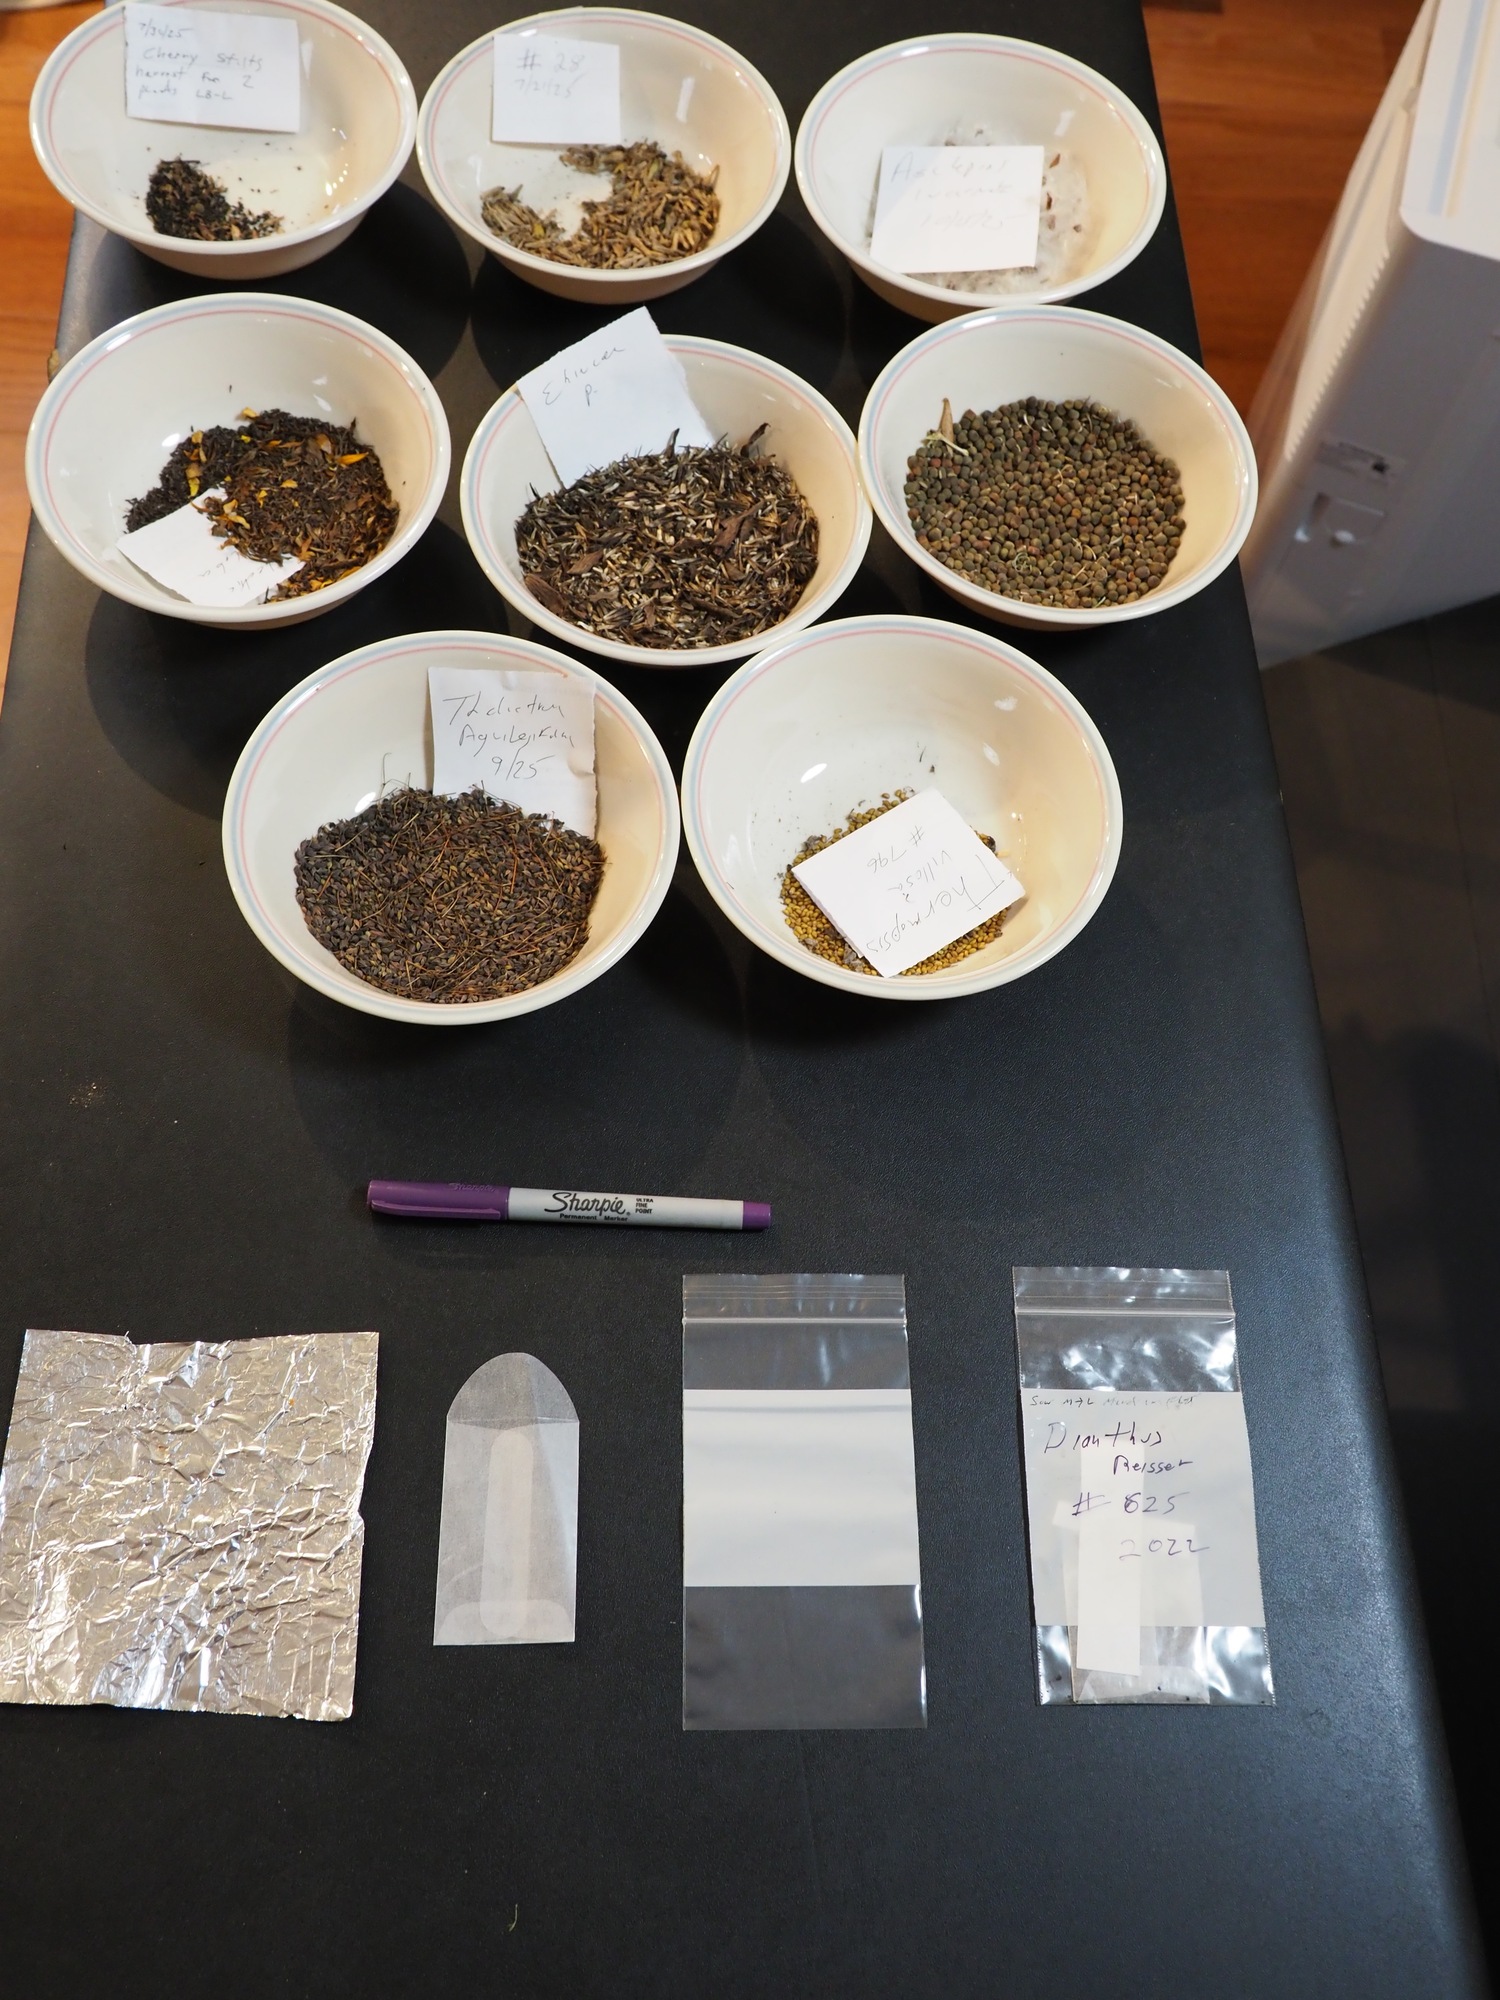
Tools of the trade, starting with eight bowls of dry seed from different plants with notes in each bowl. The seeds then go onto a foil square that’s made into an envelope. Some seed goes right into a glassine envelope (right), then into a plastic bag with a zip lock. Lastly, the seed in the foil or glassine envelope goes into the plastic bag. The plastic bag and envelope have the seed name, or ID number, as well as the date harvested. There is also a small paper note in the plastic bag with the same information. Use a Sharpie marker for all of the notes, as it’s waterproof and long lasting. Some years I’ve had more than 50 bags in a plastic box in the regenerator. ANDREW MESSINGER

As we begin to get our outdoor gardens ready for the winter season, many of us are doing our last sweep to collect plant seeds that we hope will turn into next year’s annuals, the following year’s biennials and, yes, even 2027’s perennials.
There’s more to it than simply collecting the seed. You need a plan for storing the seed so it will survive until you set out to germinate them — and you need the various storage elements. A paper or plastic bag just won’t do.
The first step, though, is in knowing what seed is worth saving. Forget any plants that are hybrids. If they do produce seed, which is unlikely, they will not produce plants identical to the originals. Seeds from true species can be stored as long as you know what storage regime they need.
Keep in mind that storage doesn’t simply mean in a drawer or envelope. Many seeds need special care and temperature regimes in order for them to break dormancy. Some are better sown outdoors, where Mother Nature can provide the perfect situation for germination. If you don’t know what seeds these are and you simply bring them indoors, or put them in the regenerator, you may end up very frustrated. And no seeds — none of them — should go into the freezer. This is a long-used method for some seeds that has, more often than not, been shown to result in total and complete disaster.
So, before you decide how to store your seeds, the first thing you need to do is find out what storage regime each type needs to provide results. For serious seed collectors, this might mean a look into the work of Norman Deno. You’ll find his complete instructions in his books and papers. This link will take you to a site that allows you to open all three of his publications on the subject: tinyurl.com/3eb8turf. The information here is much more comprehensive than what you’ll find in seed catalogs; seed sowers will find it very interesting and helpful.
But back to the topic at hand. How do you store your harvested seed? I’ll start with the assumption that you harvested your seed when it was ripe. The seed must also be dry, but not desiccated to the point where all the moisture under the seed coat has been totally dried out. Once harvested, I allow my seeds to sit in a cereal bowl for about a week before I package it.
What will you need? First, a sieve that the seed will pass through but will capture all the chaff. Chaff is all the stuff that often drops from or with the seeds with harvesting, but should be removed for storage. Once the seed is screened, you’ll need your packaging and labeling materials. This includes 3-inch squares of aluminum foil, or thereabouts; glassine envelopes that you can get online, or possibly from a drug or hobby store; and plastic zip-lock bags, about 3 inches wide and 6 inches long. All of these items are available online, but often only in bulk. Lastly, you’ll need a narrow-point permanent black marker.
Cleaned seed is set into the aluminum foil square, then the square folded in such a way as to create a folded and sealed packet containing the seed. On the foil packet, write the name of the seed, as well as the month and year. Dating is important as your seed collection grows; you can trash older saved seed and replace it with the more recently harvested.
The foil packet can now go into the glassine envelope with the top flap folded over, but you can skip this step so long as your seed is in foil packets. For seed that’s not critical or rare, you can skip either the foil or the glassine envelope, but I like to use both as insurance. The point is to prevent the seed from getting desiccated while keeping it fresh.
On the white window on the plastic bag, write the same information that you have on the foil or glassine envelope. It’s important to label each container at each step to avoid finding a packet of seed that has no identification and date on it. Keep in mind that one size packet won’t work for all your seeds. Be flexible, but try to follow the regime when it comes to layered protection. Never store damp or moist seed as it will quickly mold.
With the seed in the foil, the foil in the glassine envelope, and all of this in the plastic bag, where do you actually store the seed? Some seed will survive just as you’ve packaged it, but as one more step of insurance, it should go in the refrigerator.
One last step, though. Most modern refrigerators are frost free. This means your fridge will do everything possible to suck out every drop of moisture from your seed — if it’s not properly packaged, like you’ve done.
All your packaged seed packets should go inside a rigid plastic container. This can be a rigid black plastic container with a clear top that frozen and take-out food comes in, or a small plastic storage box with a lid. This last container keeps other items in the fridge from spilling on your seed packets and is your final layer of insurance.
Store your seed on the top shelf of the fridge where it will usually remain around 35 to 38 degrees. In this situation, your seed will remain viable, in most cases, for up to a year.
Seed that needs only minor stratification (chilling) will do fine when stored like this, but make sure you know if your seed type needs stratification that involves alternate periods of chilling, freezing and thawing. These will be the most challenging seeds, but often the most rewarding when they germinate.
This type of seeding should be done outdoors in a wooden seeding flat covered with screen mesh to keep rodents from stealing the seed. The box can be set in an unheated shed, left on a porch where the sun won’t hit it, or under an overhang. Such a seed box will germinate slowly and naturally over time, so be patient. I use this method for growing my varieties of Trollius, which often germinate in mid-summer — some nine months after being seeded.
Yes, this can be a challenge, but it opens all kinds of opportunities to grow plants from seed that otherwise might not ever get into your garden. Hope you give this a try.
Need some seed? Try jelitto.com (you can get Trollius seed there) — and, of course, keep growing.
More Posts from Andrew Messinger


