


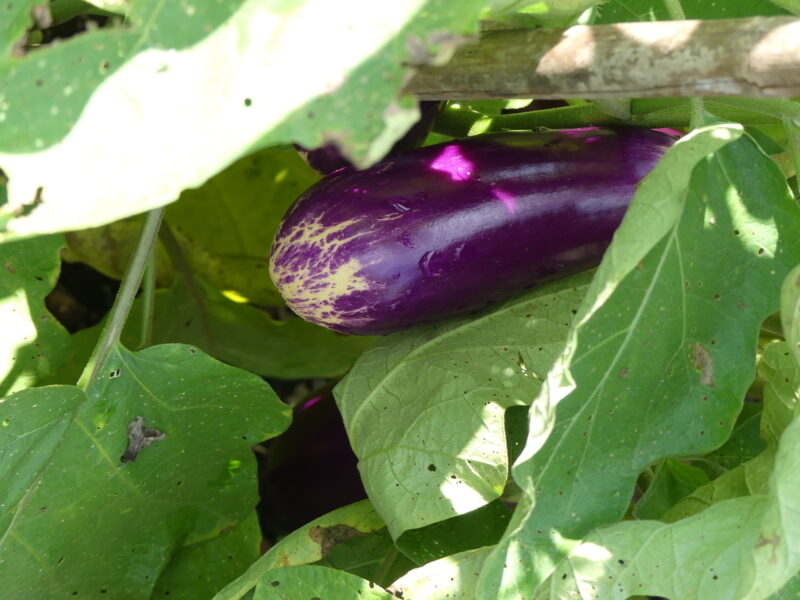

An overripe eggplant is showing signs of cracking at the blossom end. For prime taste, harvest eggplants at maturity based on looks and days from transplanting. The smaller holes on the leaves below the fruit are from flea beetle feeding. ANDREW MESSINGER
 CC BY 2.0" class="img-fluid">
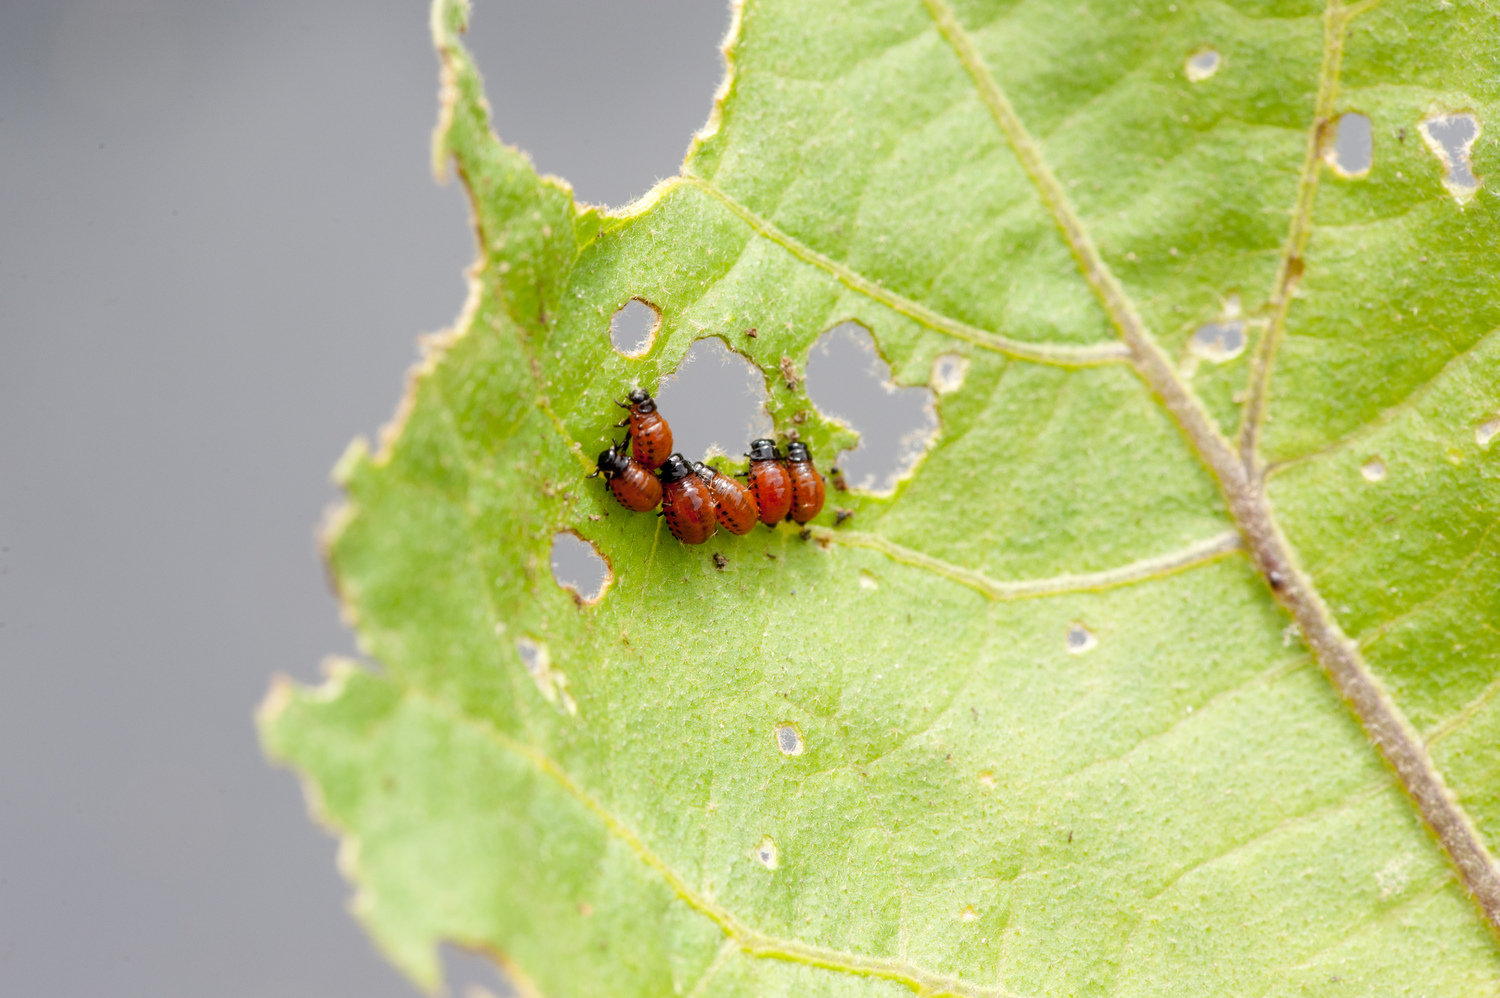
Colorado potato beetle larvae feeding on eggplant foliage. The larvae and adults leave large feeding holes on leaf interior and on leaf edges. They can be hand-picked or organic insecticides can be used. DWIGHT SIPLER, CC BY 2.0
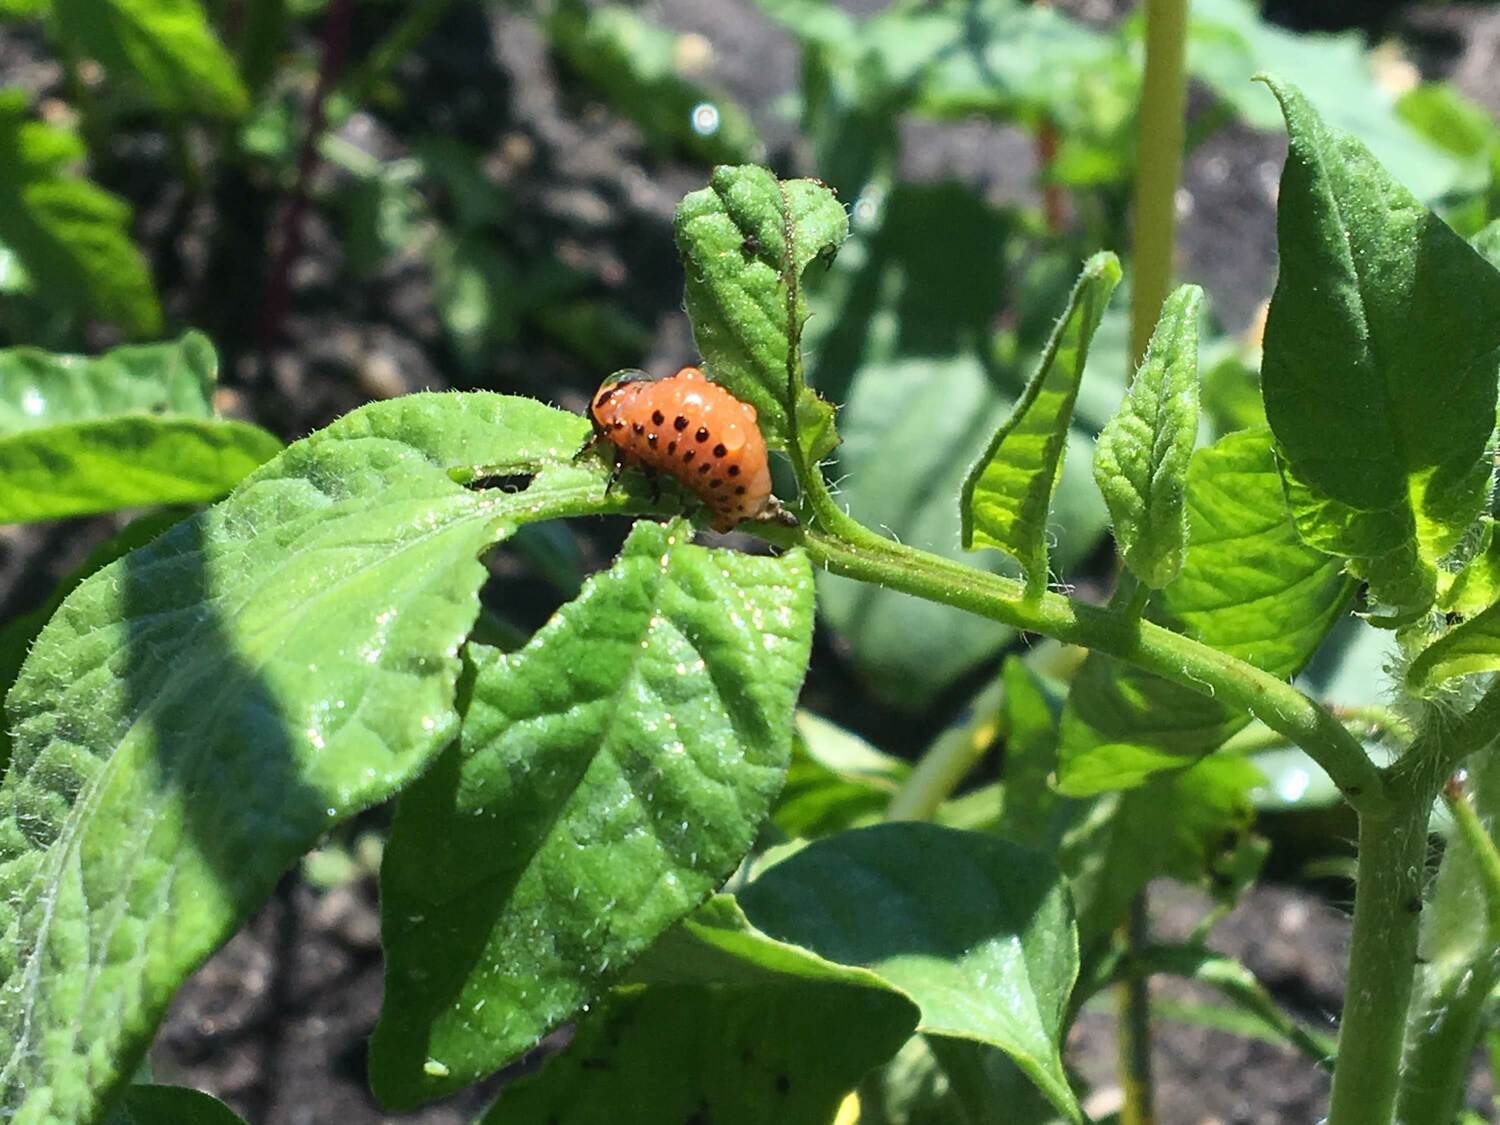
A Colorado potato beetle larva. BRENDAN J. O'REILLY
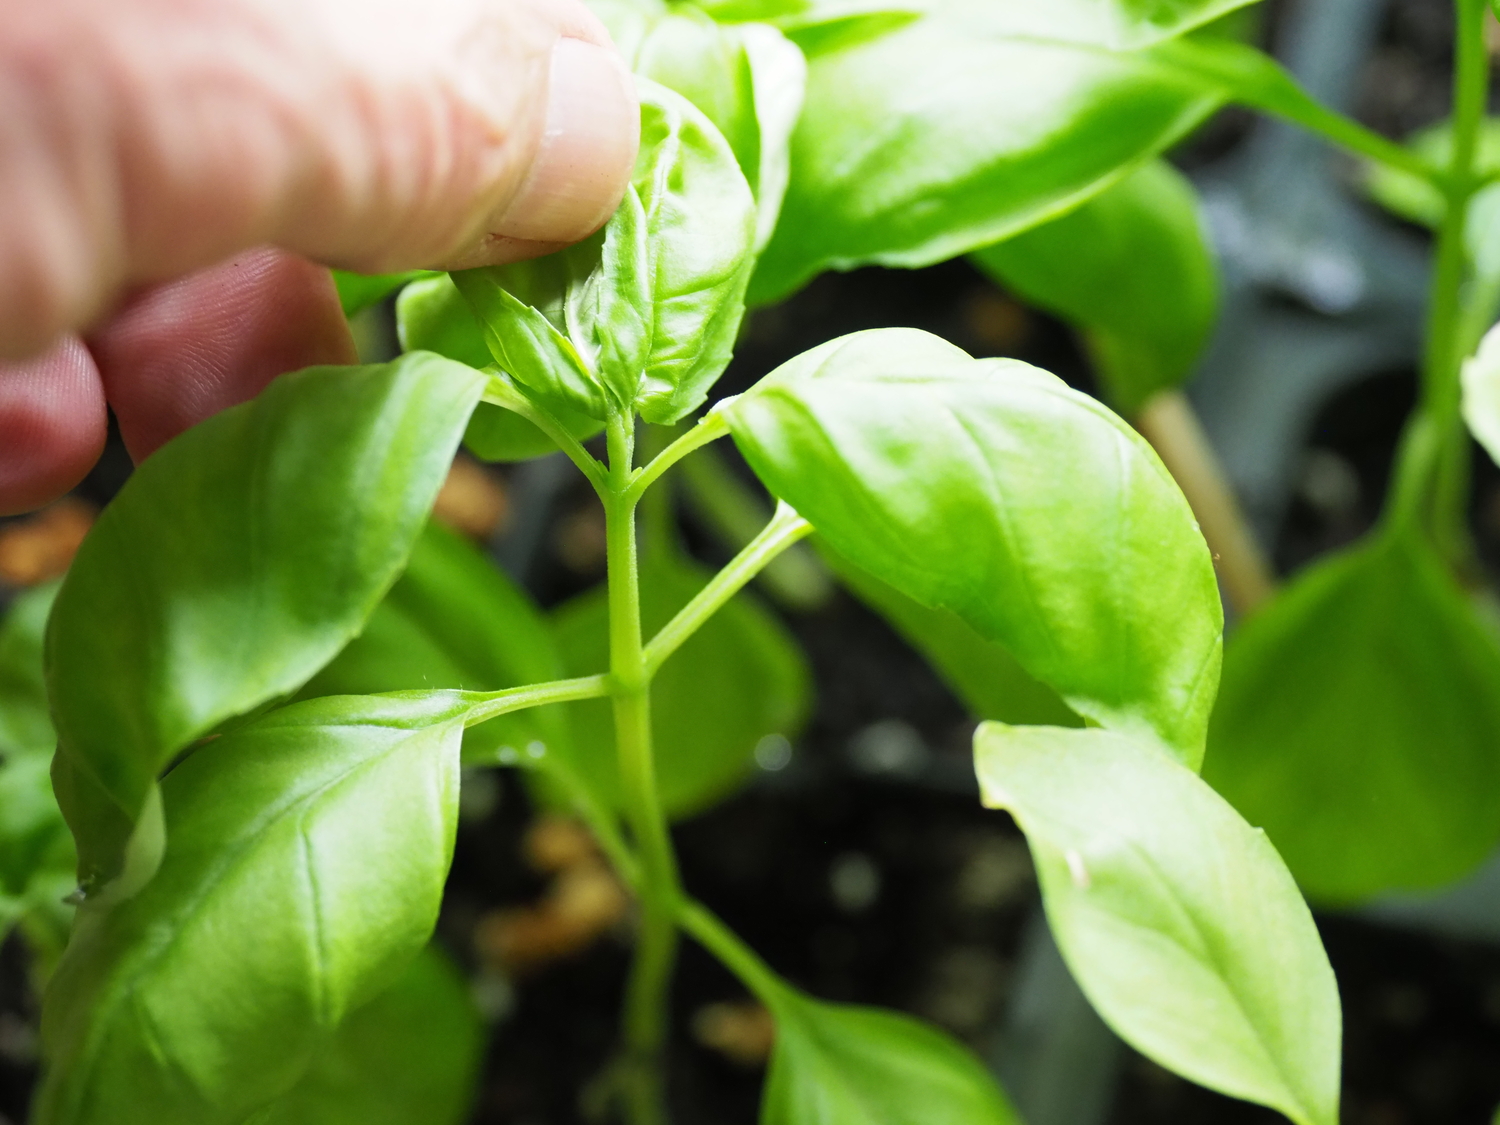
The tip or apical meristem of a basil plant. Pinching off the foliage below the last set of leaves will force the stem to branch lower on the stem resulting in a denser plant with more delicious leaves. ANDREW MESSINGER
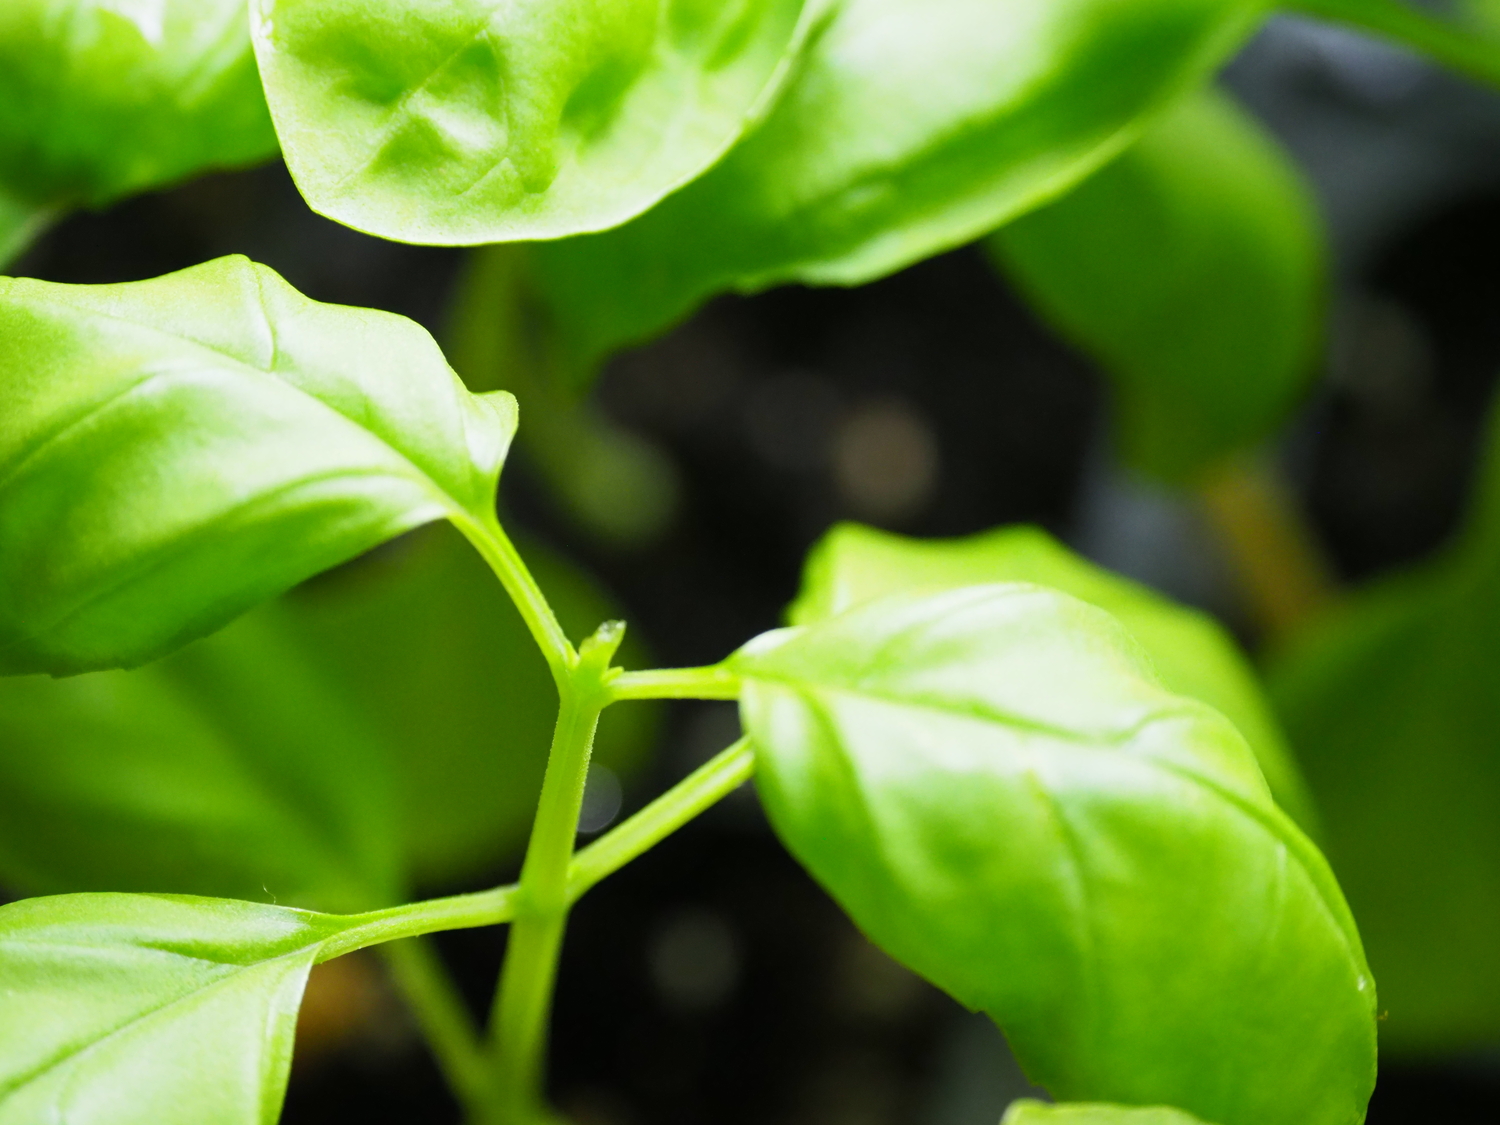
A view of the same basil stem having just been pinched. Fingernails work, but pruners make for cleaner cuts. ANDREW MESSINGER
Less than a week later the point that was pinched begins the process of branching with two new shoots emerging at the stem axis where the pinch was made. Pinching continues through the summer as part of the process of leaf and stem harvesting. ANDREW MESSINGER

Last week we began our journey into the world of eggplants, and I have to admit that I still have eggplant Parmesan on my brain. Does this mean I’ll grow some this summer with a gastronomic fantasy in the wings?
With limited space for anything but a few broccoli plants and maybe a couple of Brussels sprouts, do I have the time and space for yet another vegetable and, most of all, are they easy or hard to grow?
When I managed private estates and gardens I grew just about every vegetable and at least two types of eggplants. These plants are a bit of a challenge and do require a bit of extra care and attention. Remember, they are heat lovers so they go into the ground fairly late in the spring and may require some early protection from wind, sun and cold.
Once it stays warm though, eggplants take off, and you need to know what insects might show up and what diseases can be an issue. Fairly early on you will want to stake the plants so they can support the large leaves and heavy fruits. The varieties that are long and slender will need taller stakes while the shorter types will do well with a classic tomato cage or homemade wire cage. Space the plants well leaving plenty of room for air circulation and make sure each plant gets six hours or more of full sunlight.
Flea beetles and the Colorado potato beetle are the most common insect enemies of these plants. Shot holes in the leaves like someone used a BB gun on them is a good indication of flea beetles while the potato beetle damage is more pronounced and can be on the leaf margins or the body of the leaf. A fabric row cover over hoops or stakes can pretty much keep your eggplants free of these insects, and Spinosad, an organic, biological insecticide can control both insects quite well as can some formulations of Bt. Follow the directions though when it comes to frequency of spraying. Spinosad may work on contact or by ingestion, but Bt needs to be ingested.
Aphids can often be found on the undersides of the leaves, stems and on the small developing buds. They can easily be dislodged with sprays of water or insecticidal soap but never use the soaps when it’s hot and sunny. Once the insects are knocked down or off, continue to monitor for them.
Mites are yet another problem especially when it’s hot and dry, and too often they are discovered after their damage is done. They are small and damage the plant by sucking the plant juices and leaving the foliage distorted and yellowing. If their population gets too high you’ll notice webbing on the leaves. You can manage them pretty well if you catch them early by washing the foliage with water sprays to dislodge them. This has to be done daily for four or five days though. Insecticidal soap can also work, but again, these insects are most active in hot dry weather when soaps can damage the foliage.
The most common disease on eggplants is probably verticillium wilt. It’s caused by a soil-borne fungus that causes the plant to wilt, turn yellow and die. The stems will brown and when cut they look discolored. There is no cure and there are no resistant varieties of eggplant. The best management strategy involves frequent crop rotations — not growing them in the same spot every year and possibly growing them in raised beds, in large pots with peat-based soils or composts. Don’t add your finished eggplant plants to your compost pile, and this will help control reintroduction of this disease.
Watering properly will also help to control this disease, and watering in any manner that gets the foliage wet or causes water to splash from the ground up onto the foliage will be an issue. Watering rings or other methods of drip or trickle irrigation can be very helpful.
Harvesting at the right time will result in better tasting fruits. Keep track of the suggested days-to-maturity on the label or packet, and remember this is most often the number of days from transplanting (not seeding) to harvest. Most eggplants are ready in 75 to 95 days from transplanting, but the small hybrids and some of the newer varieties can be ready in a little as 50 to 60 days. So, you can see how a mix of maturities (varieties) can give you a harvesting season that’s four to six weeks long.
The fruits are best used fresh but will keep for about a week when loosely wrapped and kept in the vegetable crisper. You can also freeze them after blanching or steaming slices or cubes then freezing them for as long as six to eight months.
The plants are fairly heavy feeders and should get a liquid feed of an organic fertilizer at planting time followed up by ringing the plant with an organic fertilizer higher in phosphorus than nitrogen (1-2-1 or 1-3-1 equivalents) every three to four weeks.
So, is it really worth growing eggplants at home? The answer is simple. Unless you have farm-fresh eggplant that’s been harvested the same day you want to prepare it for a meal — nothing will beat a homegrown eggplant. Nothing!
And if you don’t have a garden you’re not off the hook. A number of the smaller varieties can be grown in a 12-inch pot or a 5-gallon container or tub. Just remember to fertilize them and water as needed especially in the summer heat when the fruits are forming. Get to your local garden center and pick up some plants and a few varieties. If a six-pack is too many, look for 4-inch pots, and if all you can find are six-packs, share with a friend. Keep growing.
I received a good number of emails about the wild perennial lupine, Lupinus perennis. I subsequently found out that this native is being crowded out by the Western lupine. Lupinus polyphyllus, which has been improperly sold in the east as our native. It is not! According to the National Park Service, L. polyphyllus has crowded out the native lupine in Maine to the point where the native species may be gone or extirpated. I was, however, able to find out that Prairie Moon Nursery does have seed available for L. perennis. The seed has a Wisconsin origin but it should be fine here on Long Island. A packet of 80 seeds costs only $3, but I’d suggest getting as much as you can afford. I’ll go over growing lupines from seed here in an upcoming column as well as lupines in the garden as well. Use this link to order the seed: bit.ly/44O2x6a. You may also be able to order plants from them as well but for September delivery.
According to the drought monitor, as of last week Long Island was still in a mild drought. This is most important to the plants you planted last year and keeping them well watered now but water in new plantings as well.
And while you’re out buying your cosmos, marigolds and other annuals in pots and packs you may want to buy some seed packets of annuals as well. These should be sown directly in the garden during late May and into June as they will fill in while other annuals begin to fade in the heat of summer. Marigolds, zinnias, and cosmos seeds are large, easy to handle and great seeding projects for kids as well.
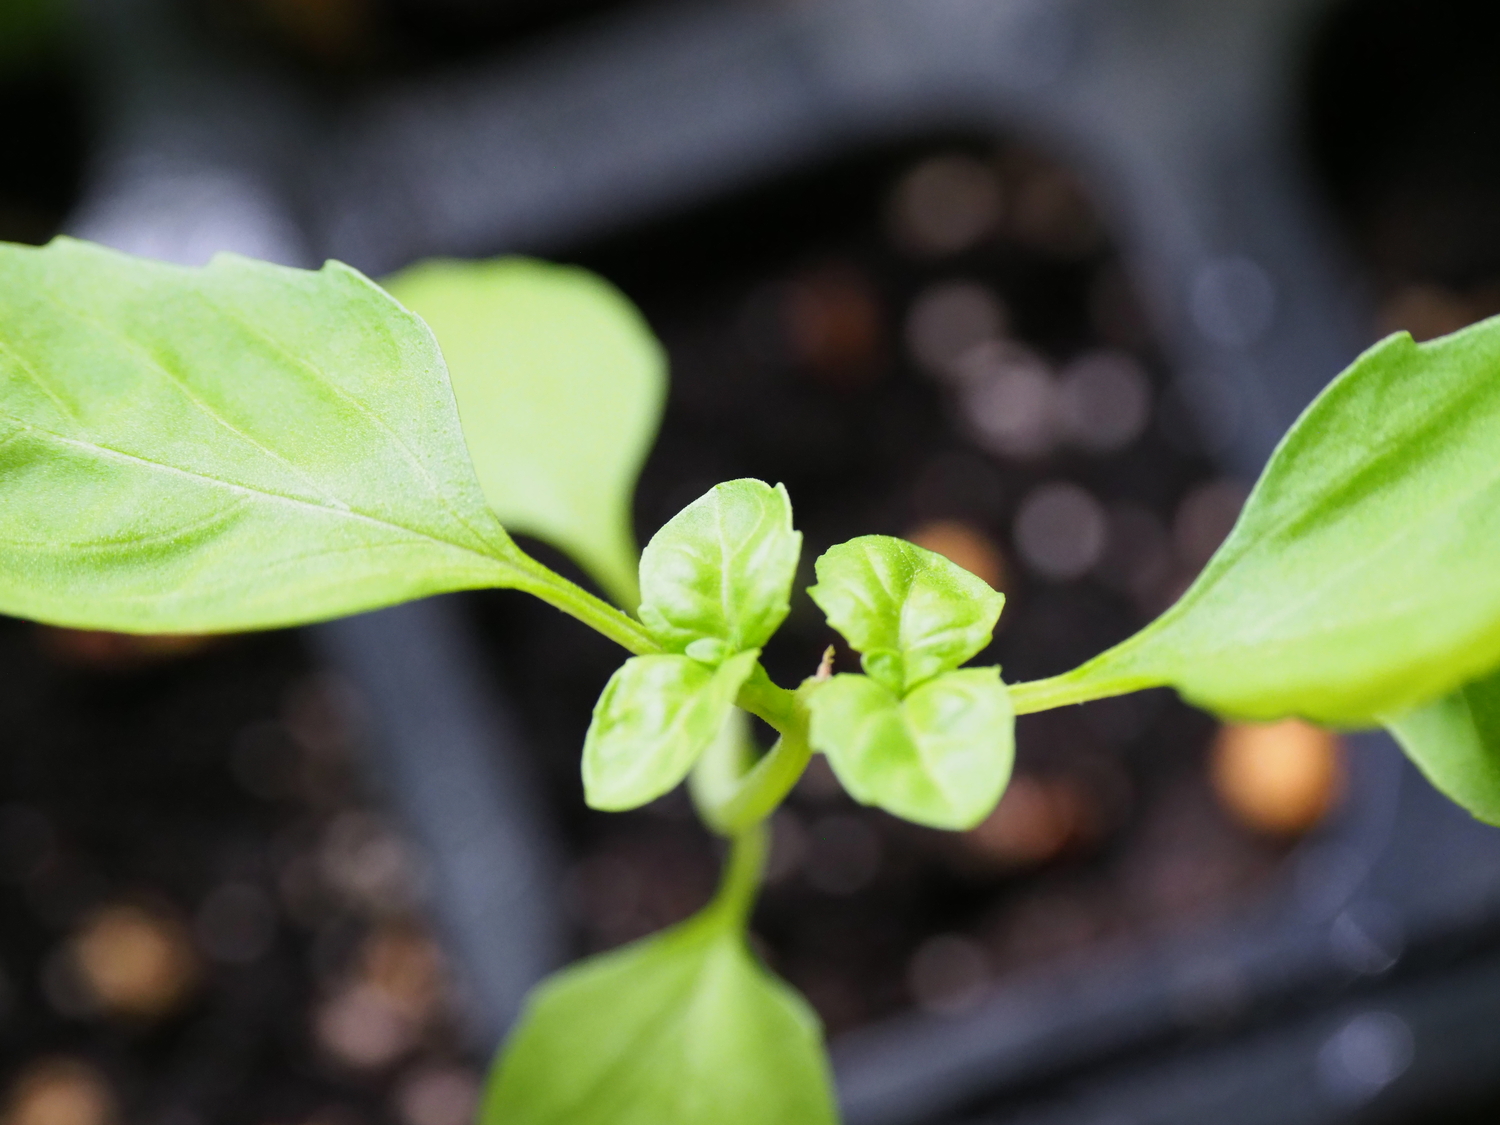
If you’re growing your own basil from seed your resulting plants will probably need pinching. When your plants are about 2 inches tall use your fingernails or a tweezer to snip off the top set of leaves. This will cause the stem to branch and the plant to become fuller (see picture).
Columbines are in bloom, and if you have several varieties or only one you like be ready to collect some seed. The seed pods start off green but as they brown and ripen you’ll notice they may start to break open. This is the time to harvest the seed. They will be black and shiny; just let them dry in a bright, dry spot for a couple of days. The seeds can then be scattered on the soil where you want the new plants to develop. Scratch the soil a bit then just drop the seed — don’t cover them. The seed needs light to germinate (but still moisture) and the plants that develop over the summer or in the fall will either flower next year or the following year with plenty of surprises as they notoriously cross-pollinate.
More Posts from Andrew Messinger


